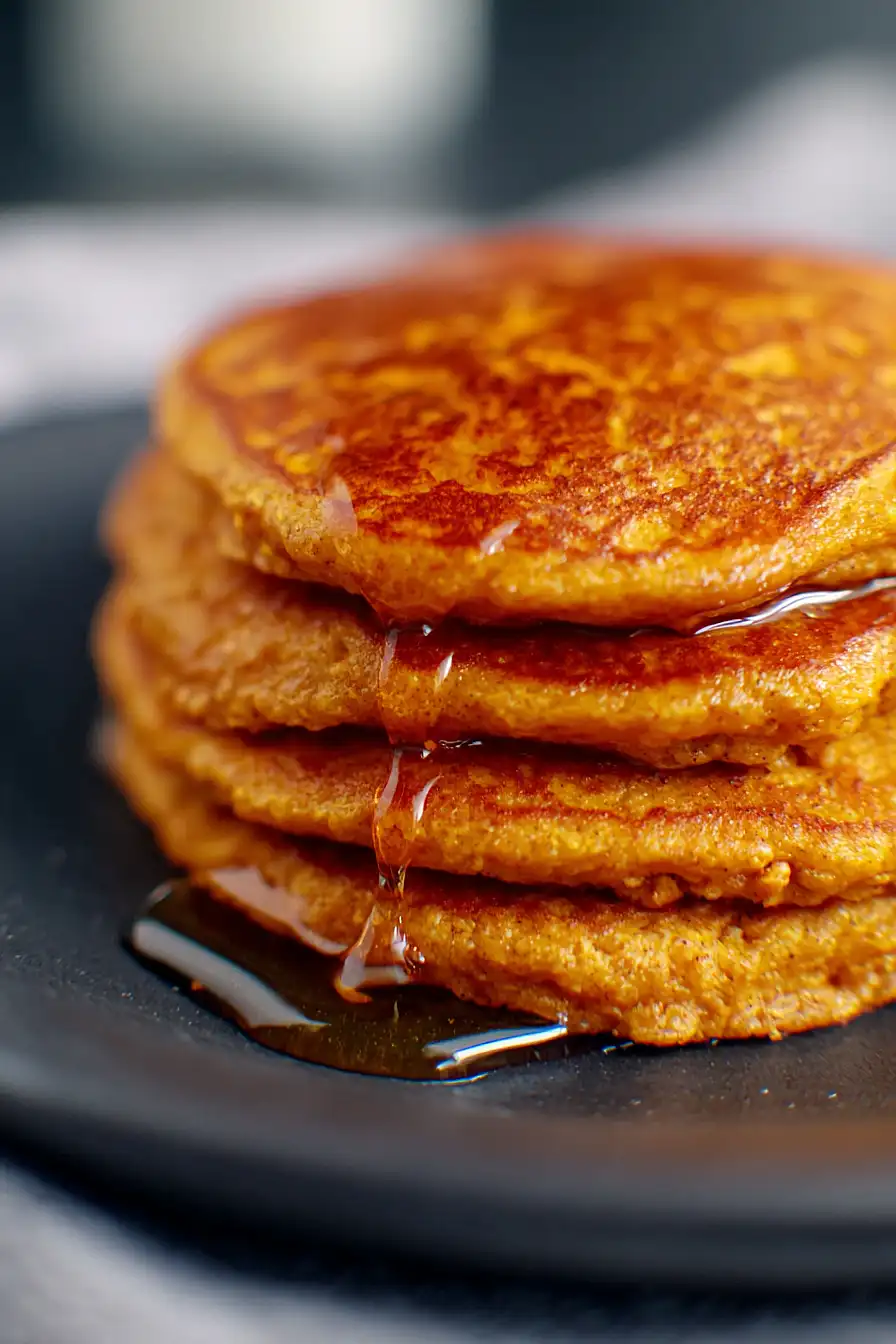
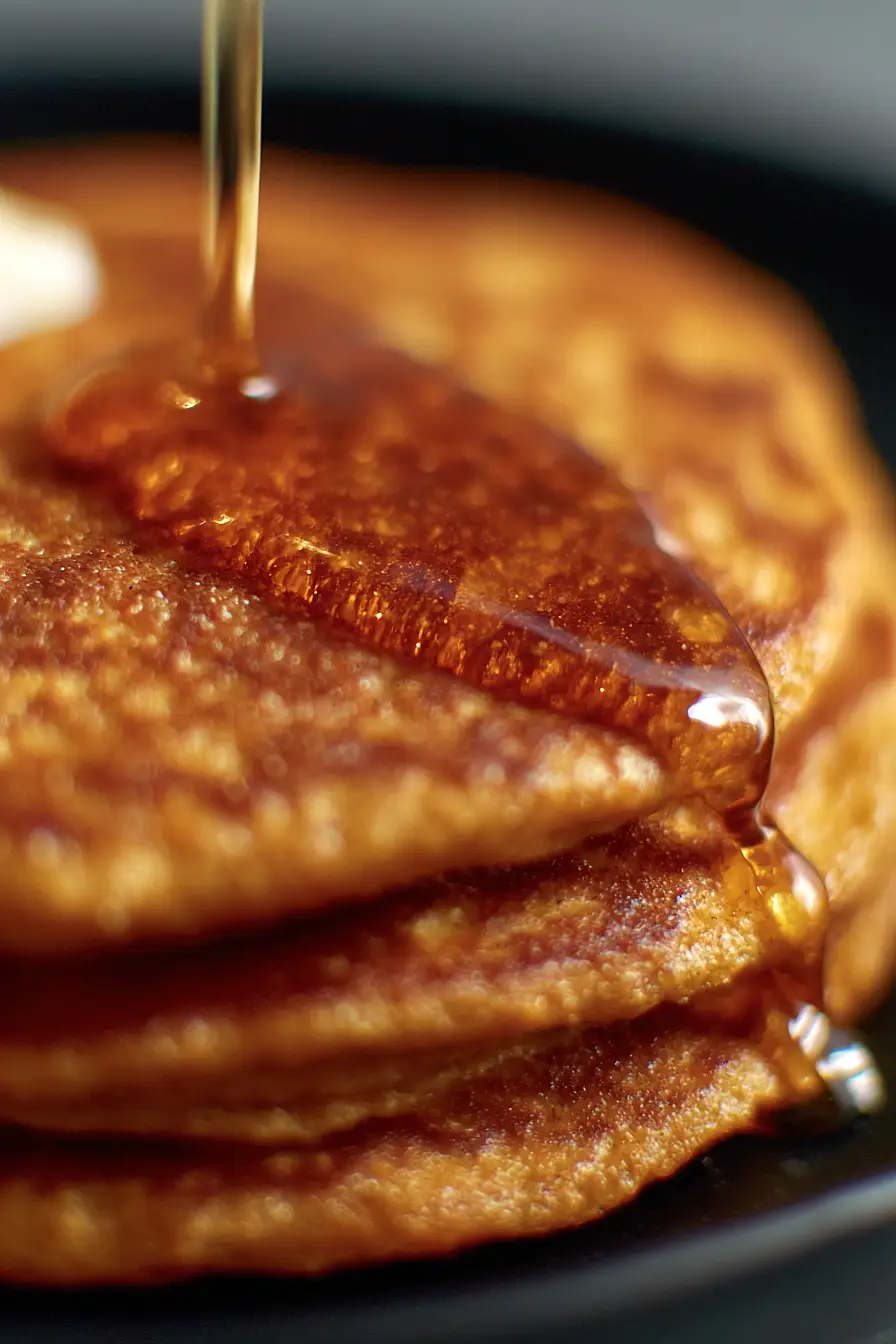
Here is my favorite oat flour pumpkin pancake recipe, with fluffy, tender pancakes made from wholesome oat flour, pumpkin puree, warm spices, and a touch of maple syrup.
These pumpkin pancakes are my family’s go-to weekend breakfast during fall. I usually make a double batch so we can freeze the extras for busy school mornings. Nothing beats the smell of cinnamon and pumpkin filling the kitchen, right?

Why You’ll Love These Oat Flour Pumpkin Pancakes
- Naturally gluten-free – Made with oat flour instead of regular flour, these pancakes are perfect for anyone avoiding gluten or looking for a healthier breakfast option.
- Cozy fall flavors – The combination of pumpkin puree and warm spices like cinnamon and nutmeg creates that perfect autumn taste that makes your kitchen smell amazing.
- Simple pantry ingredients – You probably have most of these ingredients on hand already, and you can even make your own oat flour from regular oats if needed.
- Quick weekend breakfast – Ready in under 30 minutes, these pancakes are perfect for lazy Saturday mornings when you want something special but don’t want to spend hours in the kitchen.
- Healthier than regular pancakes – Packed with fiber from oat flour and vitamins from pumpkin, these pancakes let you enjoy a treat while still getting some good nutrition.
What Kind of Oat Flour Should I Use?
You can either buy oat flour from the store or make your own at home by grinding old-fashioned oats in a blender or food processor until they reach a fine, flour-like consistency. Store-bought oat flour tends to be more finely ground and consistent, but homemade works just as well and is often more budget-friendly. If you’re making your own, make sure to use old-fashioned oats rather than quick oats, as they’ll give you a better texture. Just pulse the oats until they’re powdery – it usually takes about 30-60 seconds depending on your blender’s power.
Options for Substitutions
These pancakes are pretty forgiving when it comes to swaps, so here’s what you can try:
- Oat flour: This is the star of the recipe, so I’d stick with oat flour for the best texture. You can easily make your own by blending old-fashioned oats in a food processor until they’re finely ground. If you absolutely must substitute, try almond flour or whole wheat flour, but expect a different texture.
- Pumpkin puree: Sweet potato puree or butternut squash puree work great here. You could also try mashed banana, though it will change the flavor profile completely.
- Milk of choice: Any milk works – dairy, almond, oat, coconut, or soy milk all do the job. If using canned coconut milk, thin it out with a bit of water first.
- Maple syrup: Honey, agave, or brown sugar (use 1½ tablespoons) can replace the maple syrup. For sugar, you might need to add an extra tablespoon of milk to keep the batter smooth.
- Eggs: For each egg, you can use ¼ cup applesauce, mashed banana, or a flax egg (1 tablespoon ground flaxseed mixed with 3 tablespoons water, let sit for 5 minutes).
- Butter or coconut oil: These can be swapped for each other, or try neutral oil like vegetable or canola oil for a lighter option.
Watch Out for These Mistakes While Cooking
The biggest mistake with oat flour pancakes is cooking them on heat that’s too high, which will burn the outside while leaving the inside raw – keep your pan at medium-low heat since oat flour takes longer to cook through than regular flour.
Another common error is not letting the batter rest for 5-10 minutes before cooking, as oat flour needs time to absorb the liquid and thicken properly, preventing thin and fragile pancakes.
Make sure your pumpkin puree isn’t too watery by draining it on paper towels if needed, and resist the urge to flip too early – wait until you see bubbles forming on the surface and the edges look set.
For the fluffiest results, don’t overmix the batter once you add the dry ingredients, and if making your own oat flour, pulse the oats until they’re finely ground but not turned into oat butter.
What to Serve With Oat Flour Pumpkin Pancakes?
These fluffy pumpkin pancakes are perfect with a drizzle of warm maple syrup and a pat of butter, but you can really go wild with the toppings! I love adding a dollop of whipped cream or Greek yogurt, plus a sprinkle of chopped pecans or walnuts for some crunch. Fresh berries like blueberries or sliced bananas work great too, especially since they balance out the warm spices in the pancakes. For a cozy fall breakfast, try serving them alongside some crispy bacon or breakfast sausage, and don’t forget a hot cup of coffee or spiced apple cider to complete the meal.
Storage Instructions
Refrigerate: These pumpkin pancakes taste great the next day! Stack them with parchment paper between each pancake and store in the fridge for up to 4 days. They make breakfast so much easier during busy mornings when you can just grab and go.
Freeze: I love making a double batch and freezing half for later. Let the pancakes cool completely, then freeze them in a single layer on a baking sheet for about an hour. Once frozen, transfer to a freezer bag and they’ll keep for up to 3 months.
Warm Up: Pop refrigerated pancakes in the toaster or microwave for 30-60 seconds until warmed through. For frozen ones, you can toast them straight from the freezer or thaw overnight in the fridge first. They’ll taste almost as good as fresh!
| Preparation Time | 10-15 minutes |
| Cooking Time | 15-25 minutes |
| Total Time | 25-40 minutes |
| Level of Difficulty | Easy |
Estimated Nutrition
Estimated nutrition for the whole recipe (without optional ingredients):
- Calories: 500-600
- Protein: 14-18 g
- Fat: 20-26 g
- Carbohydrates: 68-78 g
Ingredients
For the wet ingredients:
- 1/2 cup milk
- 2 eggs (room temperature)
- 1 tsp vanilla extract
- 2 tbsp maple syrup (pure, not pancake syrup)
- 1 cup pumpkin puree (I use Libby’s)
- 1 tbsp lemon juice (freshly squeezed for best flavor)
- 2 tbsp melted unsalted butter (or coconut oil)
For the dry ingredients:
- 2 tsp pumpkin pie spice
- 1/2 tsp baking soda
- 1 cup oat flour (finely ground for smoother texture)
- 1/2 tsp salt
Step 1: Prepare the Dry Ingredient Mixture
- 1 cup oat flour
- 2 tsp pumpkin pie spice
- 1/2 tsp baking soda
- 1/2 tsp salt
In a medium bowl, whisk together the oat flour, pumpkin pie spice, baking soda, and salt.
Set aside.
I like to sift the oat flour first if it feels lumpy—this ensures smoother, fluffier pancakes without any gritty texture.
Step 2: Combine the Wet Ingredients
- 1 cup pumpkin puree
- 1/2 cup milk
- 2 tbsp melted unsalted butter
- 2 tbsp maple syrup
- 1 tbsp lemon juice
- 1 tsp vanilla extract
- 2 eggs
In a large bowl, whisk together the pumpkin puree, milk, melted butter, maple syrup, lemon juice, vanilla extract, and eggs until smooth and well combined.
The lemon juice brightens the pumpkin flavor and helps activate the baking soda, so don’t skip it even if it seems like an odd ingredient.
Step 3: Create the Batter and Let It Rest
- wet ingredient mixture from Step 2
- dry ingredient mixture from Step 1
Pour the wet ingredient mixture from Step 2 into the bowl with the dry ingredient mixture from Step 1.
Stir gently with a spatula until just combined—a few lumps are okay and actually desirable here, as overmixing develops gluten and makes pancakes tough.
Let the batter rest for 10 minutes at room temperature.
This resting period allows the oat flour to fully hydrate and the baking soda to start working, resulting in fluffier pancakes.
Step 4: Heat Your Cooking Surface
While the batter rests, heat a nonstick skillet or griddle to medium-low heat (or 350°F if using a griddle).
Let it preheat for about 2 minutes so it’s evenly heated.
A slightly lower temperature prevents the outside from burning before the inside cooks through, which is especially important with oat flour pancakes since they’re denser than regular flour pancakes.
Step 5: Cook the Pancakes Until Golden
- batter from Step 3
Lightly grease the skillet or griddle if needed (nonstick surfaces may require just a light spray).
Using a 1/4 cup measure or scoop, portion the batter from Step 3 onto the cooking surface, spacing them about 2 inches apart.
Cook for 2-3 minutes until the edges look set and bubbles form on the surface, then flip gently and cook for another 2-3 minutes until the underside is golden brown.
Work in batches to avoid overcrowding, and transfer finished pancakes to a warm plate while you cook the remaining batter.


