Here is my go-to pumpkin muffin recipe, with warm spices, real pumpkin puree, and a tender crumb that’s perfectly sweet and not too heavy.
These pumpkin muffins are what I bake every fall when the weather starts to cool down. My kids ask for them almost every weekend, and I love how the whole house smells like cinnamon and nutmeg while they’re in the oven.

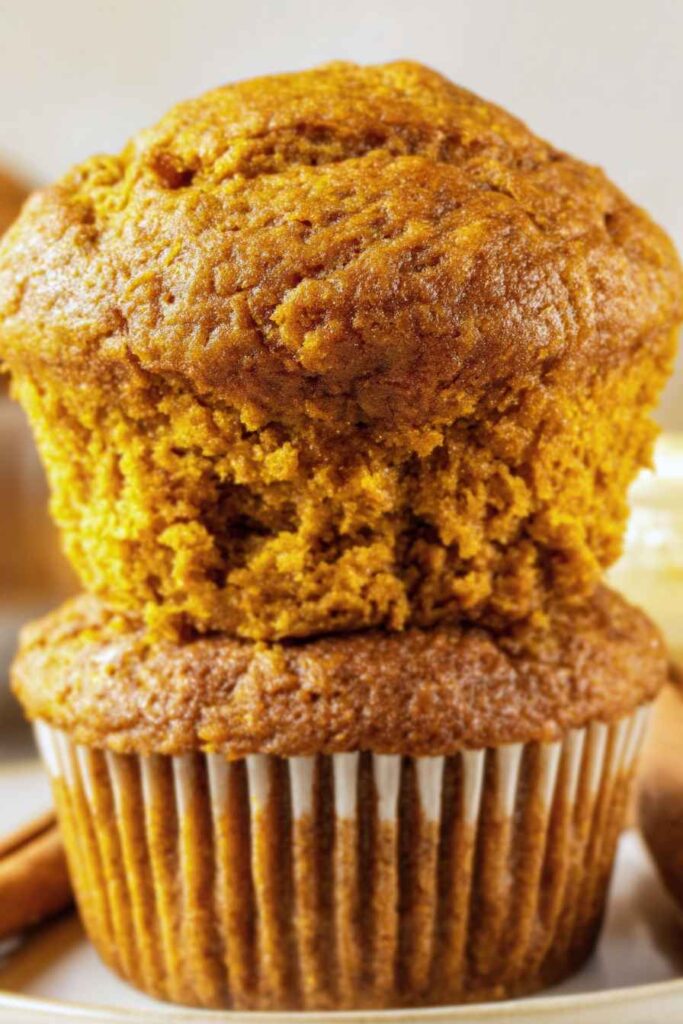
Why You’ll Love These Pumpkin Muffins
- Perfect fall flavors – The warm spices like cinnamon, nutmeg, and cloves combined with real pumpkin puree create that cozy autumn taste you crave all season long.
- Quick and easy – Ready in under 45 minutes from start to finish, these muffins are perfect for busy mornings or when you need a sweet treat fast.
- Moist and tender texture – The combination of pumpkin puree, sour cream, and the right balance of wet and dry ingredients keeps these muffins incredibly soft and never dry.
- Simple pantry ingredients – Most of these ingredients are probably already in your kitchen, making it easy to whip up a batch whenever the craving hits.
- Great for meal prep – These muffins freeze well and make perfect grab-and-go breakfasts or snacks throughout the week.
What Kind of Pumpkin Should I Use?
For pumpkin muffins, canned pumpkin puree is your best friend and honestly the easiest option. Make sure you’re grabbing plain pumpkin puree, not pumpkin pie filling which already has spices mixed in. If you want to use fresh pumpkin, sugar pumpkins or pie pumpkins work great – just roast them until tender, scoop out the flesh, and puree it until smooth. Fresh pumpkin can be a bit more watery than canned, so you might need to drain it through a fine mesh strainer for about 30 minutes before using it in your muffins.
Options for Substitutions
These pumpkin muffins are pretty forgiving when it comes to swaps, so here’s what you can change up:
- All purpose flour: You can substitute up to half the flour with whole wheat flour for a heartier texture, or use a 1:1 gluten-free flour blend if needed.
- Pumpkin puree: This is the star ingredient, so don’t skip it! But if you’re out, you can use the same amount of sweet potato puree or butternut squash puree for similar results.
- Vegetable oil: Melted butter, canola oil, or even applesauce work great here. If using applesauce, your muffins will be a bit more dense but still tasty.
- Sour cream: Plain Greek yogurt is a perfect swap, or you can use buttermilk (same amount) for extra tang.
- Spices: No individual spices? Use 2 tablespoons of pumpkin pie spice instead of the cinnamon, nutmeg, and cloves combo.
- Brown sugar: You can use all granulated sugar if that’s what you have, but the muffins won’t have quite the same rich flavor and moisture.
Watch Out for These Mistakes While Baking
The biggest mistake when making pumpkin muffins is overmixing the batter, which creates tough, dense muffins instead of light and fluffy ones – mix just until the dry ingredients are barely combined with the wet ingredients, even if you see a few lumps.
Another common error is using pumpkin pie filling instead of pure pumpkin puree, which contains added spices and sugar that will throw off your recipe’s balance.
Don’t skip checking your muffins with a toothpick inserted into the center – it should come out with just a few moist crumbs, not wet batter, and avoid opening the oven door too early as this can cause them to sink.
For extra moist muffins, make sure your pumpkin puree is well-drained if it seems watery, and fill your muffin cups about 2/3 full to prevent overflow while still getting nice, domed tops.

What to Serve With Pumpkin Muffins?
These pumpkin muffins are perfect for breakfast with a hot cup of coffee or chai tea – the warm spices really complement each other nicely. I love serving them alongside scrambled eggs and crispy bacon for a complete fall morning meal, or you can keep it simple with just butter and a drizzle of honey. They also make a great afternoon snack with a glass of cold milk or even warmed up with a pat of butter melting on top. For something a little fancier, try pairing them with cream cheese frosting or a dollop of whipped cream and a sprinkle of cinnamon.
Storage Instructions
Keep Fresh: These pumpkin muffins stay moist and delicious when stored in an airtight container at room temperature for up to 4 days. I like to line the container with paper towels to absorb any extra moisture. They’re perfect for grabbing on busy mornings or packing in lunch boxes.
Freeze: Pumpkin muffins freeze really well for up to 3 months! Let them cool completely, then wrap each one individually in plastic wrap or store them in a freezer bag. This way you can grab just one or two whenever you want a quick breakfast or snack.
Thaw: To enjoy frozen muffins, just leave them on the counter for about an hour to thaw completely. If you’re in a hurry, pop one in the microwave for 20-30 seconds on medium power. They taste almost as good as fresh, and the spices really come through after they’ve had time to meld together.
| Preparation Time | 15-20 minutes |
| Cooking Time | 20-22 minutes |
| Total Time | 35-42 minutes |
| Level of Difficulty | Easy |
Estimated Nutrition
Estimated nutrition for the whole recipe (without optional ingredients):
- Calories: 2450-2600
- Protein: 30-36 g
- Fat: 85-95 g
- Carbohydrates: 410-430 g
Ingredients
For the dry ingredients:
- 1 1/2 tsp baking powder
- 3/4 tsp salt
- 1/4 tsp ground cloves
- 2 1/2 tsp ground cinnamon (freshly ground preferred for best flavor)
- 2 1/4 cups all-purpose flour (I use King Arthur all-purpose)
- 1/2 tsp ground nutmeg
- 3/4 tsp baking soda
For the wet ingredients:
- 1/2 cup vegetable oil (or any neutral oil like canola)
- 1 cup packed dark brown sugar
- 2 large eggs (room temperature)
- 1 large egg yolk
- 3 tbsp sour cream (I prefer Greek yogurt for tanginess)
- 1/3 cup white sugar
- 1 can pumpkin puree (I use Libby’s 100% pure pumpkin)
Step 1: Prepare Equipment and Preheat Oven
Preheat your oven to 350°F and line a standard muffin tin with paper liners.
This ensures your oven will be at the correct temperature when you’re ready to bake, and gives you time to complete your mise en place without rushing.
Step 2: Combine Dry Ingredients
- 2 1/4 cups all-purpose flour
- 1 1/2 tsp baking powder
- 3/4 tsp baking soda
- 3/4 tsp salt
- 2 1/2 tsp ground cinnamon
- 1/2 tsp ground nutmeg
- 1/4 tsp ground cloves
In a medium bowl, whisk together the flour, baking powder, baking soda, salt, cinnamon, nutmeg, and cloves.
Whisking instead of just mixing helps distribute the leavening agents and spices evenly throughout the flour, which ensures consistent rise and flavor in every muffin.
I like to use freshly ground cinnamon here—it makes a noticeable difference in the final flavor compared to pre-ground spices that have been sitting in your pantry.
Step 3: Create the Sugar and Oil Base
- 1 cup packed dark brown sugar
- 1/3 cup white sugar
- 1/2 cup vegetable oil
In a large bowl, whisk together the dark brown sugar, white sugar, and vegetable oil until the mixture becomes smooth and well combined, about 1-2 minutes.
This step emulsifies the oil with the sugar, creating a more uniform batter that will give your muffins better texture and moisture.
The brown sugar adds depth and richness that white sugar alone cannot provide.
Step 4: Build the Wet Ingredient Mixture
- 2 large eggs
- 1 large egg yolk
- 3 tbsp sour cream
- 1 can pumpkin puree
Add the room temperature eggs one at a time to the sugar mixture from Step 3, whisking well after each addition to fully incorporate.
Then add the egg yolk, sour cream, and pumpkin puree, stirring until the mixture is smooth and combined.
Room temperature eggs emulsify better into the batter, giving you a more tender crumb.
I prefer Greek yogurt over sour cream for a little extra tang that brightens the pumpkin flavor, but either works beautifully.
Step 5: Combine Wet and Dry Ingredients
- dry ingredient mixture from Step 2
- wet ingredient mixture from Step 4
Pour the dry ingredient mixture from Step 2 into the wet ingredient mixture from Step 4.
Using a spatula or wooden spoon, fold the ingredients together gently until just combined—stop as soon as you no longer see streaks of dry flour.
Overmixing activates the gluten in the flour, which leads to dense, tough muffins rather than the tender, moist crumb we’re after.
Step 6: Fill and Bake the Muffins
- batter from Step 5
Divide the batter evenly among the prepared muffin liners, filling each about 3/4 full.
Transfer the tin to your preheated 350°F oven and bake for 20 to 22 minutes, until a toothpick inserted into the center of a muffin comes out clean or with just a few moist crumbs.
The muffins should have a gentle spring when lightly touched on top.
Step 7: Cool and Finish
Allow the muffins to cool in the tin for about 10 minutes—this gives them time to set slightly and become sturdy enough to handle.
Then transfer them to a wire cooling rack to cool completely.
This cooling process prevents the muffins from becoming soggy on the bottom from trapped steam.


