I used to think cheesecake was one of those desserts you could only get right in a springform pan with a water bath and crossed fingers. Too many steps, too much stress, and don’t even get me started on cracked tops.
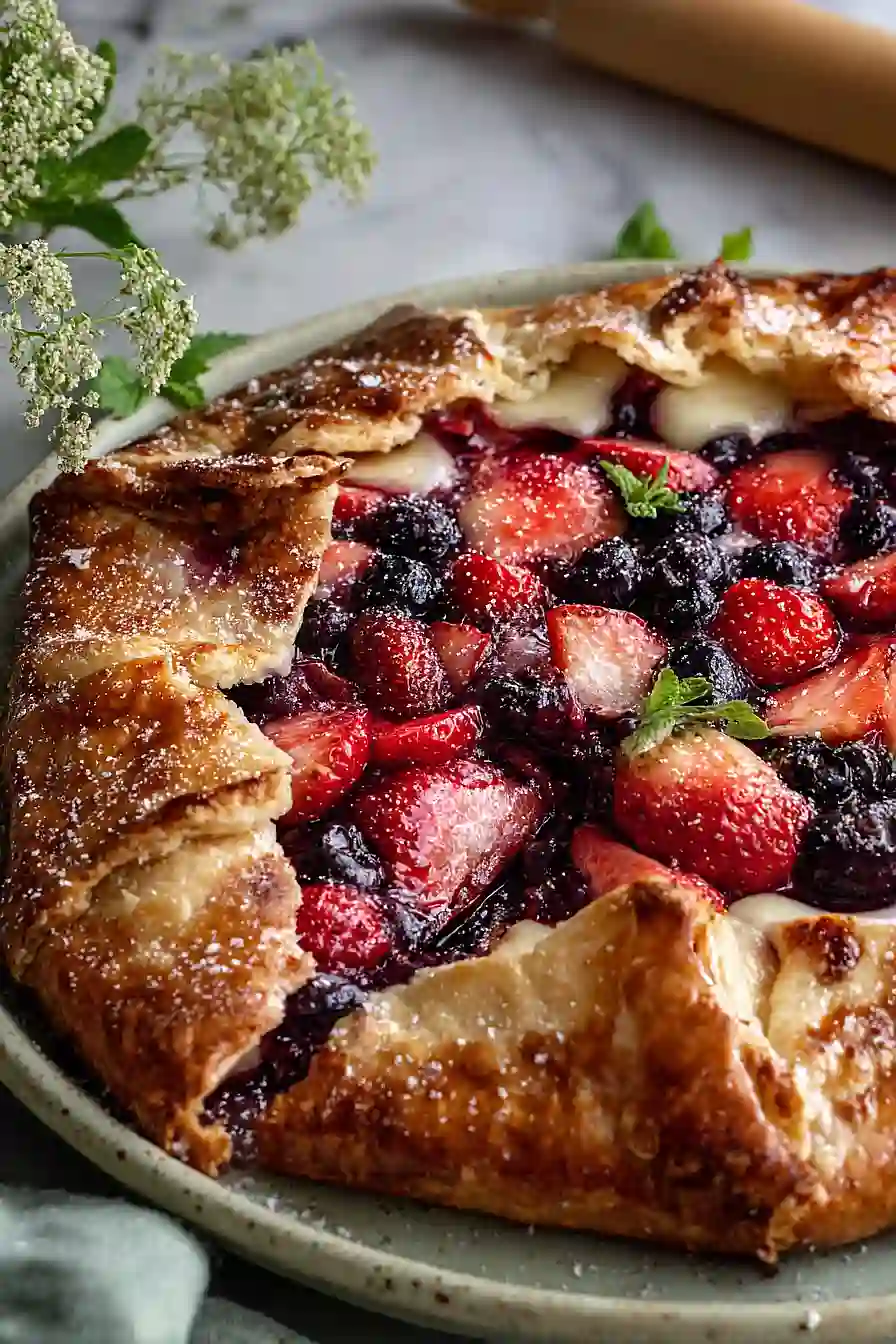
Then I discovered the galette—which is basically a fancy word for a rustic, free-form pastry that doesn’t care if your edges are perfect. You get all that creamy cheesecake filling mixed with fresh berries, wrapped up in buttery pastry that you just fold over however it wants to fold. No pan sides to worry about, no cracks to hide, and if it looks a little messy? That’s the whole point.

Why You’ll Love This Strawberry Cheesecake Galette
- Easier than pie – Galettes are forgiving and rustic by nature, so you don’t need to stress about perfect crimping or fancy lattice work. Just fold the edges over and you’re done.
- Creamy cheesecake filling meets fresh berries – The tangy cream cheese filling pairs perfectly with sweet strawberries and blueberries, giving you all the flavors of cheesecake in a simpler format.
- Impressive presentation – This free-form tart looks like it came from a bakery, making it perfect for when you want to wow guests without spending hours in the kitchen.
- Fresh, seasonal dessert – Using fresh berries means you get bright, natural flavors that really shine through in every bite.
What Kind of Strawberries Should I Use?
Fresh strawberries are definitely the way to go for this galette, and you’ll want to pick ones that are ripe but still firm enough to hold their shape during baking. Look for berries that are bright red all the way through without any white or green shoulders, and give them a sniff – they should smell sweet and fragrant. If strawberries aren’t in season and the ones at your store look sad and pale, you can actually use frozen strawberries that have been thawed and patted dry, though fresh will always give you the best texture. Just avoid any berries that are mushy or have soft spots, as they’ll release too much liquid and make your galette soggy.
Options for Substitutions
This galette is pretty forgiving, so here are some swaps you can make if needed:
- Strawberries and blueberries: Feel free to use whatever berries you have on hand – raspberries, blackberries, or a mix of all your favorites work great. You can also use frozen berries, but thaw and drain them first to avoid a soggy crust.
- Apple cider vinegar: White vinegar or lemon juice will do the trick here. The acid helps make the crust tender and flaky.
- Vanilla bean paste: Regular vanilla extract works perfectly fine – use the same amount. You’ll just miss out on those pretty vanilla specks.
- Lime juice and zest: Lemon is an easy swap and gives a similar bright, citrusy flavor to balance the sweetness.
- Demerara sugar: Turbinado sugar or regular granulated sugar can replace this. The coarse sugar just adds a nice crunch to the crust edges.
- Fresh nutmeg: Dried nutmeg is totally fine to use – just start with a smaller pinch since dried spices are more concentrated.
- All purpose flour: Don’t substitute the flour in the crust – it’s essential for getting that perfect flaky texture that makes a galette special.
Watch Out for These Mistakes While Baking
The biggest mistake with galette dough is overworking it, which develops too much gluten and creates a tough, chewy crust instead of a flaky one – stop kneading after just 4 turns and handle the dough as little as possible.
Make sure your butter stays cold throughout the process, so if your kitchen is warm, pop the dough back in the fridge for 10 minutes if it starts feeling soft while you’re rolling it out.
A common error is not draining your berry mixture before assembling, which can lead to a soggy bottom crust – let the berries sit for about 10 minutes, then drain off most of the liquid they release.
Finally, don’t skip the egg wash on the crust edges, as it creates a golden, crispy border that holds up better against the juicy filling and gives your galette that bakery-quality finish.

What to Serve With Strawberry Cheesecake Galette?
This galette is pretty rich and sweet on its own, so I like to keep things simple on the side. A dollop of freshly whipped cream or a scoop of vanilla ice cream is always a good call, especially if you’re serving it warm from the oven. For a brunch setting, pair it with a strong cup of coffee or some mimosas to balance out the sweetness. If you want to make it feel more like a full dessert spread, add some extra fresh berries on the side or a light fruit salad with mint.
Storage Instructions
Store: Keep your galette covered loosely with foil or plastic wrap in the fridge for up to 3 days. The crust might soften a bit over time, but it’ll still taste great. I find it’s best enjoyed within the first day or two when the crust is at its flakiest.
Serve: This galette is delicious served at room temperature or slightly warm. If you’re eating leftovers from the fridge, let it sit out for about 20 minutes before serving. You can also warm individual slices in a 300°F oven for about 10 minutes to crisp up the crust again.
| Preparation Time | 45-55 minutes |
| Cooking Time | 45-50 minutes |
| Total Time | 140-150 minutes |
| Level of Difficulty | Medium |
| Servings | 8 slices |
Estimated Nutrition
Estimated nutrition for the whole recipe (without optional ingredients):
- Calories: 3100-3400
- Protein: 38-45 g
- Fat: 150-165 g
- Carbohydrates: 400-430 g
Ingredients
For the dough:
- 2 cups all-purpose flour
- 1/2 teaspoon fine sea salt
- 3/4 cup unsalted butter (chilled and cubed)
- 1 tablespoon apple cider vinegar
- 8-10 tablespoons ice water
- 1 egg (for egg wash)
- 1 tablespoon demerara sugar
For the berry topping:
- 16 oz strawberries (hulled and sliced)
- 1 cup blueberries
- 1 tablespoon lime juice
- 1/4 cup granulated sugar
- 1 tablespoon cornstarch (to thicken juices)
For the cheesecake filling:
- 8 oz cream cheese (room temperature)
- 1 teaspoon vanilla bean paste
- 1/4 teaspoon salt
- 1/4 teaspoon ground nutmeg
- 1.5 teaspoons lime zest
- 1 large egg
- 1/3 cup powdered sugar (sifted)
Step 1: Make the Pie Dough
- 2 cups all-purpose flour
- 1/2 teaspoon fine sea salt
- 3/4 cup unsalted butter
- 1 tablespoon apple cider vinegar
- 8-10 tablespoons ice water
Pulse the flour and salt together in a food processor until combined.
Add the chilled, cubed butter and pulse until the mixture resembles coarse breadcrumbs with some pea-sized pieces of butter remaining—this creates those flaky layers we want.
Transfer to a bowl and stir in the apple cider vinegar, then add ice water one tablespoon at a time, stirring gently with a fork until shaggy dough just begins to form.
Turn the dough onto a work surface and knead it gently 4 times to bring it together, then shape into a flat disk.
Wrap in plastic and refrigerate for at least 1 hour—I always make this dough ahead so it’s cold and easy to work with when I’m ready to assemble.
Step 2: Prepare the Cheesecake Filling
- 8 oz cream cheese
- 1 teaspoon vanilla bean paste
- 1/4 teaspoon salt
- 1/4 teaspoon ground nutmeg
- 1.5 teaspoons lime zest
- 1 large egg
- 1/3 cup powdered sugar
While the dough chills, beat the room-temperature cream cheese until smooth and creamy.
Add the vanilla bean paste, salt, ground nutmeg, and lime zest, beating until well combined.
Add the large egg and continue beating, then sift in the powdered sugar and mix until the filling is light and smooth.
Set aside at room temperature.
Step 3: Prepare the Fruit Filling
- 16 oz strawberries
- 1 cup blueberries
- 1 tablespoon lime juice
- 1/4 cup granulated sugar
- 1 tablespoon cornstarch
Combine the hulled and sliced strawberries with the blueberries in a bowl.
Drizzle with lime juice and sprinkle with the granulated sugar and cornstarch, tossing gently to coat.
Let sit for 5-10 minutes so the berries release their juices slightly—the cornstarch will help thicken these juices during baking so your galette doesn’t become soggy.
Step 4: Shape and Fill the Galette
- chilled dough from Step 1
- cheesecake filling from Step 2
- fruit filling from Step 3
Preheat your oven to 400°F and line a large baking sheet with parchment paper.
On a lightly floured surface, roll the chilled dough from Step 1 into a 14-16 inch circle.
Transfer to the prepared baking sheet.
Spread half of the cheesecake filling from Step 2 over the dough, leaving a 2-inch border around the edges.
Arrange the fruit filling from Step 3 on top of the cream cheese layer, then dollop the remaining cheesecake filling over and around the berries.
Step 5: Finish and Bake
- 1 egg
- 1 tablespoon demerara sugar
Fold the 2-inch dough border up and over the filling, creating a rustic frame that partially encloses the fruit and cheese.
Don’t worry about it being perfectly even—that’s part of the charm!
Beat the remaining egg and brush it onto the exposed dough edges, then sprinkle generously with demerara sugar.
Bake for 40-45 minutes until the crust is deep golden brown and you can see the fruit filling bubbling slightly at the edges.
I like to rotate the sheet halfway through baking to ensure even browning.
Step 6: Cool and Serve
Remove the galette from the oven and let it cool on the baking sheet for at least 15-20 minutes before serving.
This allows the filling to set slightly while the crust remains crispy.
Serve warm or at room temperature with whipped cream or vanilla ice cream if desired.

Juicy Strawberry Cheesecake Galette
Ingredients
For the dough
- 2 cups all-purpose flour
- 1/2 teaspoon fine sea salt
- 3/4 cup unsalted butter (chilled and cubed)
- 1 tablespoon apple cider vinegar
- 8-10 tablespoons ice water
- 1 egg (for egg wash)
- 1 tablespoon demerara sugar
For the berry topping
- 16 oz strawberries (hulled and sliced)
- 1 cup blueberries
- 1 tablespoon lime juice
- 1/4 cup granulated sugar
- 1 tablespoon cornstarch (to thicken juices)
For the cheesecake filling
- 8 oz cream cheese (room temperature)
- 1 teaspoon vanilla bean paste
- 1/4 teaspoon salt
- 1/4 teaspoon ground nutmeg
- 1.5 teaspoons lime zest
- 1 large egg
- 1/3 cup powdered sugar (sifted)
Instructions
- Pulse the flour and salt together in a food processor until combined. Add the chilled, cubed butter and pulse until the mixture resembles coarse breadcrumbs with some pea-sized pieces of butter remaining—this creates those flaky layers we want. Transfer to a bowl and stir in the apple cider vinegar, then add ice water one tablespoon at a time, stirring gently with a fork until shaggy dough just begins to form. Turn the dough onto a work surface and knead it gently 4 times to bring it together, then shape into a flat disk. Wrap in plastic and refrigerate for at least 1 hour—I always make this dough ahead so it's cold and easy to work with when I'm ready to assemble.
- While the dough chills, beat the room-temperature cream cheese until smooth and creamy. Add the vanilla bean paste, salt, ground nutmeg, and lime zest, beating until well combined. Add the large egg and continue beating, then sift in the powdered sugar and mix until the filling is light and smooth. Set aside at room temperature.
- Combine the hulled and sliced strawberries with the blueberries in a bowl. Drizzle with lime juice and sprinkle with the granulated sugar and cornstarch, tossing gently to coat. Let sit for 5-10 minutes so the berries release their juices slightly—the cornstarch will help thicken these juices during baking so your galette doesn't become soggy.
- Preheat your oven to 400°F and line a large baking sheet with parchment paper. On a lightly floured surface, roll the chilled dough from Step 1 into a 14-16 inch circle. Transfer to the prepared baking sheet. Spread half of the cheesecake filling from Step 2 over the dough, leaving a 2-inch border around the edges. Arrange the fruit filling from Step 3 on top of the cream cheese layer, then dollop the remaining cheesecake filling over and around the berries.
- Fold the 2-inch dough border up and over the filling, creating a rustic frame that partially encloses the fruit and cheese. Don't worry about it being perfectly even—that's part of the charm! Beat the remaining egg and brush it onto the exposed dough edges, then sprinkle generously with demerara sugar. Bake for 40-45 minutes until the crust is deep golden brown and you can see the fruit filling bubbling slightly at the edges. I like to rotate the sheet halfway through baking to ensure even browning.
- Remove the galette from the oven and let it cool on the baking sheet for at least 15-20 minutes before serving. This allows the filling to set slightly while the crust remains crispy. Serve warm or at room temperature with whipped cream or vanilla ice cream if desired.







