I didn’t grow up with coconut cake on the table—that came later, when I married into a family that served it at every birthday and holiday. At first, I wasn’t sure about all that coconut, but one bite of the real deal changed my mind completely.
The secret is using actual coconut milk and coconut flavoring in both the cake and the frosting, not just sprinkling some flakes on top and calling it done. When you do it right, you get coconut flavor in every single bite, not just on the outside. And yes, it takes a few steps to pull together, but none of them are complicated. If you can separate eggs and use a mixer, you’re already halfway there.
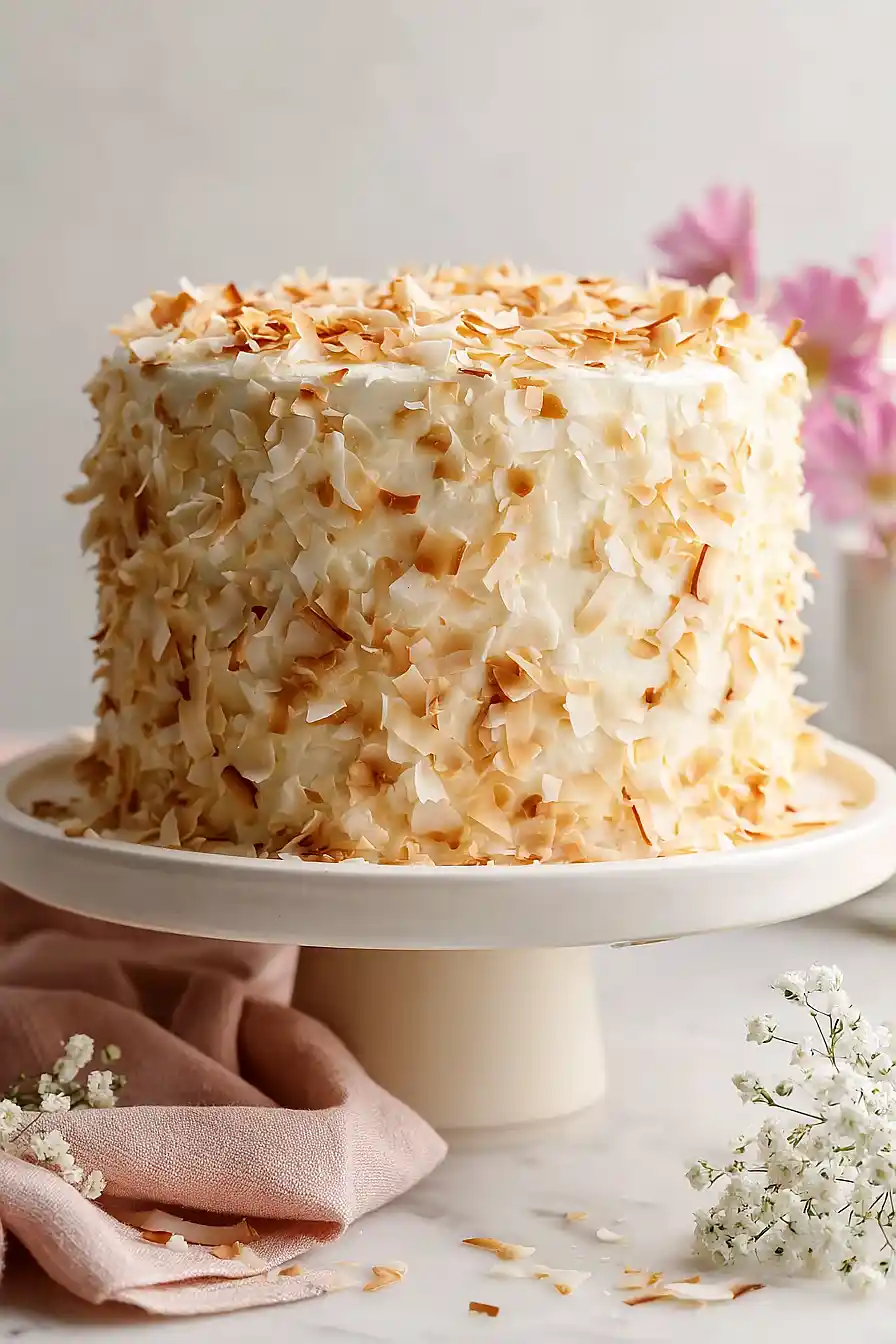
Why You’ll Love This Coconut Layer Cake
- Impressive presentation – This beautiful layered cake looks like it came straight from a bakery, making it perfect for birthdays, holidays, or any celebration where you want to wow your guests.
- Rich coconut flavor – With coconut milk in the cake, coconut flavoring in the frosting, and shredded coconut on top, every bite is packed with that tropical taste coconut lovers crave.
- Moist and tender crumb – The combination of cake flour, coconut milk, and butter creates a soft, fluffy texture that melts in your mouth.
- Creamy frosting – The cream cheese and butter frosting is smooth and not too sweet, balancing perfectly with the cake layers.
What Kind of Coconut Should I Use?
For the coconut that goes on the outside of this cake, you’ll want to use sweetened shredded coconut, which you can find in the baking aisle of most grocery stores. Unsweetened coconut will work too if you prefer a less sweet finish, but keep in mind it has a more subtle flavor and drier texture. If you can only find large coconut flakes, don’t worry – they’ll still taste great and give your cake a nice rustic look. Before applying the coconut to your frosted cake, you can lightly toast it in the oven for a few minutes to bring out a deeper, nuttier flavor, though this step is totally optional.

Options for Substitutions
This coconut cake is pretty forgiving when it comes to swaps, so here are some options if you need them:
- Cake flour: Don’t have cake flour? You can make your own by measuring 3 cups of all-purpose flour, removing 6 tablespoons, and replacing it with 6 tablespoons of cornstarch. Sift it together a few times to mix well.
- Coconut milk: If you’re out of coconut milk, whole milk works fine for both the cake and frosting. You’ll lose a bit of coconut flavor, but the coconut flavoring and shredded coconut will still give you that tropical taste.
- Coconut flavoring: Can’t find coconut flavoring? Try using vanilla extract instead, or add a bit of almond extract for a different but complementary flavor profile.
- Cream cheese: For the frosting, you can use all butter instead of cream cheese if needed. Just increase the butter to 1.5 cups total and add a splash of heavy cream to get the right consistency.
- Shredded coconut: Sweetened or unsweetened coconut both work here. If using sweetened, you might want to reduce the sugar in the frosting by a few tablespoons to balance the sweetness.
Watch Out for These Mistakes While Baking
The biggest mistake when making layer cakes is trying to frost warm layers, which will cause your frosting to melt and slide right off – always let your cake layers cool completely, ideally for at least an hour at room temperature.
Room temperature ingredients are crucial for this recipe, so take your egg whites, butter, and cream cheese out of the fridge about an hour before you start baking, as cold ingredients won’t mix properly and can lead to a dense, uneven cake.
When toasting the coconut for the outside, watch it like a hawk because it goes from golden to burned in seconds – stir it every minute or so and remove it from the oven as soon as you see color.
To get clean, professional-looking layers, try using a serrated knife to level off any domed tops before stacking, and apply a thin “crumb coat” of frosting first, then chill for 20 minutes before adding the final layer of frosting.
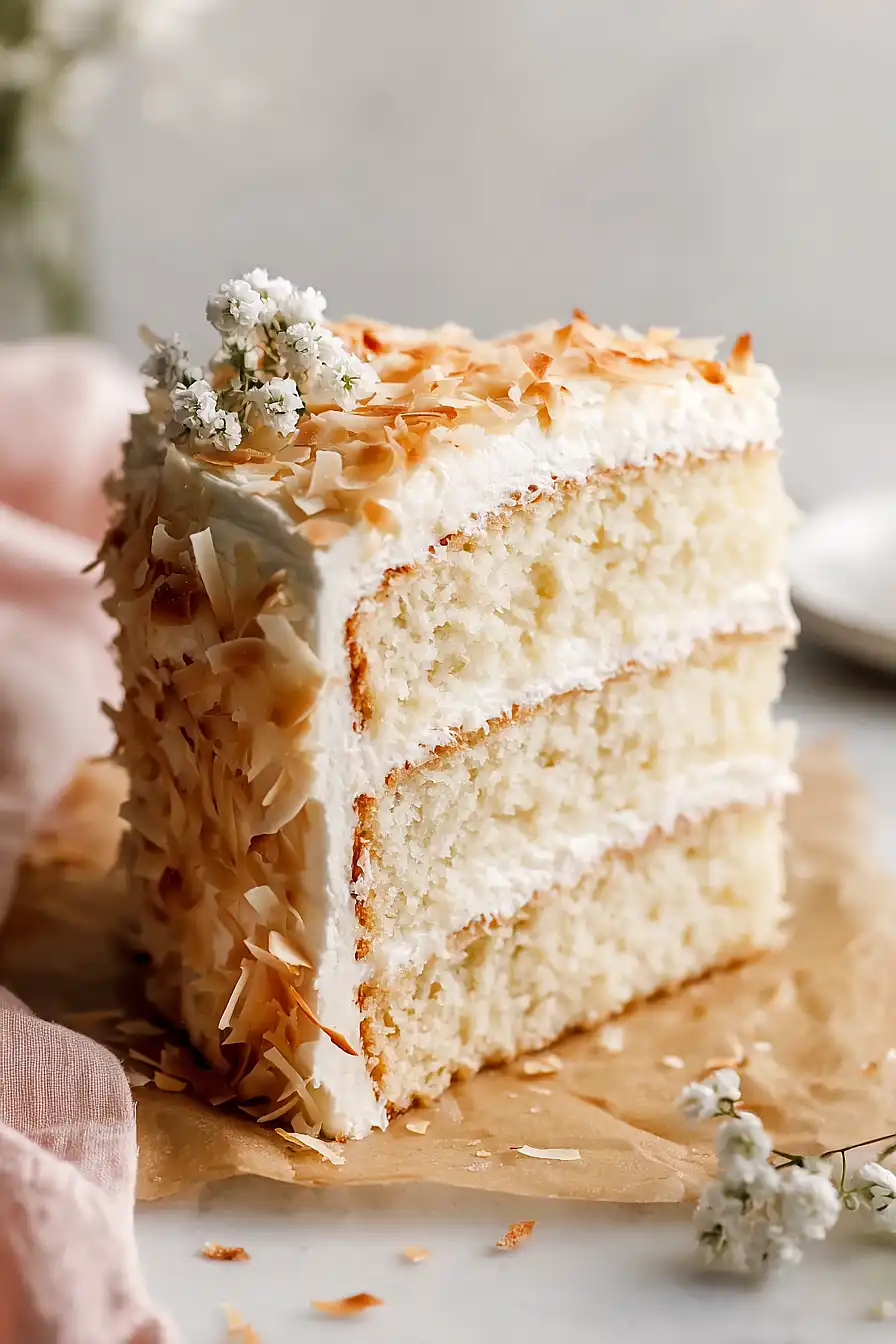
What to Serve With Coconut Layer Cake?
This coconut layer cake is rich and sweet, so I like to serve it with a hot cup of coffee or a glass of cold milk to balance out all that creamy frosting. Fresh berries like strawberries or raspberries make a great side because their tartness cuts through the sweetness of the cake. You could also serve it with a scoop of vanilla ice cream or some lightly sweetened whipped cream if you’re feeling extra indulgent. For a tropical twist that plays off the coconut flavor, try pairing it with sliced mango or pineapple on the side.
Storage Instructions
Store: Keep your coconut layer cake covered in the fridge since it has cream cheese frosting. It’ll stay fresh for about 4-5 days in an airtight container or under a cake dome. Just let it sit at room temperature for about 30 minutes before serving so the frosting softens up a bit.
Freeze: You can freeze individual slices wrapped tightly in plastic wrap and then in foil for up to 2 months. The whole cake freezes well too if you wrap it carefully. Just thaw it overnight in the fridge when you’re ready to enjoy it again.
Make Ahead: This cake is actually great to make a day ahead since the layers have time to settle and the flavors blend together. You can bake the cake layers, wrap them well, and keep them at room temperature overnight before frosting the next day.
| Preparation Time | 30-45 minutes |
| Cooking Time | 35-40 minutes |
| Total Time | 105-120 minutes |
| Level of Difficulty | Medium |
| Servings | 12 slices |
Estimated Nutrition
Estimated nutrition for the whole recipe (without optional ingredients):
- Calories: 7200-7800
- Protein: 45-55 g
- Fat: 390-430 g
- Carbohydrates: 900-1000 g
Ingredients
For the cake layers:
- 5 egg whites (room temperature, about 70°F)
- 1.75 cups coconut milk (I prefer Thai Kitchen full-fat coconut milk)
- 2 tsp coconut flavoring
- 0.5 tsp vanilla extract
- 3 cups cake flour (I always use King Arthur cake flour)
- 2.25 cups sugar
- 4.5 tsp baking powder
- 0.5 tsp salt
- 1 cup butter
For the cream cheese frosting:
- 8 oz cream cheese (I use Philadelphia full-fat bricks)
- 0.66 cup butter
- 4 cups powdered sugar (sifted to remove lumps)
- 3 tbsp coconut milk
- 1.5 tsp coconut flavoring
- 0.5 tsp vanilla extract
For the filling and finish:
- 1 cup buttercream
- 1 cup heavy cream
- 2.25 cups coconut (unsweetened shredded gives better texture)
Step 1: Prepare Equipment and Mise en Place
- 2 nine-inch round cake pans
- 4 cups powdered sugar
- 5 egg whites
Preheat your oven to 350°F and grease two 9-inch round cake pans with butter or cooking spray, then line the bottoms with parchment paper for easy removal.
Sift the powdered sugar for the frosting to remove any lumps, and bring your egg whites to room temperature (around 70°F) as this helps them incorporate better into the batter and create a more stable crumb.
Measure out all your ingredients and have them ready before you begin mixing.
Step 2: Create the Cake Batter
- 3 cups cake flour
- 2.25 cups sugar
- 4.5 tsp baking powder
- 0.5 tsp salt
- 1 cup butter
- 1 cup coconut milk
- 5 egg whites
- 0.5 cup coconut milk
- 2 tsp coconut flavoring
- 0.5 tsp vanilla extract
In a large mixer bowl, combine the cake flour, sugar, baking powder, and salt, then mix on low speed for about 30 seconds to blend the dry ingredients evenly.
Add 1 cup of butter and 1 cup of coconut milk to the dry mixture and beat on medium speed for 2 minutes—this technique, called the “two-stage method,” creates a tender, moist cake by ensuring the flour is fully hydrated before adding eggs.
In a separate bowl, whisk together the egg whites, remaining 0.5 cup coconut milk, 2 teaspoons coconut flavoring, and vanilla extract until well combined.
Step 3: Combine Wet and Dry Ingredients and Bake
- egg white mixture from Step 2
Add the egg white mixture from Step 2 to the batter in three additions, beating on medium speed for about 20 seconds after each addition to fully incorporate without overmixing.
Divide the batter evenly between the two prepared pans and smooth the tops with a spatula.
Bake for 35-40 minutes until a toothpick inserted in the center comes out clean or with just a few moist crumbs.
I like to rotate the pans halfway through baking to ensure even cooking, as ovens have hot spots.
Cool the cakes in their pans for 10 minutes, then turn them out onto wire cooling racks and let them cool completely before frosting.
Step 4: Make the Cream Cheese Frosting Base
- 0.66 cup butter
- 8 oz cream cheese
- 4 cups powdered sugar
- 3 tbsp coconut milk
- 1.5 tsp coconut flavoring
- 0.5 tsp vanilla extract
While the cakes cool, beat together the 0.66 cup butter and 8 oz cream cheese in a mixer on medium speed for 2-3 minutes until light and fluffy, scraping down the bowl occasionally.
Add the sifted powdered sugar in two additions, beating until smooth between additions.
Add 3 tablespoons coconut milk, 1.5 teaspoons coconut flavoring, and 0.5 teaspoon vanilla extract, then beat for another 1-2 minutes until the frosting is creamy and spreadable.
I always make sure my cream cheese and butter are at room temperature so they blend together smoothly without lumps.
Step 5: Make Whipped Coconut Filling and Toast Coconut
- 1 cup heavy cream
- 1 cup buttercream
- 2.25 cups coconut
Pour 1 cup of the cream cheese frosting from Step 4 into a separate bowl and whip the heavy cream to stiff peaks in another bowl, then gently fold the whipped cream into the frosting to create a light, airy filling.
While the whipped filling sets, spread the unsweetened shredded coconut on a baking sheet and toast it at 350°F for 5-7 minutes, stirring occasionally, until golden brown and fragrant—watch it carefully as coconut burns quickly.
Set the toasted coconut aside to cool, and this is what gives the finished cake its best texture and subtle, authentic flavor.
Step 6: Assemble and Frost the Cake
- cooled cake layers from Step 3
- whipped coconut filling from Step 5
- remaining cream cheese frosting from Step 4
- toasted coconut from Step 5
Place the first cooled cake layer on a serving plate and spread about one-third of the whipped coconut filling from Step 5 evenly over the top.
Place the second cake layer on top and gently press down.
Spread the remaining cream cheese frosting from Step 4 over the top and sides of the cake, using an offset spatula to create an even finish.
Press the toasted coconut from Step 5 onto the frosting, covering the top and sides of the cake completely for a beautiful presentation and rich coconut flavor in every bite.
Step 7: Chill and Serve
Refrigerate the assembled cake for at least 1 hour before slicing—this helps the frosting set and makes clean slices easier.
Let the cake sit at room temperature for 15-20 minutes before serving for the best flavor and texture.
Moist Coconut Layer Cake
Ingredients
For the cake layers::
- 5 egg whites (room temperature, about 70°F)
- 1.75 cups coconut milk (I prefer Thai Kitchen full-fat coconut milk)
- 2 tsp coconut flavoring
- 0.5 tsp vanilla extract
- 3 cups cake flour (I always use King Arthur cake flour)
- 2.25 cups sugar
- 4.5 tsp baking powder
- 0.5 tsp salt
- 1 cup butter
For the cream cheese frosting::
- 8 oz cream cheese (I use Philadelphia full-fat bricks)
- 0.66 cup butter
- 4 cups powdered sugar (sifted to remove lumps)
- 3 tbsp coconut milk
- 1.5 tsp coconut flavoring
- 0.5 tsp vanilla extract
For the filling and finish::
- 1 cup buttercream
- 1 cup heavy cream
- 2.25 cups coconut (unsweetened shredded gives better texture)
Instructions
- Preheat your oven to 350°F and grease two 9-inch round cake pans with butter or cooking spray, then line the bottoms with parchment paper for easy removal. Sift the powdered sugar for the frosting to remove any lumps, and bring your egg whites to room temperature (around 70°F) as this helps them incorporate better into the batter and create a more stable crumb. Measure out all your ingredients and have them ready before you begin mixing.
- In a large mixer bowl, combine the cake flour, sugar, baking powder, and salt, then mix on low speed for about 30 seconds to blend the dry ingredients evenly. Add 1 cup of butter and 1 cup of coconut milk to the dry mixture and beat on medium speed for 2 minutes—this technique, called the "two-stage method," creates a tender, moist cake by ensuring the flour is fully hydrated before adding eggs. In a separate bowl, whisk together the egg whites, remaining 0.5 cup coconut milk, 2 teaspoons coconut flavoring, and vanilla extract until well combined.
- Add the egg white mixture from Step 2 to the batter in three additions, beating on medium speed for about 20 seconds after each addition to fully incorporate without overmixing. Divide the batter evenly between the two prepared pans and smooth the tops with a spatula. Bake for 35-40 minutes until a toothpick inserted in the center comes out clean or with just a few moist crumbs. I like to rotate the pans halfway through baking to ensure even cooking, as ovens have hot spots. Cool the cakes in their pans for 10 minutes, then turn them out onto wire cooling racks and let them cool completely before frosting.
- While the cakes cool, beat together the 0.66 cup butter and 8 oz cream cheese in a mixer on medium speed for 2-3 minutes until light and fluffy, scraping down the bowl occasionally. Add the sifted powdered sugar in two additions, beating until smooth between additions. Add 3 tablespoons coconut milk, 1.5 teaspoons coconut flavoring, and 0.5 teaspoon vanilla extract, then beat for another 1-2 minutes until the frosting is creamy and spreadable. I always make sure my cream cheese and butter are at room temperature so they blend together smoothly without lumps.
- Pour 1 cup of the cream cheese frosting from Step 4 into a separate bowl and whip the heavy cream to stiff peaks in another bowl, then gently fold the whipped cream into the frosting to create a light, airy filling. While the whipped filling sets, spread the unsweetened shredded coconut on a baking sheet and toast it at 350°F for 5-7 minutes, stirring occasionally, until golden brown and fragrant—watch it carefully as coconut burns quickly. Set the toasted coconut aside to cool, and this is what gives the finished cake its best texture and subtle, authentic flavor.
- Place the first cooled cake layer on a serving plate and spread about one-third of the whipped coconut filling from Step 5 evenly over the top. Place the second cake layer on top and gently press down. Spread the remaining cream cheese frosting from Step 4 over the top and sides of the cake, using an offset spatula to create an even finish. Press the toasted coconut from Step 5 onto the frosting, covering the top and sides of the cake completely for a beautiful presentation and rich coconut flavor in every bite.
- Refrigerate the assembled cake for at least 1 hour before slicing—this helps the frosting set and makes clean slices easier. Let the cake sit at room temperature for 15-20 minutes before serving for the best flavor and texture.







