If you ask me, red velvet anything is perfect for the holidays.
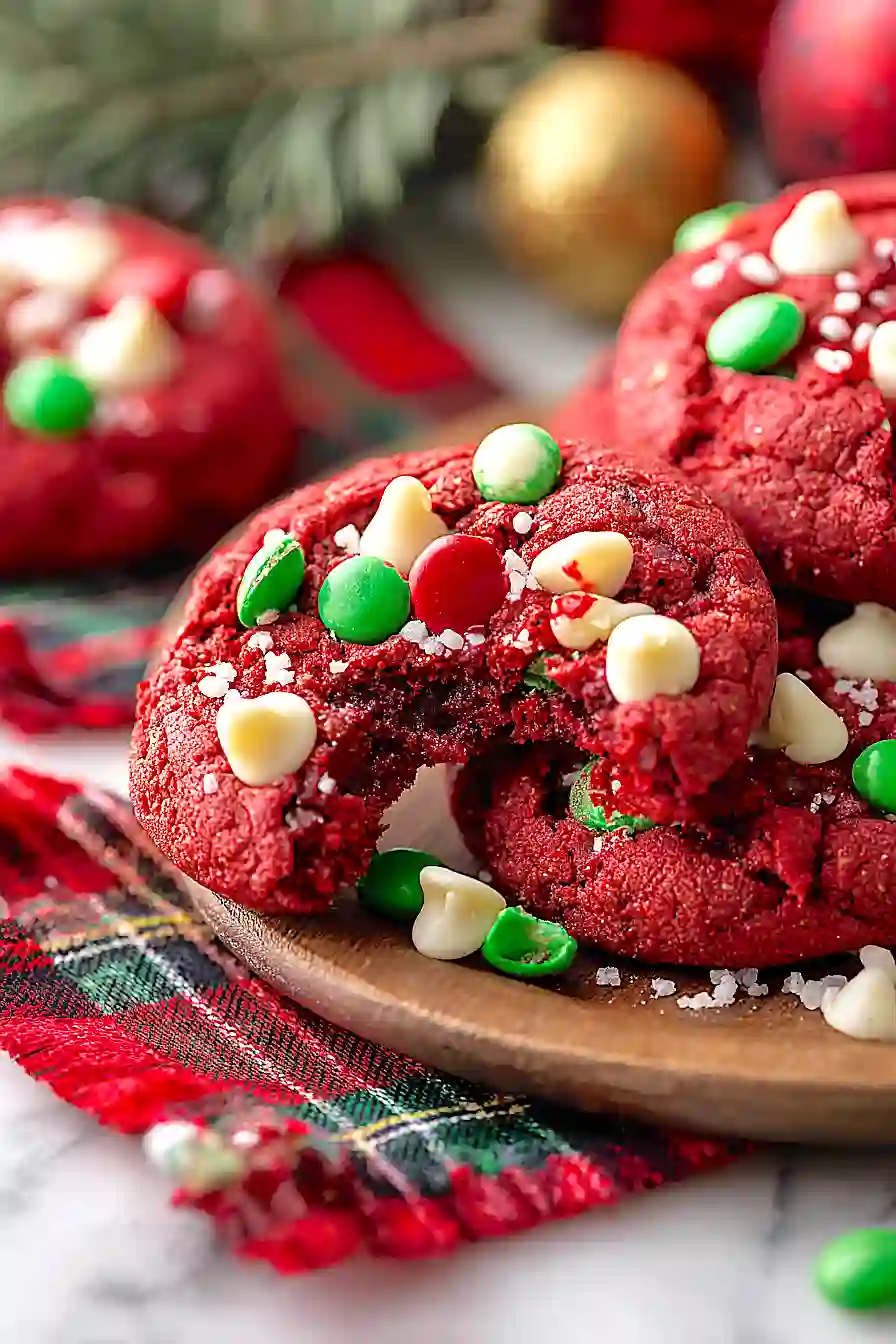
These Christmas cookies bring that classic red velvet cake flavor into a chewy, soft cookie that’s easy to make and fun to share. The hint of cocoa and cinnamon gives them a warm, festive taste without being too rich.
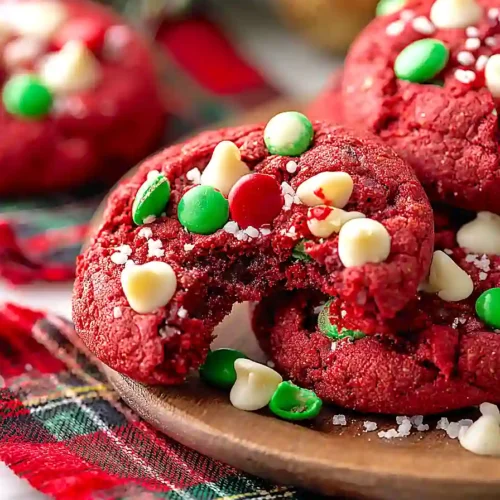
They’re loaded with melty white chocolate chips and colorful chocolate candies that make every bite a little different. A touch of vinegar and cornstarch keeps them moist and tender, just like a good red velvet cake should be.
They’re a crowd-pleasing treat that looks great on a cookie platter and disappears fast at parties.

Why You’ll Love These Red Velvet Christmas Cookies
- Quick and easy – These festive cookies come together in just 30-40 minutes, making them perfect for last-minute holiday baking or when you need treats in a hurry.
- Festive and fun – The bright red color and chocolate candies make these cookies look like they came straight from Santa’s workshop, adding a cheerful touch to any holiday cookie platter.
- Soft and chewy texture – The combination of butter, shortening, and a touch of vinegar creates cookies that stay soft and tender, not hard or crumbly.
- Kid-friendly baking project – This recipe is simple enough to make with children, and they’ll love adding the colorful chocolate candies on top.
- Classic red velvet flavor – You get all the subtle cocoa taste and tangy sweetness of traditional red velvet cake in a convenient cookie form.
What Kind of Chocolate Candies Should I Use?
For these red velvet Christmas cookies, you can use pretty much any chocolate candies you like or have on hand. M&Ms are a popular choice since they come in festive red and green colors for the holidays, plus they hold their shape well during baking. You could also go with chocolate chips, chopped chocolate bars, or even those fun holiday-themed candies you find at the store this time of year. Just keep in mind that some candies might melt more than others, so if you want them to stay intact and colorful, stick with candy-coated options like M&Ms or similar treats.

Options for Substitutions
These festive cookies are pretty forgiving when it comes to swaps, so here are some options:
- Shortening: If you don’t have shortening, you can use all butter instead (so 14 tablespoons total). Your cookies will spread a bit more and have a slightly different texture, but they’ll still taste great.
- Red food color: You can use gel food coloring instead of liquid – just use less since it’s more concentrated. Start with 1 teaspoon and add more if needed. For a natural option, try beet powder, though the color won’t be quite as bright.
- White chocolate chips: Regular chocolate chips, butterscotch chips, or even chopped white chocolate bars work perfectly here. You could also leave them out if you prefer.
- Chocolate candies: M&Ms are traditional, but any candy-coated chocolates will do. You can also use chocolate chips, chopped chocolate bars, or skip them entirely for a simpler cookie.
- Vinegar: White vinegar works best, but apple cider vinegar or lemon juice can substitute in the same amount.
- Cornstarch: In a pinch, you can replace the cornstarch with an equal amount of flour, though your cookies might be slightly less tender.
Watch Out for These Mistakes While Baking
The biggest mistake with red velvet cookies is overbaking them – since they’re already red, you can’t rely on color to tell when they’re done, so pull them out when the edges are just set but the centers still look slightly underdone at 8-9 minutes.
Another common error is skipping the cornstarch, which might seem unnecessary but actually helps create that soft, tender texture that makes these cookies special instead of cake-like.
Don’t forget to let your butter and shortening come to room temperature before mixing, as cold fats won’t cream properly with the sugar and can lead to flat, dense cookies.
For the most festive look, press those chocolate candies into the dough balls right before baking rather than mixing them in, which keeps them visible on top and prevents them from melting completely into the cookie.
What to Serve With Red Velvet Christmas Cookies?
These cookies are perfect alongside a big glass of cold milk or a mug of hot chocolate during the holiday season. I love setting them out on a dessert table with other Christmas treats like brownies, fudge, and peppermint bark for a fun cookie exchange or holiday party. They also make a great addition to a Christmas morning breakfast spread – just pair them with some coffee, fresh fruit, and maybe some scrambled eggs to balance out the sweetness. If you’re packaging them up as gifts, throw in a few alongside some homemade fudge or candied nuts for a thoughtful holiday treat box.
Storage Instructions
Store: Keep your red velvet cookies in an airtight container at room temperature for up to 5 days. Layer them with parchment paper if you’re stacking them to prevent sticking. They’ll stay soft and chewy if you toss a slice of bread in the container, which helps maintain moisture.
Freeze: These cookies freeze really well for up to 3 months. You can freeze them baked or as dough balls. If freezing the dough, just place the shaped cookies on a baking sheet until solid, then transfer to a freezer bag. Bake straight from frozen, adding an extra minute or two to the baking time.
Make Ahead: The cookie dough can be made ahead and stored in the fridge for up to 3 days before baking. Just let it sit at room temperature for about 10 minutes before scooping and baking. This actually makes the cookies taste even better since the flavors have time to develop!
| Preparation Time | 20-25 minutes |
| Cooking Time | 10-15 minutes |
| Total Time | 30-40 minutes |
| Level of Difficulty | Medium |
| Servings | 36 cookies |
Estimated Nutrition
Estimated nutrition for the whole recipe (without optional ingredients):
- Calories: 3400-3700
- Protein: 30-36 g
- Fat: 140-155 g
- Carbohydrates: 470-500 g
Ingredients
For the dry ingredients:
- 2 1/2 cups flour (I always use King Arthur all-purpose flour)
- 4 tbsp cocoa powder (sifted to remove lumps)
- 1 1/2 tsp cornstarch (gives better texture and moisture)
- 3/4 tsp baking soda
- 1/2 tsp salt
- 1/4 tsp ground cinnamon
For the wet ingredients:
- 9 tbsp butter (I like Kerrygold unsalted butter for this)
- 7 tbsp shortening
- 1 3/4 cups sugar
- 1 egg (room temperature, about 70°F)
- 1 egg yolk
- 1 1/2 tsp vinegar
- 1 1/2 tsp vanilla
- 1 tbsp red food color (liquid or gel for vibrant color)
For the mix-ins:
- 3/4 cup white chocolate chips (I prefer Ghirardelli for a creamy melt)
- 1 cup chocolate candies
Step 1: Prepare the Dry Ingredient Base
- 2 1/2 cups flour
- 4 tbsp cocoa powder
- 1 1/2 tsp cornstarch
- 3/4 tsp baking soda
- 1/2 tsp salt
- 1/4 tsp ground cinnamon
Sift together the flour, cocoa powder, cornstarch, baking soda, salt, and cinnamon in a medium bowl.
Sifting is essential here—it removes lumps from the cocoa powder and ensures even distribution of the leavening agents, which gives you a more tender, evenly-colored cookie.
Set this mixture aside and preheat your oven to 375°F while you prepare the wet ingredients.
Step 2: Cream the Butter and Shortening with Sugar
- 9 tbsp butter
- 7 tbsp shortening
- 1 3/4 cups sugar
In a large bowl, beat together the butter, shortening, and sugar for about 4 minutes until the mixture is light, fluffy, and pale in color.
This creaming process incorporates air into the dough, creating a tender crumb and helping the cookies spread evenly.
Use an electric mixer on medium speed to ensure you’re aerating properly throughout.
Step 3: Incorporate the Wet Ingredients and Color
- creamed butter mixture from Step 2
- 1 egg
- 1 egg yolk
- 1 1/2 tsp vinegar
- 1 1/2 tsp vanilla
- 1 tbsp red food color
Add the room-temperature egg, egg yolk, vinegar, vanilla, and red food coloring to the creamed mixture.
Beat until fully combined and the dough has a vibrant red color.
The room-temperature egg incorporates more smoothly and evenly distributes the color.
I use liquid food coloring for easier mixing, though gel works too—just dissolve it in the vinegar first for even distribution.
Step 4: Combine Dry and Wet Ingredients with White Chocolate
- dry ingredient mixture from Step 1
- wet ingredient mixture from Step 3
- 3/4 cup white chocolate chips
Add the dry ingredient mixture from Step 1 to the wet ingredients and mix on low speed until just combined—don’t overmix or the cookies will be tough.
Fold in the 3/4 cup white chocolate chips by hand using a spatula or wooden spoon.
The contrast of the creamy white chocolate against the deep red dough creates both visual appeal and flavor complexity.
Step 5: Shape and Assemble the Cookies
- cookie dough from Step 4
- 1 cup chocolate candies
Roll about 1.5 tablespoons of dough into balls and place them about 2 inches apart on ungreased baking sheets.
Press 6 chocolate candies into the top of each ball, gently pushing them down so they stick.
This is a great time to let someone help—kids especially love pressing the candies in!
The candies will soften slightly during baking and create little pockets of chocolate flavor.
Step 6: Bake and Cool the Cookies
Bake for 8-9 minutes until the edges are set but the centers still look slightly underdone—this is key to keeping them soft and cake-like.
The cookies will continue cooking on the hot pan, so don’t overbake.
Let them cool on the baking sheet for 2-3 minutes, then transfer to a wire cooling rack to finish cooling.
This two-stage cooling prevents them from cracking while keeping them moist.
Simple Red Velvet Christmas Cookies
Ingredients
For the dry ingredients::
- 2 1/2 cups flour (I always use King Arthur all-purpose flour)
- 4 tbsp cocoa powder (sifted to remove lumps)
- 1 1/2 tsp cornstarch (gives better texture and moisture)
- 3/4 tsp baking soda
- 1/2 tsp salt
- 1/4 tsp ground cinnamon
For the wet ingredients::
- 9 tbsp butter (I like Kerrygold unsalted butter for this)
- 7 tbsp shortening
- 1 3/4 cups sugar
- 1 egg (room temperature, about 70°F)
- 1 egg yolk
- 1 1/2 tsp vinegar
- 1 1/2 tsp vanilla
- 1 tbsp red food color (liquid or gel for vibrant color)
For the mix-ins::
- 3/4 cup white chocolate chips (I prefer Ghirardelli for a creamy melt)
- 1 cup chocolate candies
Instructions
- Sift together the flour, cocoa powder, cornstarch, baking soda, salt, and cinnamon in a medium bowl. Sifting is essential here—it removes lumps from the cocoa powder and ensures even distribution of the leavening agents, which gives you a more tender, evenly-colored cookie. Set this mixture aside and preheat your oven to 375°F while you prepare the wet ingredients.
- In a large bowl, beat together the butter, shortening, and sugar for about 4 minutes until the mixture is light, fluffy, and pale in color. This creaming process incorporates air into the dough, creating a tender crumb and helping the cookies spread evenly. Use an electric mixer on medium speed to ensure you're aerating properly throughout.
- Add the room-temperature egg, egg yolk, vinegar, vanilla, and red food coloring to the creamed mixture. Beat until fully combined and the dough has a vibrant red color. The room-temperature egg incorporates more smoothly and evenly distributes the color. I use liquid food coloring for easier mixing, though gel works too—just dissolve it in the vinegar first for even distribution.
- Add the dry ingredient mixture from Step 1 to the wet ingredients and mix on low speed until just combined—don't overmix or the cookies will be tough. Fold in the 3/4 cup white chocolate chips by hand using a spatula or wooden spoon. The contrast of the creamy white chocolate against the deep red dough creates both visual appeal and flavor complexity.
- Roll about 1.5 tablespoons of dough into balls and place them about 2 inches apart on ungreased baking sheets. Press 6 chocolate candies into the top of each ball, gently pushing them down so they stick. This is a great time to let someone help—kids especially love pressing the candies in! The candies will soften slightly during baking and create little pockets of chocolate flavor.
- Bake for 8-9 minutes until the edges are set but the centers still look slightly underdone—this is key to keeping them soft and cake-like. The cookies will continue cooking on the hot pan, so don't overbake. Let them cool on the baking sheet for 2-3 minutes, then transfer to a wire cooling rack to finish cooling. This two-stage cooling prevents them from cracking while keeping them moist.


