If you ask me, homemade spring rolls are totally worth the effort.
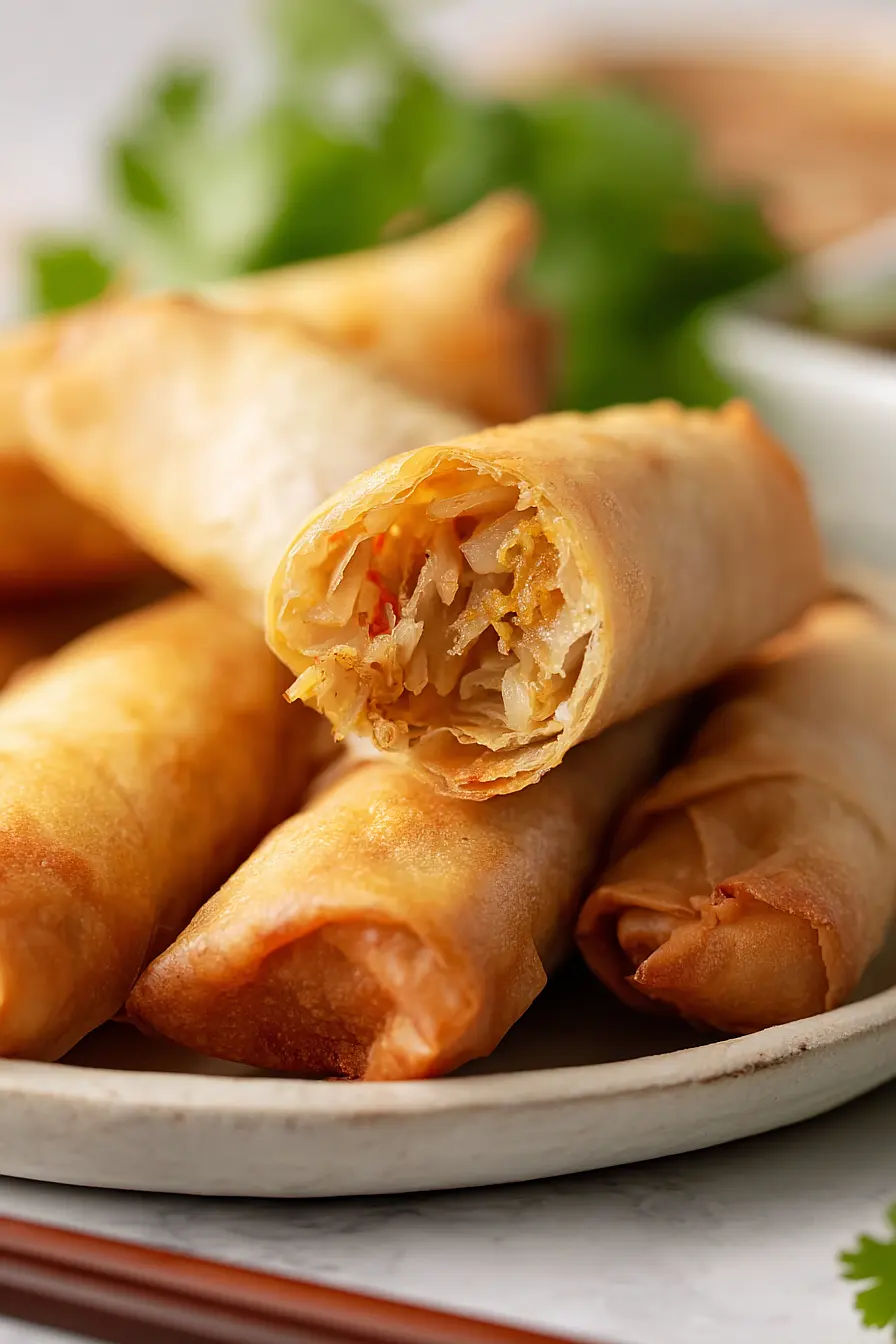
These Thai-inspired chicken rolls make a fun appetizer or light dinner that’s packed with fresh flavors and satisfying crunch. Tender chicken mince and soft glass noodles get mixed with shredded cabbage and julienned carrots, seasoned with fish sauce and garlic.
The filling is wrapped up in spring roll paper and fried until golden and crispy. A sweet-savory sauce brings everything together with oyster sauce, sesame oil, and a touch of white pepper.
They’re the kind of dish that disappears fast at parties, crispy on the outside and full of flavor on the inside.
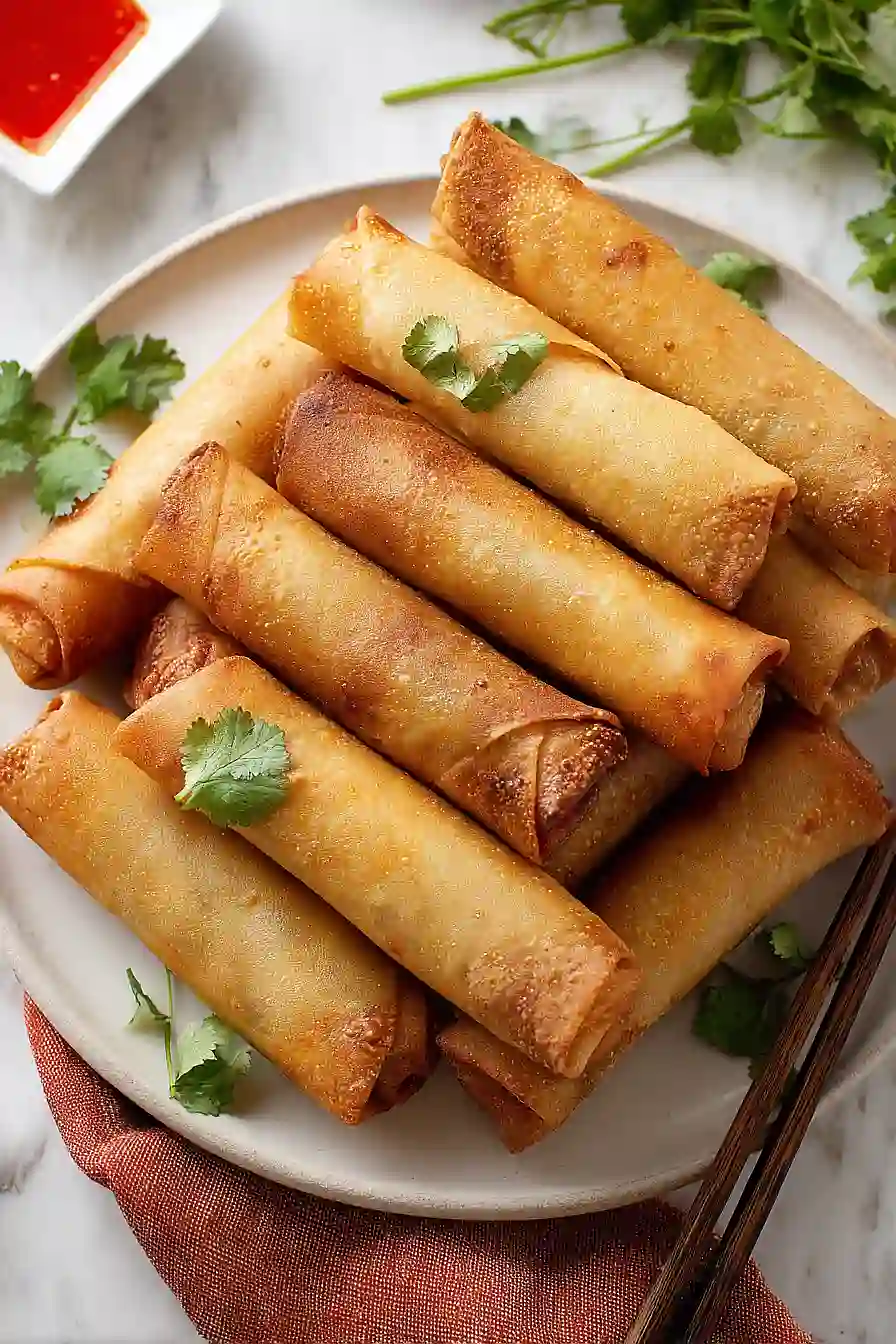
Why You’ll Love These Thai Chicken Rolls
- Restaurant-quality at home – These crispy spring rolls taste just like what you’d order at your favorite Thai restaurant, but you can make them in your own kitchen for a fraction of the cost.
- Perfect for meal prep – You can make a big batch and freeze them for later, giving you a quick snack or appetizer whenever you need one.
- Customizable filling – The combination of chicken, glass noodles, and fresh vegetables creates a satisfying texture, and you can easily adjust the ingredients to use what you have on hand.
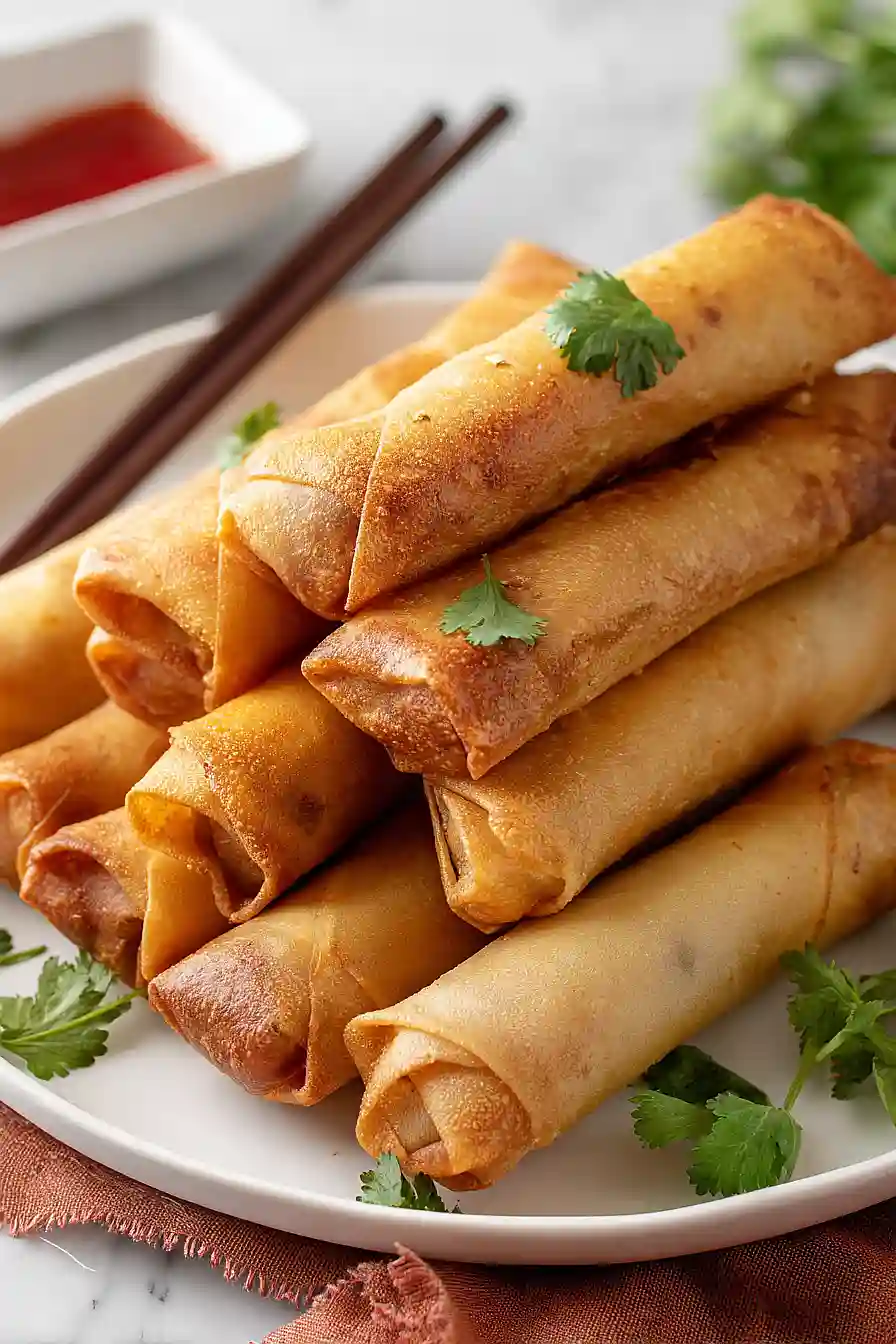
- Great for entertaining – These golden, crispy rolls always impress guests at parties and gatherings, and they pair perfectly with sweet chili sauce for dipping.
What Kind of Chicken Mince Should I Use?
For these Thai chicken rolls, you can use either chicken breast mince or chicken thigh mince, depending on what you prefer. Thigh mince tends to be a bit juicier and more flavorful because it has slightly more fat, which can make your rolls taste richer. Breast mince is leaner and works perfectly fine too, especially if you’re watching your fat intake. If you can’t find pre-made chicken mince at the store, you can easily make your own by chopping boneless chicken into small pieces and pulsing it in a food processor until it reaches a minced consistency.
Options for Substitutions
This recipe is pretty adaptable, so here are some swaps you can make based on what you have:
- Chicken mince: You can easily swap chicken for pork mince or even turkey mince. If you’re vegetarian, crumbled firm tofu works well – just press out the excess water first and add a bit more seasoning.
- Spring roll paper: These wrappers are essential for the recipe, so try to stick with them. You can find them in the freezer section of Asian grocery stores. Make sure they’re the thin, translucent kind, not the thicker egg roll wrappers.
- Glass noodles: If you can’t find glass noodles, rice vermicelli is a decent substitute. Just cook according to package directions and chop them up a bit before adding to the filling.
- Chinese cabbage: Regular green cabbage works fine here. You could also use a mix of cabbage and bean sprouts for extra crunch.
- Fish sauce: If you don’t have fish sauce, use soy sauce instead. You might want to add a tiny squeeze of lime juice to get that salty-tangy balance.
- Coriander stems: The stems add great flavor, but if you only have coriander leaves, use those. You could also substitute with finely chopped green onions in a pinch.
Watch Out for These Mistakes While Cooking
The biggest mistake when making spring rolls is not draining the filling well enough, which causes the wrappers to become soggy and tear during frying – spread your cooled filling on paper towels and press gently to remove excess moisture before wrapping.
Overfilling the wrappers is another common error that leads to bursting during cooking, so stick to 2-3 tablespoons of filling and leave enough space around the edges to fold properly.
Make sure your oil temperature stays at 350°F throughout frying, as oil that’s too cool will make greasy rolls while oil that’s too hot will burn the outside before the inside heats through – use a thermometer to check.
If you’re baking instead of frying, brush the rolls lightly with oil before putting them in the oven, which helps them crisp up and turn golden brown rather than staying pale and dry.
What to Serve With Thai Chicken Rolls?
These crispy spring rolls are perfect with a sweet chili sauce or a tangy peanut dipping sauce on the side – the contrast between the crunchy wrapper and the sauce is really satisfying. I like to serve them alongside a fresh cucumber salad with rice vinegar and sesame seeds to balance out the fried goodness. If you’re making these for a meal rather than an appetizer, pair them with some jasmine rice and a simple stir-fried vegetable like bok choy or green beans. You could also serve them with a light Thai-style soup like tom yum or a coconut-based soup to round out the meal.
Storage Instructions
Store: Once your Thai chicken rolls have cooled completely, store them in an airtight container lined with paper towels to absorb any extra moisture. They’ll stay crispy in the fridge for about 2-3 days, though they’re honestly best enjoyed fresh.
Freeze Before Frying: If you want to prep ahead, you can freeze the uncooked rolls! Just arrange them on a baking sheet so they’re not touching, freeze until solid, then transfer to a freezer bag. They’ll keep for up to 2 months and you can fry them straight from frozen, just add a couple extra minutes to the cooking time.
Crisp Up Leftovers: To bring back that crispy texture, skip the microwave and pop your leftover rolls in a 375°F oven for about 8-10 minutes, or use an air fryer at the same temperature for 5-6 minutes. They won’t be quite as crispy as fresh, but they’ll still be pretty good!
| Preparation Time | 35-45 minutes |
| Cooking Time | 25-30 minutes |
| Total Time | 60-75 minutes |
| Level of Difficulty | Medium |
| Servings | 15 pieces |
Estimated Nutrition
Estimated nutrition for the whole recipe (without optional ingredients):
- Calories: 1300-1500
- Protein: 50-65 g
- Fat: 55-70 g
- Carbohydrates: 160-190 g
Ingredients
For the filling:
- 7 oz chicken mince (leaner grind preferred)
- 1.75 oz glass noodles (soaked in warm water until soft)
- 10.5 oz cabbage (shredded into thin 1/8-inch strips)
- 5.3 oz carrot (julienned into 2-inch long matchsticks)
- 2 tbsp coriander stems
- 3 garlic cloves (finely minced)
- 2 tbsp vegetable oil
- 1.5 tbsp fish sauce (Red Boat preferred)
- 1 tbsp oyster sauce
- 2 tsp sugar
- 1/2 tsp ground white pepper
- 1/4 tsp salt
- 1/2 tsp toasted sesame oil
For assembly:
- 15 sheets spring roll paper
- 1 tbsp flour (mixed with water to create a thick paste for sealing)
For frying:
- Vegetable oil (high smoke point, for deep frying)
Step 1: Prepare the Mise en Place and Soften the Noodles
- 1.75 oz glass noodles
- 3 garlic cloves, finely minced
- 5.3 oz carrot, julienned
- 10.5 oz cabbage, shredded
- 2 tbsp coriander stems, chopped
- 1.5 tbsp fish sauce
- 1 tbsp oyster sauce
- 2 tsp sugar
- 1/2 tsp ground white pepper
- 1/4 tsp salt
- 1/2 tsp toasted sesame oil
Soak the glass noodles in warm water for 4-5 minutes until they’re completely soft and pliable, then drain thoroughly and cut them into 2-inch pieces.
While the noodles soak, mince the garlic finely, julienne the carrot into 2-inch matchsticks, shred the cabbage into thin 1/8-inch strips, and finely chop the coriander stems.
Measure out the fish sauce, oyster sauce, sugar, white pepper, salt, and sesame oil so everything is ready when you start cooking.
Step 2: Cook the Chicken Base with Aromatics
- 2 tbsp vegetable oil
- 3 garlic cloves, finely minced
- 7 oz chicken mince
- 2 tbsp coriander stems, chopped
Heat 2 tablespoons of vegetable oil in a large pan or wok over medium-high heat.
Add the minced garlic and cook for just a few seconds until fragrant—don’t let it burn.
Immediately add the chicken mince and coriander stems, breaking up the meat as it cooks for 1-2 minutes until the chicken is no longer pink.
I like to use a lean grind here because it cooks faster and won’t leave excess oil in the filling.
Step 3: Build the Filling with Vegetables and Seasonings
- cooked chicken mixture from Step 2
- 10.5 oz cabbage, shredded
- 5.3 oz carrot, julienned
- softened glass noodles from Step 1
- 1.5 tbsp fish sauce
- 1 tbsp oyster sauce
- 2 tsp sugar
- 1/2 tsp ground white pepper
- 1/4 tsp salt
- 1/2 tsp toasted sesame oil
Add the shredded cabbage and julienned carrot to the cooked chicken, stirring constantly for about 1 minute to soften the vegetables slightly.
Pour in the cooked noodles from Step 1, followed by the fish sauce, oyster sauce, sugar, white pepper, and salt.
Toss everything together and cook for 2-3 minutes, stirring frequently, until the vegetables are tender but still have a slight crunch and the flavors meld together.
Finish with the sesame oil for an authentic Thai aroma.
Step 4: Cool and Drain the Filling
- cooked filling mixture from Step 3
Spread the cooked filling on a large tray or plate and let it cool to room temperature, which will take about 10-15 minutes.
This cooling step is important because it stops the cooking process and helps the filling firm up, making it easier to roll.
As it cools, any excess liquid will drain away—you can blot it with paper towels if needed to prevent soggy rolls.
Step 5: Assemble the Spring Rolls
- 15 sheets spring roll paper
- cooled filling from Step 4
- 1 tbsp flour mixed with water
While the filling cools, prepare the flour-water paste by mixing 1 tablespoon of flour with just enough water to create a thick, paste-like consistency.
Lay a spring roll sheet on a clean, dry surface with one corner pointing toward you.
Place 2-3 tablespoons of the cooled filling in a tight log about 2 inches from the bottom edge, leaving about 1 inch of space on each side.
Fold the bottom corner up and over the filling, fold in the left and right corners, then roll tightly away from you.
When you reach the top corner, lightly brush it with the flour paste, then roll to seal.
I find that not overfilling the rolls is key—this helps them seal properly and fry evenly.
Step 6: Fry or Bake the Spring Rolls
- assembled spring rolls from Step 5
- Vegetable oil for frying
For deep frying: Heat vegetable oil in a deep pot to 350°F, then carefully lower the rolls in batches (don’t overcrowd), and fry for 5-6 minutes until they’re golden brown and crispy, turning occasionally for even cooking.
For baking: Lightly brush the assembled rolls with oil, place them on a parchment-lined baking sheet, and bake at 400°F for 18-20 minutes, turning halfway through for even browning.
Either method will give you a delicious result—frying gives you more crunch while baking is a lighter option.
Step 7: Serve the Rolls
- cooked spring rolls from Step 6
Transfer the hot spring rolls to a serving platter lined with paper towels to drain any excess oil.
Serve immediately while they’re still warm and crispy, with your favorite dipping sauce such as sweet chili sauce, peanut sauce, or a simple fish sauce-lime dipping sauce on the side.
Simple Thai Chicken Rolls
Ingredients
For the filling
- 7 oz chicken mince (leaner grind preferred)
- 1.75 oz glass noodles (soaked in warm water until soft)
- 10.5 oz cabbage (shredded into thin 1/8-inch strips)
- 5.3 oz carrot (julienned into 2-inch long matchsticks)
- 2 tbsp coriander stems
- 3 garlic cloves (finely minced)
- 2 tbsp vegetable oil
- 1.5 tbsp fish sauce (Red Boat preferred)
- 1 tbsp oyster sauce
- 2 tsp sugar
- 1/2 tsp ground white pepper
- 1/4 tsp salt
- 1/2 tsp toasted sesame oil
For assembly
- 15 sheets spring roll paper
- 1 tbsp flour (mixed with water to create a thick paste for sealing)
For frying
- Vegetable oil (high smoke point, for deep frying)
Instructions
- Soak the glass noodles in warm water for 4-5 minutes until they're completely soft and pliable, then drain thoroughly and cut them into 2-inch pieces. While the noodles soak, mince the garlic finely, julienne the carrot into 2-inch matchsticks, shred the cabbage into thin 1/8-inch strips, and finely chop the coriander stems. Measure out the fish sauce, oyster sauce, sugar, white pepper, salt, and sesame oil so everything is ready when you start cooking.
- Heat 2 tablespoons of vegetable oil in a large pan or wok over medium-high heat. Add the minced garlic and cook for just a few seconds until fragrant—don't let it burn. Immediately add the chicken mince and coriander stems, breaking up the meat as it cooks for 1-2 minutes until the chicken is no longer pink. I like to use a lean grind here because it cooks faster and won't leave excess oil in the filling.
- Add the shredded cabbage and julienned carrot to the cooked chicken, stirring constantly for about 1 minute to soften the vegetables slightly. Pour in the cooked noodles from Step 1, followed by the fish sauce, oyster sauce, sugar, white pepper, and salt. Toss everything together and cook for 2-3 minutes, stirring frequently, until the vegetables are tender but still have a slight crunch and the flavors meld together. Finish with the sesame oil for an authentic Thai aroma.
- Spread the cooked filling on a large tray or plate and let it cool to room temperature, which will take about 10-15 minutes. This cooling step is important because it stops the cooking process and helps the filling firm up, making it easier to roll. As it cools, any excess liquid will drain away—you can blot it with paper towels if needed to prevent soggy rolls.
- While the filling cools, prepare the flour-water paste by mixing 1 tablespoon of flour with just enough water to create a thick, paste-like consistency. Lay a spring roll sheet on a clean, dry surface with one corner pointing toward you. Place 2-3 tablespoons of the cooled filling in a tight log about 2 inches from the bottom edge, leaving about 1 inch of space on each side. Fold the bottom corner up and over the filling, fold in the left and right corners, then roll tightly away from you. When you reach the top corner, lightly brush it with the flour paste, then roll to seal. I find that not overfilling the rolls is key—this helps them seal properly and fry evenly.
- For deep frying: Heat vegetable oil in a deep pot to 350°F, then carefully lower the rolls in batches (don't overcrowd), and fry for 5-6 minutes until they're golden brown and crispy, turning occasionally for even cooking. For baking: Lightly brush the assembled rolls with oil, place them on a parchment-lined baking sheet, and bake at 400°F for 18-20 minutes, turning halfway through for even browning. Either method will give you a delicious result—frying gives you more crunch while baking is a lighter option.
- Transfer the hot spring rolls to a serving platter lined with paper towels to drain any excess oil. Serve immediately while they're still warm and crispy, with your favorite dipping sauce such as sweet chili sauce, peanut sauce, or a simple fish sauce-lime dipping sauce on the side.







