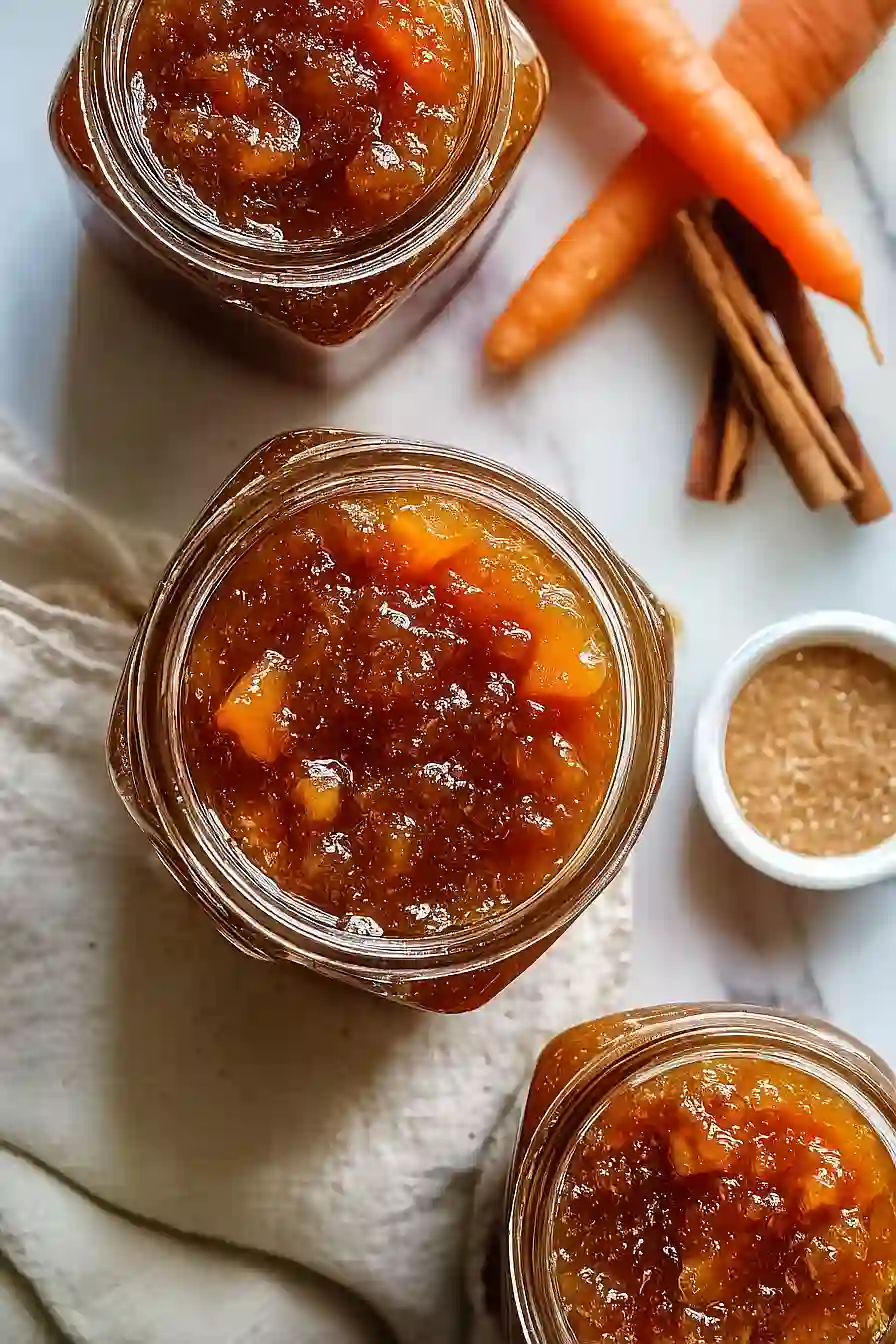
I never thought I’d turn my favorite cake into something I could spread on toast, but here we are. Carrot cake jam came about one spring when I had way too many carrots from our CSA box and a craving for those warm spices that make carrot cake so good.
The idea sounds a little weird at first, I’ll admit. But think about it—you’ve got sweet pineapple, tender carrots, and all those cozy spices like cinnamon and nutmeg working together. It’s basically carrot cake in a jar, minus the cream cheese frosting (though nobody’s stopping you from spreading this on a cream cheese bagel).
What I love most is that it tastes like dessert but works for breakfast. My kids eat it on their morning toast without complaining, which is a win in my book.
Why You’ll Love This Carrot Cake Jam
- Unique twist on a classic dessert – This jam captures all the warm spices and flavors of carrot cake in a spreadable form that you can enjoy on toast, biscuits, or even swirled into yogurt.
- Ready in about an hour – You can whip up multiple jars of this sweet treat in less time than it takes to bake an actual carrot cake.
- Makes a thoughtful homemade gift – Jar up a batch and you’ve got a special present that friends and family will actually be excited to receive, especially during the holidays.
- No frosting required – You get all the cozy carrot cake taste without the hassle of making cream cheese frosting or dealing with layer cakes.
What Kind of Carrots Should I Use?
Fresh carrots are definitely the way to go for this jam – they’ll give you the best flavor and texture. You can use regular orange carrots from the grocery store, or if you’re feeling adventurous, try rainbow carrots for a fun twist (though they’ll all cook down to a similar color anyway). Make sure to peel and finely grate or shred your carrots so they break down properly during cooking. If your carrots are a bit older and seem dry, they’ll still work fine since they’ll be cooking in all that pineapple juice and sugar.
Options for Substitutions
This jam recipe has some room for tweaking, though a few ingredients are pretty important to keep:
- Pears: If you don’t have pears, you can use apples instead. They’ll give you a similar texture and sweetness. Just peel and dice them the same way you would the pears.
- Crushed pineapple: Fresh pineapple works great if you want to go that route. Just pulse it in a food processor until it’s crushed, and measure out the same amount. Make sure to include any juice.
- Spices: Feel free to adjust the spice blend to your taste. You could add a pinch of ginger or allspice, or dial back the cloves if you find them too strong.
- Lemon juice: Lime juice can work in place of lemon juice if that’s what you have on hand. The acidity is what matters here for proper setting.
- Fruit pectin: Don’t substitute the pectin – it’s essential for getting your jam to set properly. Make sure you’re using the type called for in the recipe, as different pectins require different sugar amounts.
- Sugar: The sugar amount is important for proper jam setting, so avoid reducing it. If you want a less sweet version, look for low-sugar pectin specifically designed for that purpose and follow its instructions.
Watch Out for These Mistakes While Cooking
The biggest mistake when making jam is not bringing the mixture to a full rolling boil after adding the sugar – if it’s just simmering, the pectin won’t activate properly and your jam will stay runny instead of setting up nicely.
Many people skip the foam-skimming step, but those bubbles can create air pockets in your jars and affect the seal, so take a minute to skim them off with a spoon before filling your jars.
Another common error is not leaving that 1/4 inch headspace at the top of each jar, which is necessary for proper sealing during the water bath process – too much or too little space can prevent the lids from sealing correctly.
Finally, resist the urge to check if your jam has set right away, as it needs at least 24 hours to fully gel after cooling, and moving the jars around too much can interfere with the setting process.
What to Serve With Carrot Cake Jam?
This jam is perfect spread on warm buttermilk biscuits or English muffins for breakfast, and it also makes a great topping for pancakes or waffles. I love using it as a filling for thumbprint cookies or swirled into plain yogurt with some granola for a quick snack. It’s also really good on cream cheese bagels or stirred into oatmeal to give your morning routine a little something special. Since the flavors are so similar to actual carrot cake, try spreading it on pound cake or angel food cake for an easy dessert that feels fancy without any extra work.
Storage Instructions
Store: Once your carrot cake jam has cooled and sealed properly, store the unopened jars in a cool, dark place like your pantry for up to a year. After opening a jar, keep it in the fridge and use it within 3 weeks for the best flavor and freshness.
Can: If you’re canning this jam, make sure to process the jars in a boiling water bath for about 10 minutes to ensure they seal properly. You’ll hear that satisfying pop as they cool, which means they’re good to go for long-term storage.
Freeze: Not into canning? No problem! This jam freezes really well in freezer-safe containers or jars, leaving about half an inch of headspace for expansion. It’ll keep in the freezer for up to a year, and you can thaw it in the fridge overnight whenever you need some.
| Preparation Time | 25-35 minutes |
| Cooking Time | 20-30 minutes |
| Total Time | 45-65 minutes |
| Level of Difficulty | Medium |
| Servings | 8 cups of jam |
Estimated Nutrition
Estimated nutrition for the whole recipe (without optional ingredients):
- Calories: 3200-3400
- Protein: 6-8 g
- Fat: 0-2 g
- Carbohydrates: 820-850 g
Ingredients
- 22 oz crushed pineapple (I prefer Dole for consistent sweetness and texture)
- 1.5 cups carrots (finely grated to ensure they soften during the boil)
- 1.5 cups pears (peeled, cored, and finely chopped into 1/4-inch pieces)
- 3 tbsp lemon juice
- 1 tsp cinnamon
- 0.25 tsp cloves
- 0.25 tsp nutmeg (freshly grated provides a much deeper aroma)
- 0.5 tsp ground ginger
- 1.75 oz fruit pectin (I always use Sure-Jell for a reliable set)
- 6 cups sugar
Step 1: Prepare Ingredients and Sterilize Equipment
- Jars and lids for sterilizing
- 1.5 cups carrots
- 1.5 cups pears
- 3 tbsp lemon juice
- 1 tsp cinnamon
- 0.25 tsp cloves
- 0.25 tsp nutmeg
- 0.5 tsp ground ginger
While you’re getting organized, place your jars and lids in a large pot of hot water to sterilize—they need to be ready when your jam is done.
Meanwhile, prepare your mise en place: finely grate the carrots (this ensures they soften properly during boiling), peel and finely chop the pears into roughly 1/4-inch pieces, and measure out the lemon juice.
Measure all your spices into a small bowl so they’re ready to add at once.
I like to do all my spice prep together because it prevents you from forgetting one and having to stop mid-cooking to hunt for it.
Step 2: Build the Jam Base with Fruit and Spices
- 22 oz crushed pineapple
- grated carrots from Step 1
- chopped pears from Step 1
- 3 tbsp lemon juice
- spice mixture from Step 1
In a large, heavy-bottomed pot (at least 8-quart capacity), combine the crushed pineapple with its juice, grated carrots, chopped pears, lemon juice, and all the measured spices.
Stir well to distribute the spices evenly throughout the fruit.
Bring the mixture to a boil over medium-high heat, then reduce to medium-low and simmer covered for 15 minutes.
This allows the carrots to fully soften and the flavors to meld together.
I find that freshly grated nutmeg makes a noticeable difference in the final aroma—it’s worth taking the extra 30 seconds to grate it fresh.
Step 3: Incorporate Pectin and Prepare for Sugar
- 1.75 oz fruit pectin
- fruit mixture from Step 2
Remove the pot from heat and stir in the fruit pectin, making sure it’s fully dissolved with no lumps remaining.
Return the pot to medium-high heat and bring the mixture to a full rolling boil—one that doesn’t subside when you stir it.
This vigorous boiling is essential for the pectin to activate and set the jam properly.
Stir constantly to prevent sticking on the bottom.
Step 4: Add Sugar and Reach Setting Point
- 6 cups sugar
- boiling fruit and pectin mixture from Step 3
Once at a full rolling boil, quickly stir in all 6 cups of sugar, stirring until completely dissolved.
Return to a full rolling boil and maintain it for exactly 1 minute—this is the critical time for the sugar and pectin to work together and create the proper gel.
Start your timer and don’t skip this step; it’s what transforms your fruit mixture into jam with the right consistency.
Step 5: Finish and Fill Jars
- jam from Step 4
- sterilized jars and lids from Step 1
Remove the pot from heat and use a spoon or skimmer to remove any foam that has risen to the surface—this helps create a clearer, more beautiful jam.
Working quickly while the jam is still hot, carefully pour it into your sterilized jars (from Step 1), leaving exactly 1/4 inch of headspace from the rim.
Wipe the rims clean with a damp cloth to remove any jam residue, then immediately place the lids on top and screw on the bands until they’re snug but not overly tight.
Step 6: Process in Water Bath Canner
- filled jars from Step 5
- water for canning
Place the filled jars into a large water bath canner (or pot with a rack on the bottom) and add enough water to cover the tops of the jars by 1 to 2 inches.
Bring the water to a boil and maintain a rolling boil for 10 minutes—this process seals the jars and ensures the jam is shelf-stable.
Set a timer and don’t interrupt this step.
Step 7: Cool and Set
- processed jars from Step 6
Carefully remove the jars from the canner using a jar lifter and place them upright on a clean towel to cool at room temperature.
You’ll likely hear a reassuring ‘pop’ sound as the lids seal—this is a good sign!
Allow the jam to cool completely (at least 12 hours) before moving or storing.
The jam will continue to thicken as it cools, so don’t worry if it seems a bit loose while still warm.
Spiced Carrot Cake Jam
Ingredients
- 22 oz crushed pineapple (I prefer Dole for consistent sweetness and texture)
- 1.5 cups carrots (finely grated to ensure they soften during the boil)
- 1.5 cups pears (peeled, cored, and finely chopped into 1/4-inch pieces)
- 3 tbsp lemon juice
- 1 tsp cinnamon
- 0.25 tsp cloves
- 0.25 tsp nutmeg (freshly grated provides a much deeper aroma)
- 0.5 tsp ground ginger
- 1.75 oz fruit pectin (I always use Sure-Jell for a reliable set)
- 6 cups sugar
Instructions
- While you're getting organized, place your jars and lids in a large pot of hot water to sterilize—they need to be ready when your jam is done. Meanwhile, prepare your mise en place: finely grate the carrots (this ensures they soften properly during boiling), peel and finely chop the pears into roughly 1/4-inch pieces, and measure out the lemon juice. Measure all your spices into a small bowl so they're ready to add at once. I like to do all my spice prep together because it prevents you from forgetting one and having to stop mid-cooking to hunt for it.
- In a large, heavy-bottomed pot (at least 8-quart capacity), combine the crushed pineapple with its juice, grated carrots, chopped pears, lemon juice, and all the measured spices. Stir well to distribute the spices evenly throughout the fruit. Bring the mixture to a boil over medium-high heat, then reduce to medium-low and simmer covered for 15 minutes. This allows the carrots to fully soften and the flavors to meld together. I find that freshly grated nutmeg makes a noticeable difference in the final aroma—it's worth taking the extra 30 seconds to grate it fresh.
- Remove the pot from heat and stir in the fruit pectin, making sure it's fully dissolved with no lumps remaining. Return the pot to medium-high heat and bring the mixture to a full rolling boil—one that doesn't subside when you stir it. This vigorous boiling is essential for the pectin to activate and set the jam properly. Stir constantly to prevent sticking on the bottom.
- Once at a full rolling boil, quickly stir in all 6 cups of sugar, stirring until completely dissolved. Return to a full rolling boil and maintain it for exactly 1 minute—this is the critical time for the sugar and pectin to work together and create the proper gel. Start your timer and don't skip this step; it's what transforms your fruit mixture into jam with the right consistency.
- Remove the pot from heat and use a spoon or skimmer to remove any foam that has risen to the surface—this helps create a clearer, more beautiful jam. Working quickly while the jam is still hot, carefully pour it into your sterilized jars (from Step 1), leaving exactly 1/4 inch of headspace from the rim. Wipe the rims clean with a damp cloth to remove any jam residue, then immediately place the lids on top and screw on the bands until they're snug but not overly tight.
- Place the filled jars into a large water bath canner (or pot with a rack on the bottom) and add enough water to cover the tops of the jars by 1 to 2 inches. Bring the water to a boil and maintain a rolling boil for 10 minutes—this process seals the jars and ensures the jam is shelf-stable. Set a timer and don't interrupt this step.
- Carefully remove the jars from the canner using a jar lifter and place them upright on a clean towel to cool at room temperature. You'll likely hear a reassuring 'pop' sound as the lids seal—this is a good sign! Allow the jam to cool completely (at least 12 hours) before moving or storing. The jam will continue to thicken as it cools, so don't worry if it seems a bit loose while still warm.


