I’d never heard of putting cinnamon in chili until I moved to the Midwest for a year after college. My first taste of Cincinnati chili was at a local diner, served over spaghetti and piled high with cheese and onions. I thought someone was playing a joke on me.
But that first bite? It changed everything. The warm spices—cinnamon, allspice, and even a touch of cocoa powder—create this sweet and savory combination that’s nothing like Texas chili or any other chili I grew up with. It’s thinner, more like a meat sauce, which is exactly why it works so well over pasta. Now I make it at home whenever my family wants something different for dinner, and it’s become one of those recipes we go back to again and again.

Why You’ll Love This Cincinnati Chili
- Unique flavor profile – The combination of cinnamon, allspice, and cocoa powder creates a sweet and savory taste that sets this chili apart from traditional versions.
- Simple ingredients – You probably already have most of these spices and pantry staples in your kitchen, making it easy to whip up without a special grocery run.
- Customizable toppings – Serve it over spaghetti and let everyone pile on their favorite toppings like cheese, onions, and beans for a fun, interactive dinner.
- Great for meal prep – This recipe makes a big batch that tastes even better the next day, so you can enjoy leftovers throughout the week or freeze portions for later.
What Kind of Ground Beef Should I Use?
For Cincinnati chili, you’ll want to use ground beef with a fat content between 80/20 and 85/15 – this gives you enough fat for flavor without making the chili too greasy. Leaner beef like 90/10 can work too, but you might end up with a slightly drier chili that lacks some richness. The cool thing about this recipe is that the beef gets broken down into really fine pieces as it simmers, almost like a meat sauce, so you don’t need to worry about buying the most expensive ground beef at the store. Just make sure to break it up well while it’s cooking so you get that signature Cincinnati chili texture.
Options for Substitutions
This Cincinnati chili recipe is pretty forgiving when it comes to swaps:
- Ground beef: You can use ground turkey or ground chicken for a leaner option. Just note that the flavor will be a bit milder, so you might want to add a touch more spice.
- Tomato sauce: If you’re out of tomato sauce, use tomato paste (about 6 ounces) mixed with an extra cup of water. You can also use crushed tomatoes in a pinch.
- Cider vinegar: White vinegar or red wine vinegar work just fine here. The amount of vinegar is small, so any type will give you that slight tang.
- Allspice: Don’t have allspice? Mix equal parts cinnamon, nutmeg, and cloves to create a similar warm spice profile.
- Cocoa powder: While cocoa adds a nice depth, you can leave it out if you don’t have any. The chili will still taste great, just slightly less complex.
- Spaghetti: Any long pasta works – linguine, fettuccine, or even angel hair. Some folks even use elbow macaroni if that’s what they have on hand.
- Cheddar cheese: Mild cheddar is traditional, but you can use Colby, Monterey Jack, or a Mexican cheese blend if that’s what you prefer.
Watch Out for These Mistakes While Cooking
The biggest mistake when making Cincinnati chili is browning the ground beef before adding the water, which creates chunky meat instead of the signature fine, sauce-like texture – you actually want to add the raw beef directly to the cold water and break it up with a spoon as it cooks.
Skipping the full 3-hour simmer is another common error, as this long, slow cooking time is what allows the spices (especially that cinnamon and cocoa) to meld together and develop the unique flavor profile.
Don’t forget to remove those bay leaves before serving, and if your chili seems too thick during cooking, add a splash of water to keep it at a pourable consistency that coats the spaghetti nicely.
Finally, resist the urge to crank up the heat to speed things along – keeping it at a gentle simmer prevents the spices from becoming bitter and lets everything come together properly.
What to Serve With Cincinnati Chili?
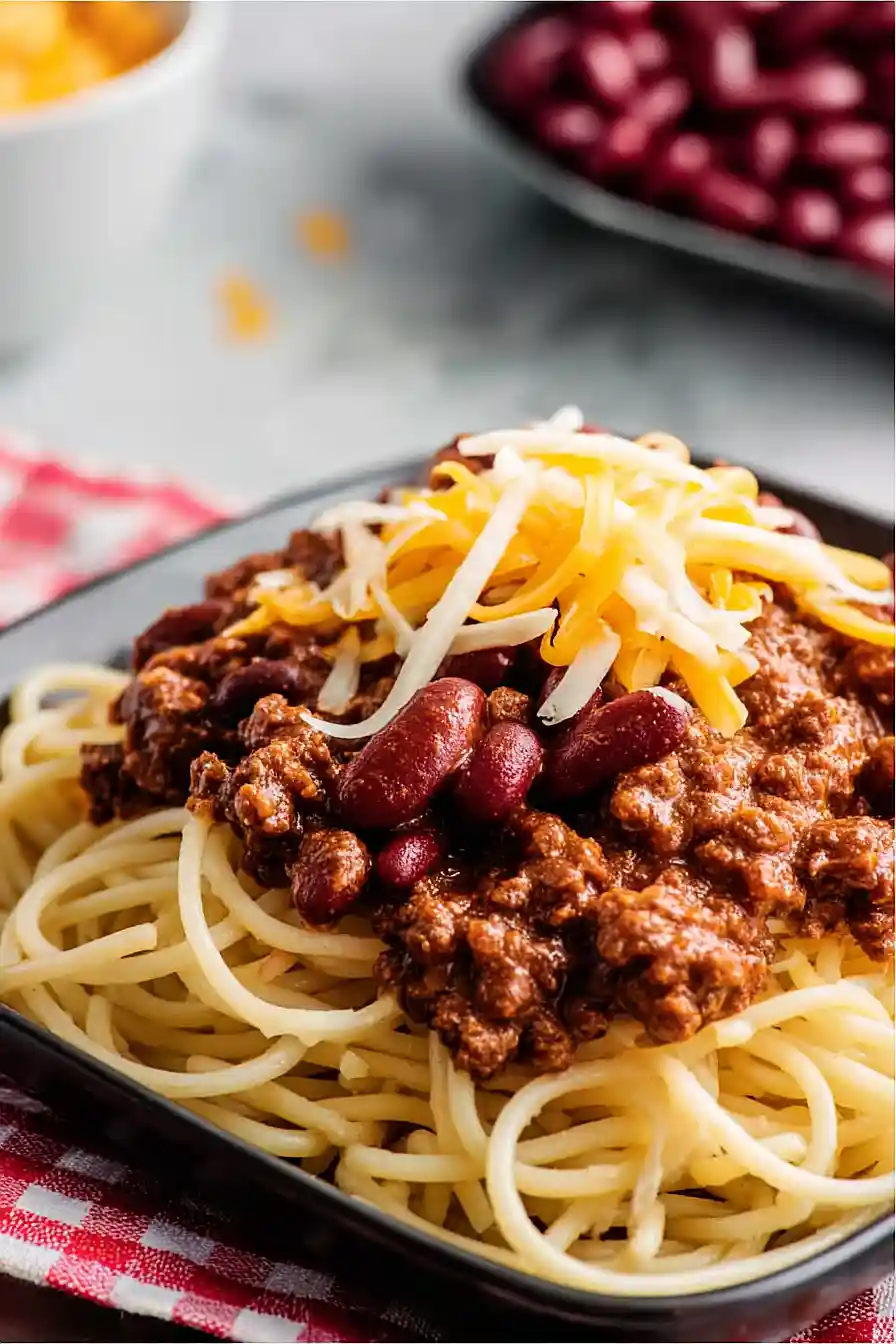
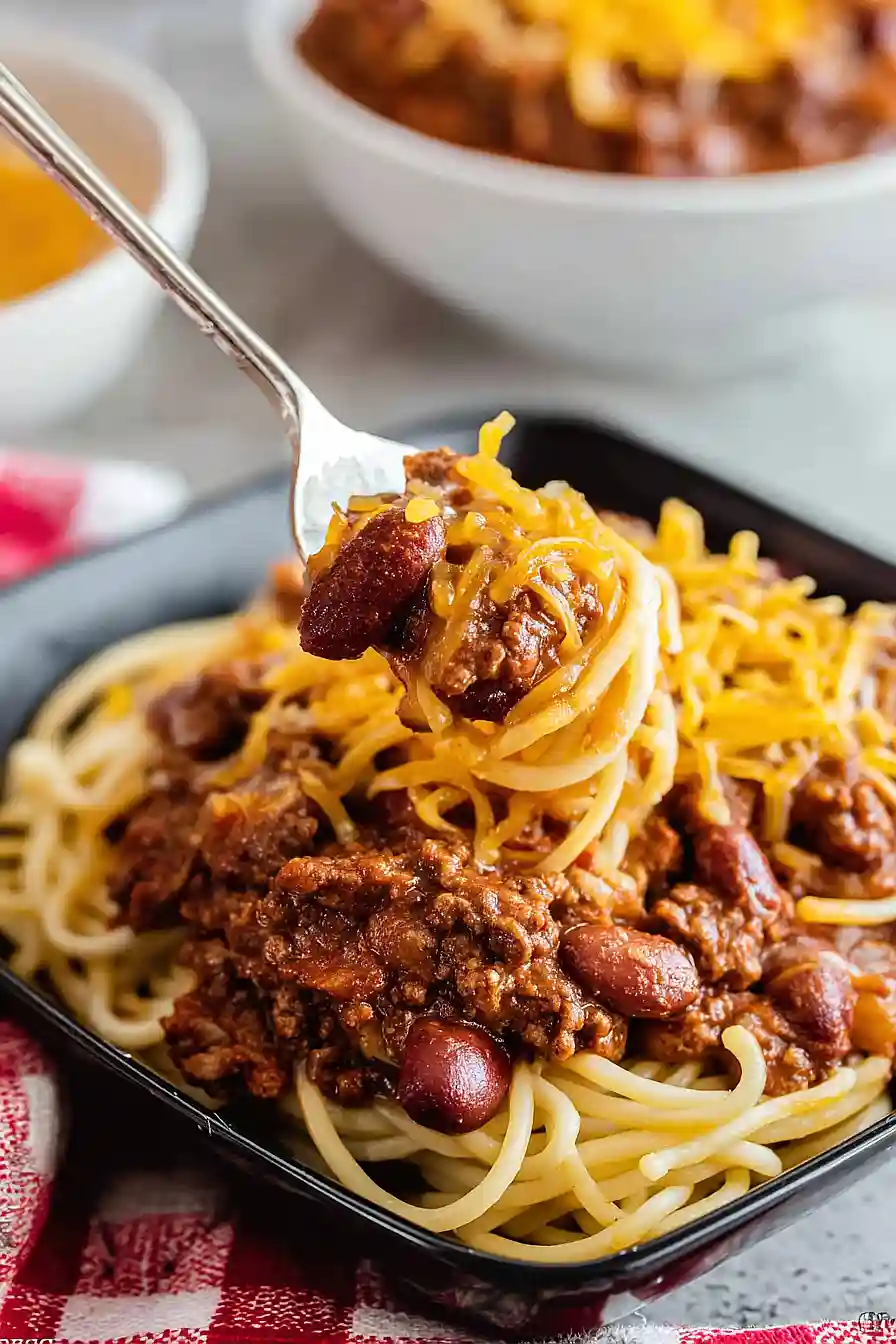
Cincinnati chili is traditionally served over spaghetti and topped with shredded cheddar cheese, diced white onions, and kidney beans – locals call this a “five-way” and it’s the real deal. If you want to keep things simple, you can do a “three-way” with just spaghetti, chili, and cheese, or add oyster crackers on the side for some crunch. A lot of people also love serving Cincinnati chili on hot dogs (called coneys) with mustard, onions, and cheese piled on top. For a lighter side, a simple coleslaw or a crisp green salad helps balance out the rich, spiced chili.
Storage Instructions
Store: Cincinnati chili actually tastes even better the next day once all those spices have had time to meld together. Keep it in an airtight container in the fridge for up to 4 days. I like to store the chili separately from the spaghetti and toppings so everything stays fresh and you can mix and match portions as needed.
Freeze: This chili is perfect for freezing! Let it cool completely, then portion it into freezer bags or containers and freeze for up to 3 months. I usually freeze it in smaller portions so I can thaw just what I need for a quick weeknight dinner.
Reheat: Warm the chili on the stovetop over medium-low heat, stirring occasionally until heated through. You can also microwave individual portions for 2-3 minutes, stirring halfway through. If it seems too thick after storing, just add a splash of water to loosen it up while reheating.
| Preparation Time | 10-15 minutes |
| Cooking Time | 180-190 minutes |
| Total Time | 190-205 minutes |
| Level of Difficulty | Easy |
| Servings | 8 servings of chili |
Estimated Nutrition
Estimated nutrition for the whole recipe (without optional ingredients):
- Calories: 3000-3400
- Protein: 185-210 g
- Fat: 180-210 g
- Carbohydrates: 145-170 g
Ingredients
For the chilli:
- 1 tbsp chili powder (freshly ground preferred for more flavor)
- 1.5 tsp ground allspice
- 3 cups water
- 2 lb ground beef (85/15 blend works best)
- 2 tsp ground cumin
- 1 tsp Worcestershire sauce
- 15 oz tomato sauce (I use Hunt’s)
- 1.5 tsp salt
- 1 medium yellow onion (diced into 1/4-inch pieces)
- 0.5 tsp crushed red pepper
- 1.5 tsp cider vinegar
- 0.25 tsp garlic powder
- 1 tsp ground cinnamon (gives the signature Cincinnati flavor)
- 2 bay leaves (remove before serving)
- 0.5 tsp cocoa powder (adds depth and richness)
For serving:
- chili beans (optional but traditional, adds heartiness)
- shredded cheddar cheese (use King Arthur extra sharp)
- cooked spaghetti (about 1 lb uncooked)
- white onion (finely diced for garnish)
Step 1: Prepare Mise en Place and Build the Spice Base
- 1 tbsp chili powder
- 1.5 tsp ground allspice
- 2 tsp ground cumin
- 1 tsp ground cinnamon
- 0.25 tsp garlic powder
- 0.5 tsp crushed red pepper
- 0.5 tsp cocoa powder
- 1 medium yellow onion, diced
- white onion for garnish, finely diced
Measure out all dry spices into a small bowl: chili powder, allspice, cumin, cinnamon, garlic powder, crushed red pepper, and cocoa powder.
Whisk them together so they’re evenly distributed—this ensures the spices blend smoothly into the meat rather than clumping.
Dice the medium yellow onion into 1/4-inch pieces and set aside.
Finely dice the white onion for garnish and reserve separately.
This prep work allows you to focus entirely on building the chili without interruption once cooking begins.
Step 2: Brown the Ground Beef and Build the Base
- 2 lb ground beef
- 3 cups water
- 1 medium yellow onion, diced
Heat a large heavy-bottomed pot over medium-high heat.
Add the ground beef (don’t break it up yet) and let it sit undisturbed for 2-3 minutes to develop a brown crust.
Stir and break the meat into small pieces, browning it thoroughly for another 4-5 minutes until most of the pink is gone.
This browning develops deep savory flavors that are essential to Cincinnati chili.
Pour in the water and use a spoon to scrape up any browned bits stuck to the bottom of the pot—these are pure flavor.
Add the diced yellow onion and stir well.
Step 3: Add Seasonings and Aromatics
- spice mixture from Step 1
- 15 oz tomato sauce
- 1 tsp Worcestershire sauce
- 1.5 tsp cider vinegar
- 1.5 tsp salt
- 2 bay leaves
Pour the spice mixture from Step 1 into the pot with the beef and water, stirring constantly for about 1 minute to bloom the spices in the hot liquid—this releases their essential oils and distributes them evenly throughout the chili.
Add the tomato sauce, Worcestershire sauce, cider vinegar, salt, and bay leaves.
Stir everything together thoroughly to combine.
I prefer to add the acid and Worcestershire at this stage because they help the spices integrate better and balance the richness of the meat.
Step 4: Simmer and Develop Flavor
- chili from Step 3
- chili beans
Bring the pot to a gentle simmer over medium heat, then immediately reduce to low heat.
The chili should barely bubble—just a few gentle bubbles breaking the surface every few seconds.
Simmer uncovered for 3 hours, stirring occasionally every 30 minutes or so.
The long, slow cooking allows the spices to fully meld, the flavors to deepen, and the chili to develop that signature Cincinnati complexity.
If using chili beans (traditional for heartiness), add them during the last 15 minutes of cooking so they warm through without falling apart.
Remove the bay leaves before serving.
Step 5: Cook Pasta and Assemble
- cooked spaghetti
- chili from Step 4
- shredded cheddar cheese
- white onion, finely diced
About 20 minutes before the chili finishes, bring a large pot of salted water to a boil and cook the spaghetti according to package directions until al dente.
Drain well and divide among serving bowls.
Ladle the finished chili over the pasta.
I like to add the cheese and garnish immediately so it melts slightly into the hot chili.
Top each bowl with shredded cheddar cheese and finely diced white onion.
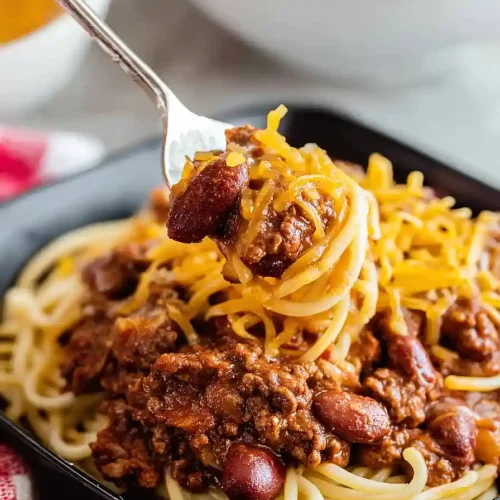
This is the classic Cincinnati three-way presentation (pasta, chili, cheese), and you can add more toppings like beans or more onion if desired.
Spiced Cincinnati Chili
Ingredients
For the chilli:
- 1 tbsp chili powder (freshly ground preferred for more flavor)
- 1.5 tsp ground allspice
- 3 cups water
- 2 lb ground beef (85/15 blend works best)
- 2 tsp ground cumin
- 1 tsp Worcestershire sauce
- 15 oz tomato sauce (I use Hunt's)
- 1.5 tsp salt
- 1 medium yellow onion (diced into 1/4-inch pieces)
- 0.5 tsp crushed red pepper
- 1.5 tsp cider vinegar
- 0.25 tsp garlic powder
- 1 tsp ground cinnamon (gives the signature Cincinnati flavor)
- 2 bay leaves (remove before serving)
- 0.5 tsp cocoa powder (adds depth and richness)
For serving:
- chili beans (optional but traditional, adds heartiness)
- shredded cheddar cheese (use King Arthur extra sharp)
- cooked spaghetti (about 1 lb uncooked)
- white onion (finely diced for garnish)
Instructions
- Measure out all dry spices into a small bowl: chili powder, allspice, cumin, cinnamon, garlic powder, crushed red pepper, and cocoa powder. Whisk them together so they're evenly distributed—this ensures the spices blend smoothly into the meat rather than clumping. Dice the medium yellow onion into 1/4-inch pieces and set aside. Finely dice the white onion for garnish and reserve separately. This prep work allows you to focus entirely on building the chili without interruption once cooking begins.
- Heat a large heavy-bottomed pot over medium-high heat. Add the ground beef (don't break it up yet) and let it sit undisturbed for 2-3 minutes to develop a brown crust. Stir and break the meat into small pieces, browning it thoroughly for another 4-5 minutes until most of the pink is gone. This browning develops deep savory flavors that are essential to Cincinnati chili. Pour in the water and use a spoon to scrape up any browned bits stuck to the bottom of the pot—these are pure flavor. Add the diced yellow onion and stir well.
- Pour the spice mixture from Step 1 into the pot with the beef and water, stirring constantly for about 1 minute to bloom the spices in the hot liquid—this releases their essential oils and distributes them evenly throughout the chili. Add the tomato sauce, Worcestershire sauce, cider vinegar, salt, and bay leaves. Stir everything together thoroughly to combine. I prefer to add the acid and Worcestershire at this stage because they help the spices integrate better and balance the richness of the meat.
- Bring the pot to a gentle simmer over medium heat, then immediately reduce to low heat. The chili should barely bubble—just a few gentle bubbles breaking the surface every few seconds. Simmer uncovered for 3 hours, stirring occasionally every 30 minutes or so. The long, slow cooking allows the spices to fully meld, the flavors to deepen, and the chili to develop that signature Cincinnati complexity. If using chili beans (traditional for heartiness), add them during the last 15 minutes of cooking so they warm through without falling apart. Remove the bay leaves before serving.
- About 20 minutes before the chili finishes, bring a large pot of salted water to a boil and cook the spaghetti according to package directions until al dente. Drain well and divide among serving bowls. Ladle the finished chili over the pasta. I like to add the cheese and garnish immediately so it melts slightly into the hot chili. Top each bowl with shredded cheddar cheese and finely diced white onion. This is the classic Cincinnati three-way presentation (pasta, chili, cheese), and you can add more toppings like beans or more onion if desired.


