I’ll be honest—I never thought I’d be the kind of person who gets excited about celebrity recipes. Most of them seem like they were made up by someone on their PR team who’s never actually chopped an onion. But then I tried John Legend’s baked mac and cheese.
Here’s the thing about this recipe: it’s not trying to be fancy. It’s just really good mac and cheese that happens to come from a guy who won an EGOT. The first time I made it, my kids asked for seconds before they even finished their firsts. My husband, who usually just nods politely at my cooking experiments, actually said “we’re making this again, right?”
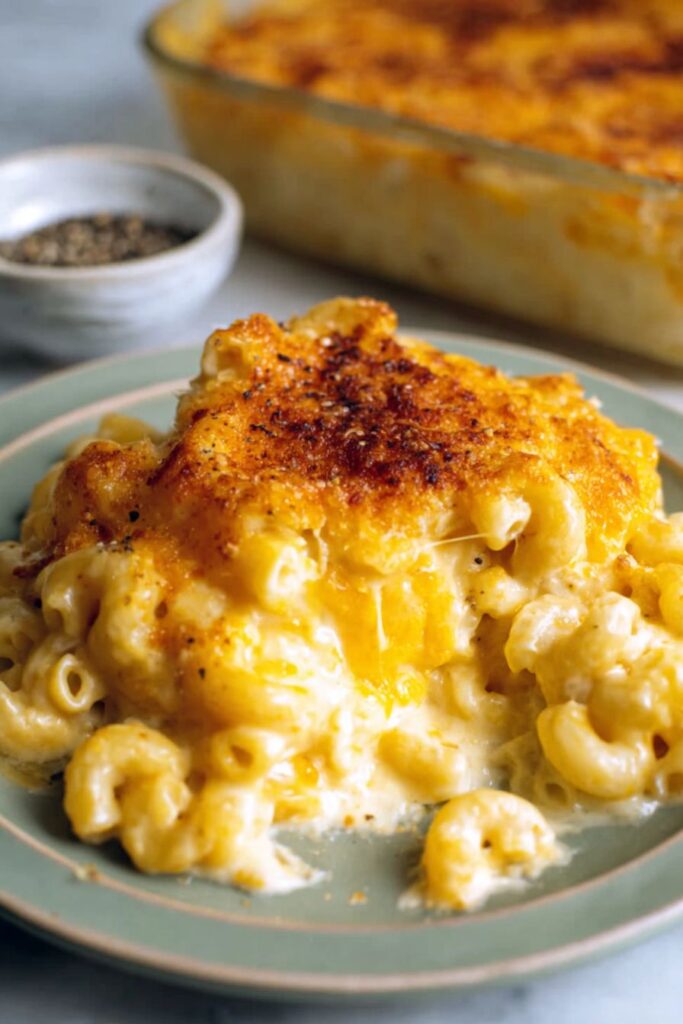
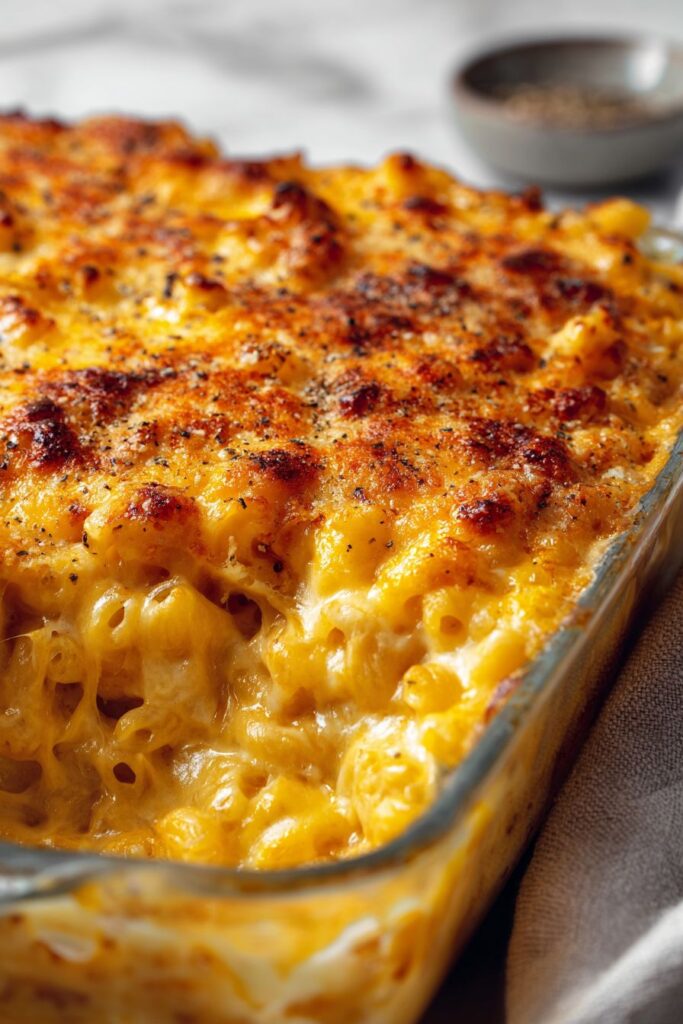
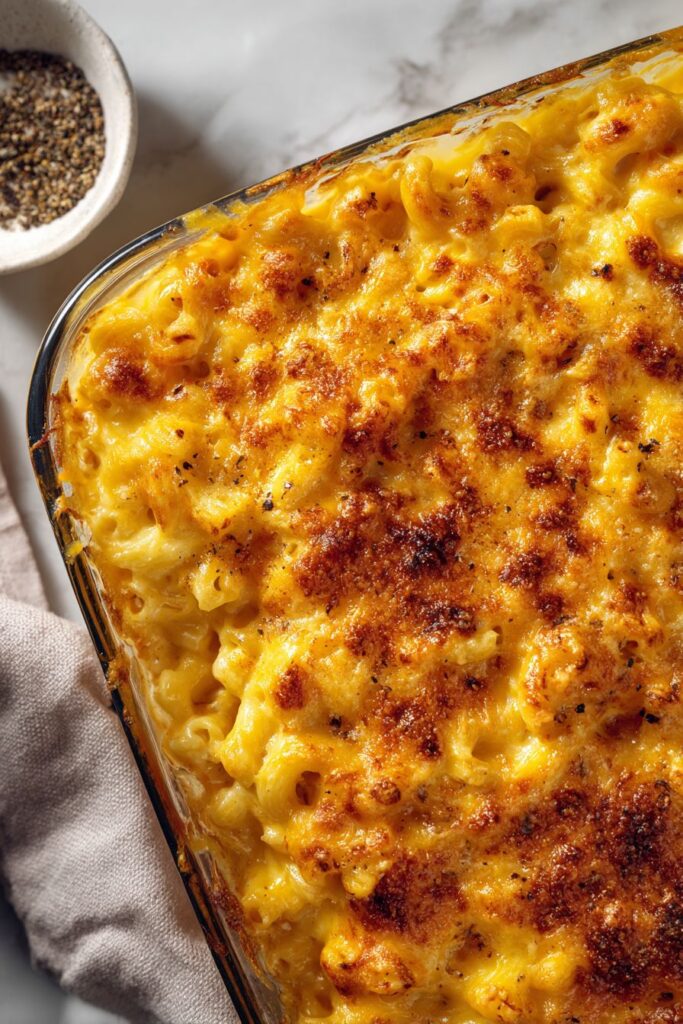
What makes it work is that it’s the kind of mac and cheese that has a crispy top and a creamy inside—you know, the way it should be. No weird ingredients you’ve never heard of, no complicated steps that make you want to just order pizza instead.
Why You’ll Love This Mac and Cheese
- Restaurant-quality results at home – This recipe delivers that creamy, indulgent mac and cheese you’d expect from a fancy restaurant, but you can make it right in your own kitchen.
- Extra cheesy and creamy – With three types of cheese and evaporated milk, every bite is rich and satisfying without being dry or bland.
- Perfect for gatherings – This baked mac and cheese is a guaranteed crowd-pleaser for potlucks, holidays, or Sunday dinners when you want to impress your guests.
- Ready in about an hour – From start to finish, you’ll have this comforting dish on the table in just over an hour, making it doable for weeknight dinners or weekend meals.
What Kind of Cheese Should I Use?
The recipe calls for extra-sharp cheddar and Monterey Jack, which is a classic combo that gives you both bold flavor and great meltability. You can definitely use sharp cheddar instead of extra-sharp if that’s what you have on hand, though the extra-sharp will give you a more pronounced cheesy taste. When it comes to buying your cheese, I highly recommend grating it yourself from a block rather than using pre-shredded cheese from a bag. Pre-shredded cheese is coated with anti-caking agents that can prevent it from melting as smoothly, and you want that creamy, silky texture in your mac and cheese. If you’re feeling adventurous, you could swap out some of the Monterey Jack for another good melting cheese like Gruyere or fontina, but the original combination is tried and true.
Options for Substitutions
This mac and cheese recipe has some room for tweaking based on what you have in your kitchen:
- Evaporated milk: If you don’t have evaporated milk, you can use heavy cream or whole milk instead. The texture will be slightly different but still creamy and delicious.
- Extra-sharp cheddar cheese: Feel free to use sharp or medium cheddar if that’s what you have. You can also try a mix of different cheeses like Gruyère, fontina, or white cheddar for a different flavor profile.
- Monterey Jack cheese: Swap this out for mozzarella, Colby Jack, or even Gouda. Just keep the total amount of cheese the same for that creamy consistency.
- Elbow macaroni: Other short pasta shapes work great too – try cavatappi, shells, or penne. Just cook according to package directions and keep the measurements the same.
- Seasoned salt: Don’t have seasoned salt? Use regular salt and add a pinch of onion powder and a little extra garlic powder to make up for it.
- Skim milk: Any milk you have on hand will work here – whole milk, 2%, or even more evaporated milk if that’s all you’ve got.
Watch Out for These Mistakes While Baking
The biggest mistake people make with baked mac and cheese is overcooking the pasta before it goes in the oven – cook your elbows only until they’re slightly firm (about 2 minutes less than the package directions), since they’ll continue cooking in the oven and you don’t want mushy noodles.
Another common error is not tempering your eggs properly, which can lead to scrambled eggs in your cheese sauce – slowly whisk a ladle of the warm milk mixture into your beaten eggs first before adding them to the pot.
To avoid a dry, grainy casserole, reserve about a cup of your cheese to sprinkle on top during the last 10 minutes of baking rather than mixing it all in at once, and make sure your oven temperature isn’t too high (325°F is ideal).
Finally, resist the urge to dig in right away – letting the casserole rest for 15 minutes after baking allows the sauce to thicken up and makes serving much cleaner.
What to Serve With Baked Mac and Cheese?
Since this mac and cheese is already pretty rich and filling, I like to balance it out with something fresh and crunchy on the side. A simple coleslaw or a crisp green salad with a tangy vinaigrette cuts through all that cheesy goodness perfectly. If you’re going for a full comfort food spread, some BBQ chicken, pulled pork, or even fried chicken makes this feel like a proper cookout meal. You could also keep it simple with some roasted vegetables like broccoli or green beans, which add a nice pop of color and give you a little break from all the cheese.
Storage Instructions
Store: Leftover mac and cheese keeps really well in the fridge. Just cover the baking dish tightly with foil or transfer it to an airtight container, and it’ll stay good for up to 4 days. The cheese sauce might thicken up a bit as it sits, but that’s totally normal.
Freeze: This mac and cheese freezes great for those times when you want comfort food ready to go. Let it cool completely, then wrap the whole dish in plastic wrap and foil, or portion it out into freezer containers. It’ll keep for up to 3 months in the freezer.
Reheat: To bring it back to life, reheat in the oven at 350°F covered with foil until warmed through, about 20-25 minutes from the fridge or 45 minutes from frozen. You can also microwave individual portions, but add a splash of milk and stir halfway through to keep it creamy.
| Preparation Time | 15-20 minutes |
| Cooking Time | 35-45 minutes |
| Total Time | 60-65 minutes |
| Level of Difficulty | Medium |
Estimated Nutrition
Estimated nutrition for the whole recipe (without optional ingredients):
- Calories: 3000-3400
- Protein: 130-150 g
- Fat: 170-190 g
- Carbohydrates: 220-250 g
Ingredients
For the casserole:
- 1/4 cup unsalted butter, plus extra for greasing (I like Kerrygold for richness)
- 3 cups elbow pasta noodles (about 12 oz dried)
- Paprika, for topping (smoked paprika adds extra depth)
- 2 packages (8 oz each) sharp cheddar cheese, shredded (freshly shredded gives creamier results)
- 1 package (8 oz) monterey jack cheese, shredded
For the custard:
- 1/4 tsp garlic powder (freshly ground preferred)
- 2 large eggs (room temperature for smoother custard)
- Coarse salt and black pepper, to taste
- 2 cans (12 oz each) evaporated milk (I use Carnation)
- 1/2 tsp seasoned salt
- 1/3 cup low-fat milk
Step 1: Prepare the Oven and Baking Dish
- 1/4 cup unsalted butter
Preheat your oven to 375°F and generously butter a 9×13-inch baking dish (or similar capacity).
This ensures even browning and prevents sticking.
I like using Kerrygold butter for its rich, slightly sweet flavor that elevates the entire dish.
Step 2: Cook the Pasta Until Just Tender
- 3 cups elbow pasta noodles
- Salt for pasta water
- Small amount of butter from Step 1
Bring a large pot of salted water to a boil and add the elbow pasta.
Cook for one minute less than the package instructions recommend—the pasta will continue cooking slightly in the oven, so you want it just barely tender, not soft.
Drain the pasta and toss it with a small amount of butter to prevent sticking, then set aside.
Step 3: Create the Custard Sauce and Prepare Cheese Blend
- 2 cans evaporated milk
- 1/3 cup low-fat milk
- 2 large eggs
- 1/2 tsp seasoned salt
- 1/4 tsp garlic powder
- Black pepper, to taste
- 2 packages sharp cheddar cheese, shredded
- 1 package monterey jack cheese, shredded
In one bowl, whisk together the evaporated milk, low-fat milk, room temperature eggs, seasoned salt, garlic powder, and black pepper until completely smooth and well combined.
The room temperature eggs are key—they blend more smoothly without lumps.
In a separate bowl, toss together the freshly shredded sharp cheddar and Monterey Jack cheeses, keeping them separate from the custard for now.
Step 4: Layer Pasta, Cheese, and Custard in Baking Dish
- Buttered pasta from Step 2
- Cheese blend from Step 3
- Custard sauce from Step 3
- Paprika, for topping
Spread half of the buttered pasta from Step 2 into the prepared baking dish, then sprinkle half of the cheese blend over it.
Add the remaining pasta, followed by the remaining cheese.
This layering creates pockets of melted cheese throughout rather than all settling to the bottom.
Pour the custard mixture from Step 3 evenly over the entire dish, then sprinkle smoked paprika generously over the top for color and subtle depth.
Step 5: Bake Until Golden and Set
Place the mac and cheese into the preheated 375°F oven and bake for 35-45 minutes, until the top is deeply golden brown and the custard is set but still slightly creamy in the center.
The baking time depends on your oven’s heat distribution, so start checking at 35 minutes.
I find that covering the dish loosely with foil for the first 20 minutes prevents the top from browning too quickly while the interior sets.
Step 6: Rest and Serve
Remove the mac and cheese from the oven and let it rest for 10-15 minutes before serving.
This resting period allows the custard to set up slightly, making it easier to scoop and serve while remaining creamy.
The residual heat will continue to cook and meld the flavors, giving you a perfectly balanced final dish.


Hands down, this is the best macaroni and cheese recipe ever. Thanks for sharing.