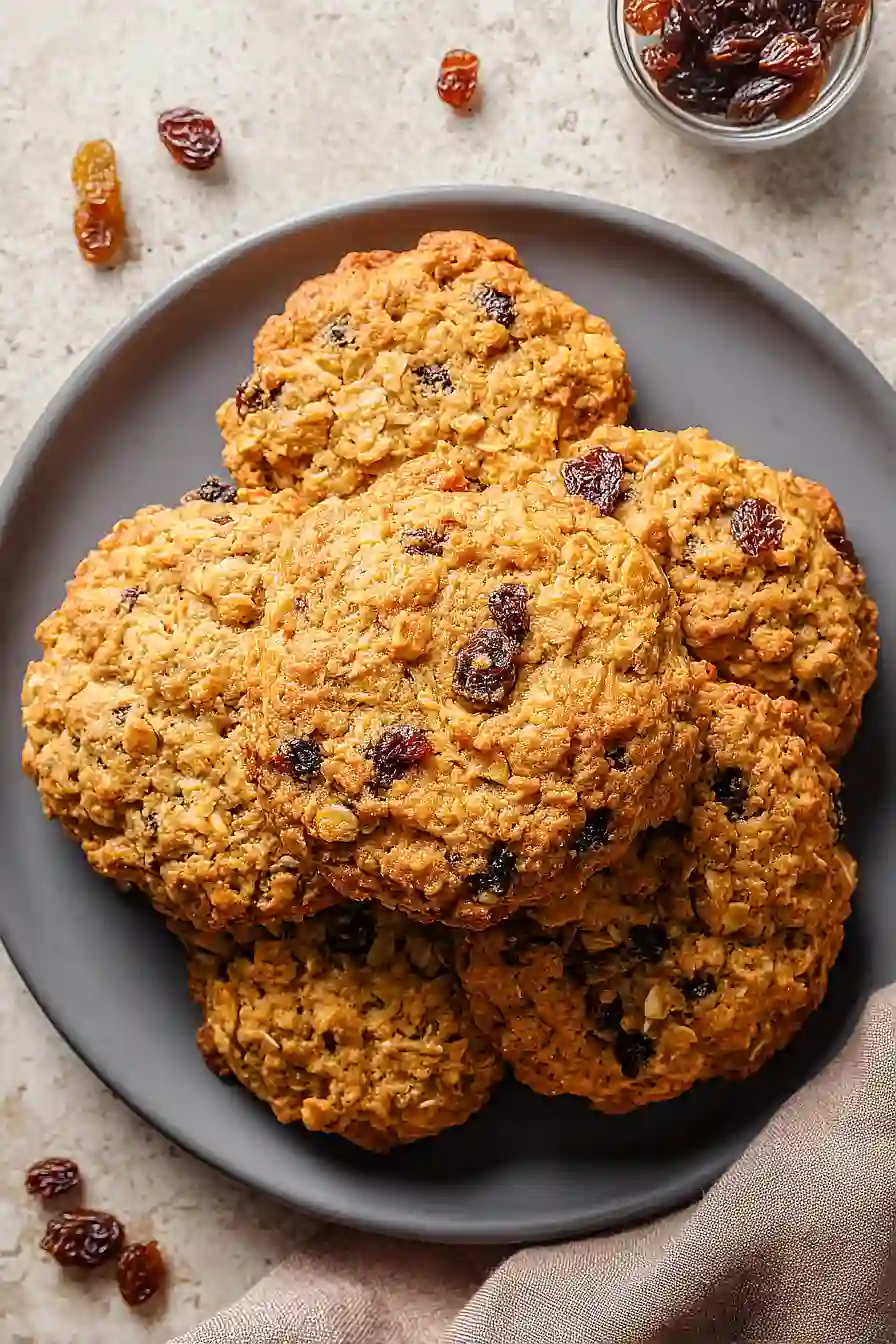
Finding a cookie recipe that satisfies your sweet tooth without all the sugar can feel like an impossible task. After all, most sugar-free cookies end up either too dry, lacking flavor, or tasting artificial, and it’s even harder when you’re trying to keep classic favorites like oatmeal raisin cookies in your rotation.
Luckily, these sugar-free oatmeal raisin cookies check all the boxes: they’re naturally sweetened yet still taste like the real deal, simple to whip up with everyday ingredients, and chewy enough that nobody will guess they’re missing the sugar.
Why You’ll Love These Sugar Free Oatmeal Raisin Cookies
- Sugar-free sweetness – You can enjoy classic oatmeal raisin cookies without the added sugar, making them a better choice for anyone watching their sugar intake or managing diabetes.
- Quick and easy – These cookies come together in under 35 minutes from start to finish, perfect for when you need a sweet treat in a hurry.
- Simple ingredients – Made with pantry staples like oats, flour, and raisins, you probably have most of what you need already on hand.
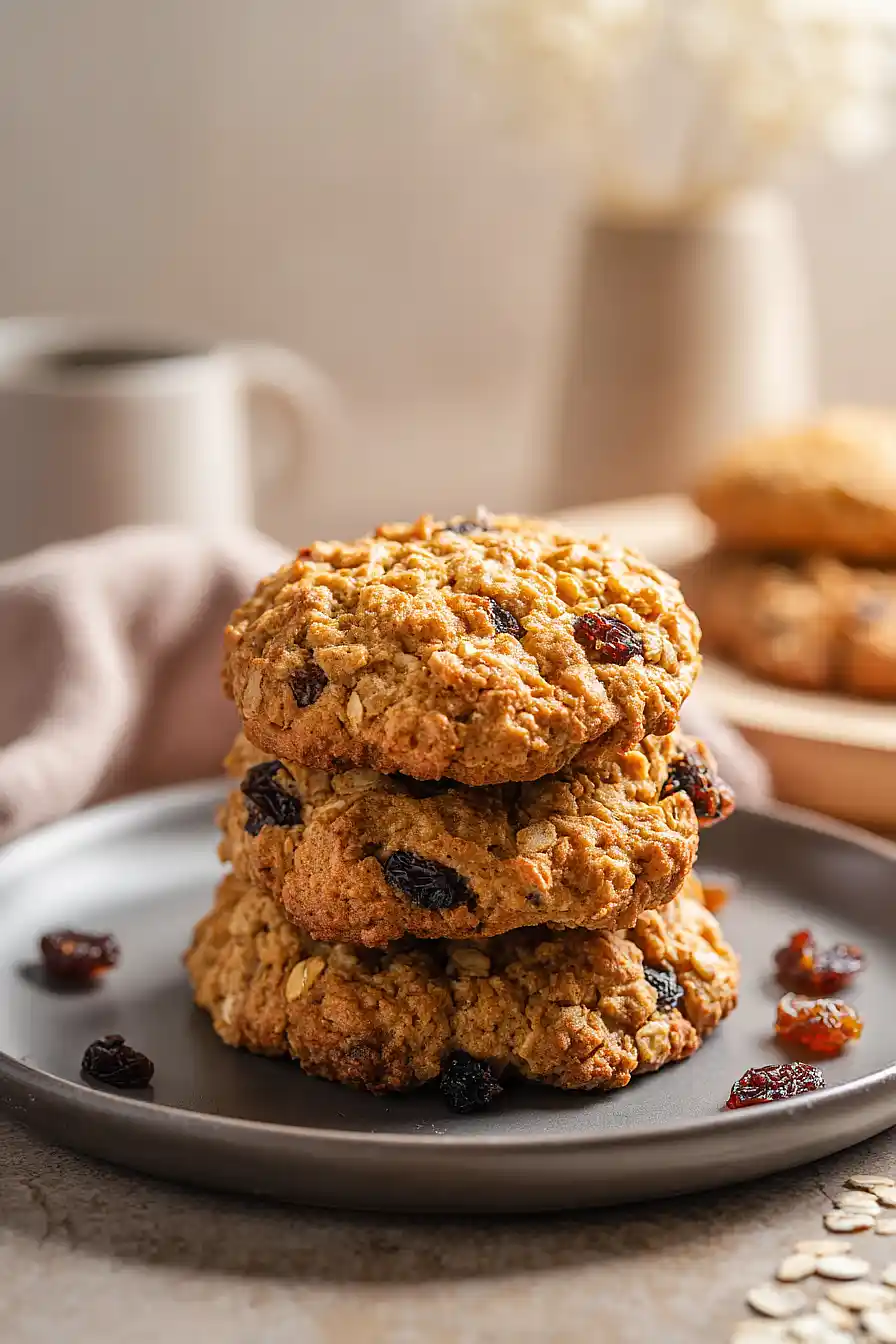
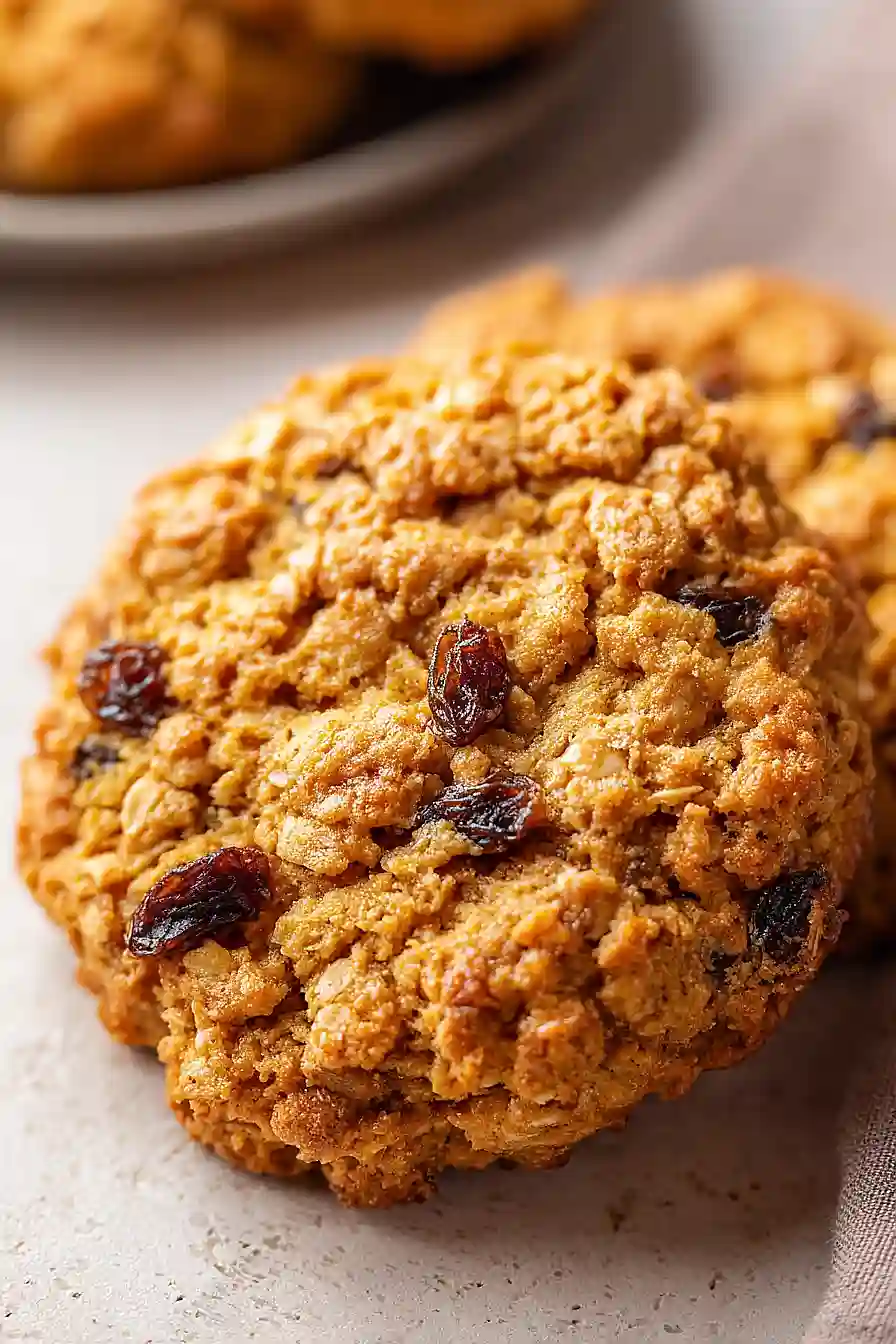
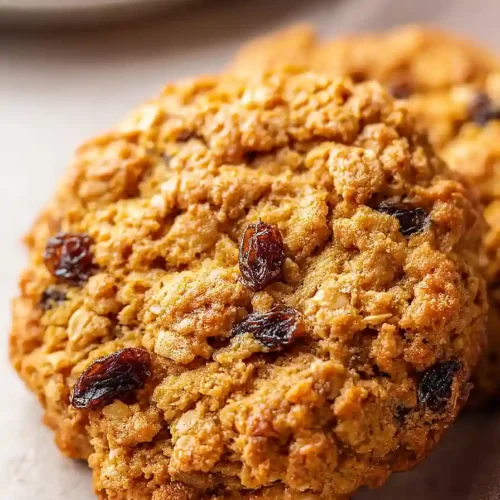
- Classic comfort food – The chewy texture and warm cinnamon flavor give you all the nostalgia of traditional oatmeal raisin cookies without compromising on taste.
What Kind of Oats Should I Use?
For this recipe, you’ll want to stick with old-fashioned rolled oats, which are sometimes called regular oats at the grocery store. Quick oats will work in a pinch, but they tend to make the cookies a bit more dense and less chewy since they’re cut smaller and absorb moisture differently. I’d avoid instant oats altogether since they’re too fine and will turn your cookies mushy. Steel-cut oats won’t work here either because they’re too hard and won’t soften up enough during the short baking time. If you only have quick oats on hand, just know your cookies might be a little flatter and less textured than if you’d used rolled oats.
Options for Substitutions
These cookies are pretty adaptable, so here are some swaps you can make:
- Sweetener: You can use any granulated sugar substitute you prefer – erythritol, monk fruit sweetener, or allulose all work well. Just stick with a 1:1 sugar replacement for best results.
- Butter: If you need a dairy-free option, coconut oil or vegan butter sticks work fine. Just make sure they’re softened to room temperature like regular butter.
- Flour: All-purpose flour is standard here, but you can use whole wheat flour for extra fiber. For gluten-free cookies, try a 1:1 gluten-free baking flour blend.
- Rolled oats: Old-fashioned rolled oats are what you want here – don’t substitute quick oats or instant oats as they’ll make the cookies too soft and mushy.
- Raisins: Not a raisin fan? Swap them out for sugar-free chocolate chips, dried cranberries, chopped walnuts, or pecans. You can also use a mix of any of these.
- Eggs: For each egg, you can use a flax egg (1 tablespoon ground flaxseed mixed with 3 tablespoons water, let sit for 5 minutes) if you need an egg-free version.
Watch Out for These Mistakes While Baking
The biggest mistake when making sugar-free oatmeal raisin cookies is using cold butter and eggs, which prevents the ingredients from mixing properly and can lead to flat, dense cookies – make sure everything sits out for about 30 minutes before you start.
Overmixing the dough after adding the flour is another common error that creates tough cookies, so stir just until the dry ingredients are incorporated and no white streaks remain.
Since sugar-free sweeteners don’t caramelize like regular sugar, these cookies can brown quickly on the bottom while staying pale on top, so consider using a light-colored baking sheet and checking them a few minutes early.
Finally, don’t skip letting the cookies cool on the baking sheet for 5 minutes before moving them to a cooling rack – they’ll be too soft and fragile right out of the oven and might break apart.
What to Serve With Sugar Free Oatmeal Raisin Cookies?
These cookies are perfect with a cold glass of milk or a hot cup of coffee for an afternoon snack. I love packing them in lunchboxes alongside some fresh apple slices and cheese cubes for a balanced treat. They also make a great breakfast on busy mornings when paired with Greek yogurt and fresh berries. If you’re having friends over, set out a platter of these cookies with some tea or hot chocolate for a cozy gathering that everyone can enjoy without the sugar crash.
Storage Instructions
Store: These cookies stay soft and chewy when kept in an airtight container at room temperature for up to 5 days. If you want them to last a bit longer, store them in the fridge for up to 2 weeks – they’ll firm up slightly but still taste great.
Freeze: You can freeze baked cookies in a freezer-safe container or bag for up to 3 months. I like to freeze the dough too – just scoop it into balls, freeze them on a baking sheet, then transfer to a bag so you can bake fresh cookies whenever a craving hits.
Enjoy: Frozen cookies thaw quickly at room temperature in about 20 minutes, or you can warm them in the microwave for 10-15 seconds. If you’re baking from frozen dough, just add an extra minute or two to the baking time – no need to thaw first.
| Preparation Time | 15-20 minutes |
| Cooking Time | 10-14 minutes |
| Total Time | 25-34 minutes |
| Level of Difficulty | Medium |
Estimated Nutrition
Estimated nutrition for the whole recipe (without optional ingredients):
- Calories: 2100-2300
- Protein: 28-32 g
- Fat: 92-102 g
- Carbohydrates: 310-340 g
Ingredients
For the wet ingredients:
- 3/4 cup sweetener (monk fruit or erythritol blend works best)
- 1 tsp vanilla extract (pure extract, not imitation)
- 1/8 tsp lemon juice
- 8 tbsp unsalted butter (I use Kerrygold for rich flavor)
- 2 eggs (room temperature for better mixing)
For the dry ingredients:
- 1/2 tsp cinnamon (freshly ground for best flavor)
- 1.5 cups rolled oats (old-fashioned, not instant)
- 3/4 cup flour (I always use King Arthur all-purpose flour)
- 1/2 tsp baking soda
- 1/2 tsp salt
For the cookies:
- 1/2 cup raisins (plump and moist)
Step 1: Prepare mise en place and preheat
- 3/4 cup flour
- 1/2 tsp baking soda
- 1/2 tsp salt
- 1/2 tsp cinnamon
Preheat your oven to 350°F and line a baking sheet with a baking mat.
While the oven heats, measure out all your ingredients into separate bowls—this makes the mixing process smooth and prevents scrambling for ingredients mid-stream.
Make sure your eggs are at room temperature; they’ll incorporate more evenly into the butter mixture and create a lighter, fluffier dough.
Whisk together the flour, baking soda, salt, and cinnamon in a small bowl to combine the leavening agents evenly throughout.
Step 2: Cream butter and sweetener
- 8 tbsp unsalted butter
- 3/4 cup sweetener
Cut the butter into small cubes and add it to a large mixing bowl with the sweetener.
Beat on medium speed for about 2 minutes until the mixture is pale, light, and creamy.
This creaming process incorporates air into the dough, which helps create cookies with a better texture.
I like to use Kerrygold butter here because its higher fat content gives the cookies a richer, more indulgent flavor that makes the lack of sugar less noticeable.
Step 3: Build the wet ingredient base
- 2 eggs
- 1 tsp vanilla extract
- 1/8 tsp lemon juice
Add the room-temperature eggs to the creamed butter mixture one at a time, beating on low speed for about 30 seconds after the first egg, then switch to medium speed.
Once both eggs are incorporated, add the vanilla extract and lemon juice, mixing until the mixture is fluffy and well combined, about 1-2 minutes total.
The lemon juice adds a subtle brightness that helps balance the sweetness of the monk fruit or erythritol, making the cookie taste more natural.
Step 4: Combine dry ingredients with wet mixture
- dry ingredient mixture from Step 1
Pour the dry ingredient mixture from Step 1 into the wet mixture from Step 3, folding and stirring gently with a spatula or wooden spoon for about 45 seconds until just combined.
Don’t overmix at this point—overmixing can develop gluten and create tough cookies.
The dough should come together but still look slightly rough; any streaks of flour will fully incorporate as you work.
Step 5: Add oats and raisins
- 1.5 cups rolled oats
- 1/2 cup raisins
Stir in the rolled oats using a sturdy spoon or spatula until evenly distributed throughout the dough.
Then fold in the raisins gently, being careful not to crush them.
The oats add texture and heartiness while the raisins provide natural sweetness and chewiness.
I always make sure my raisins are plump and moist before using them; if they seem dried out, I’ll plump them up in a little warm water for a few minutes first.
Step 6: Shape and bake cookies
- prepared dough from Step 5
Using a cookie scoop or tablespoon measure, drop portions of dough onto the prepared baking sheet, spacing them about 2 inches apart.
Gently flatten the tops of each ball with your palm or the bottom of a glass to create uniform thickness—this helps them bake evenly.
Bake for 10-14 minutes, until the edges are set but the centers still look slightly underbaked; they’ll continue to firm up as they cool.
Step 7: Cool cookies properly for optimal texture
Let the cookies rest on the baking mat for 5 minutes—this allows them to set without becoming too brittle.
Then transfer them to a wire cooling rack for an additional 10 minutes before serving or storing.
This two-stage cooling process ensures the cookies develop the right texture: crispy edges with a chewy center.
Tasty Sugar Free Oatmeal Raisin Cookies
Ingredients
For the wet ingredients:
- 3/4 cup sweetener (monk fruit or erythritol blend works best)
- 1 tsp vanilla extract (pure extract, not imitation)
- 1/8 tsp lemon juice
- 8 tbsp unsalted butter (I use Kerrygold for rich flavor)
- 2 eggs (room temperature for better mixing)
For the dry ingredients:
- 1/2 tsp cinnamon (freshly ground for best flavor)
- 1.5 cups rolled oats (old-fashioned, not instant)
- 3/4 cup flour (I always use King Arthur all-purpose flour)
- 1/2 tsp baking soda
- 1/2 tsp salt
For the cookies:
- 1/2 cup raisins (plump and moist)
Instructions
- Preheat your oven to 350°F and line a baking sheet with a baking mat. While the oven heats, measure out all your ingredients into separate bowls—this makes the mixing process smooth and prevents scrambling for ingredients mid-stream. Make sure your eggs are at room temperature; they'll incorporate more evenly into the butter mixture and create a lighter, fluffier dough. Whisk together the flour, baking soda, salt, and cinnamon in a small bowl to combine the leavening agents evenly throughout.
- Cut the butter into small cubes and add it to a large mixing bowl with the sweetener. Beat on medium speed for about 2 minutes until the mixture is pale, light, and creamy. This creaming process incorporates air into the dough, which helps create cookies with a better texture. I like to use Kerrygold butter here because its higher fat content gives the cookies a richer, more indulgent flavor that makes the lack of sugar less noticeable.
- Add the room-temperature eggs to the creamed butter mixture one at a time, beating on low speed for about 30 seconds after the first egg, then switch to medium speed. Once both eggs are incorporated, add the vanilla extract and lemon juice, mixing until the mixture is fluffy and well combined, about 1-2 minutes total. The lemon juice adds a subtle brightness that helps balance the sweetness of the monk fruit or erythritol, making the cookie taste more natural.
- Pour the dry ingredient mixture from Step 1 into the wet mixture from Step 3, folding and stirring gently with a spatula or wooden spoon for about 45 seconds until just combined. Don't overmix at this point—overmixing can develop gluten and create tough cookies. The dough should come together but still look slightly rough; any streaks of flour will fully incorporate as you work.
- Stir in the rolled oats using a sturdy spoon or spatula until evenly distributed throughout the dough. Then fold in the raisins gently, being careful not to crush them. The oats add texture and heartiness while the raisins provide natural sweetness and chewiness. I always make sure my raisins are plump and moist before using them; if they seem dried out, I'll plump them up in a little warm water for a few minutes first.
- Using a cookie scoop or tablespoon measure, drop portions of dough onto the prepared baking sheet, spacing them about 2 inches apart. Gently flatten the tops of each ball with your palm or the bottom of a glass to create uniform thickness—this helps them bake evenly. Bake for 10-14 minutes, until the edges are set but the centers still look slightly underbaked; they'll continue to firm up as they cool.
- Let the cookies rest on the baking mat for 5 minutes—this allows them to set without becoming too brittle. Then transfer them to a wire cooling rack for an additional 10 minutes before serving or storing. This two-stage cooling process ensures the cookies develop the right texture: crispy edges with a chewy center.


