If you ask me, fried rice is one of the best ways to use up leftover rice.
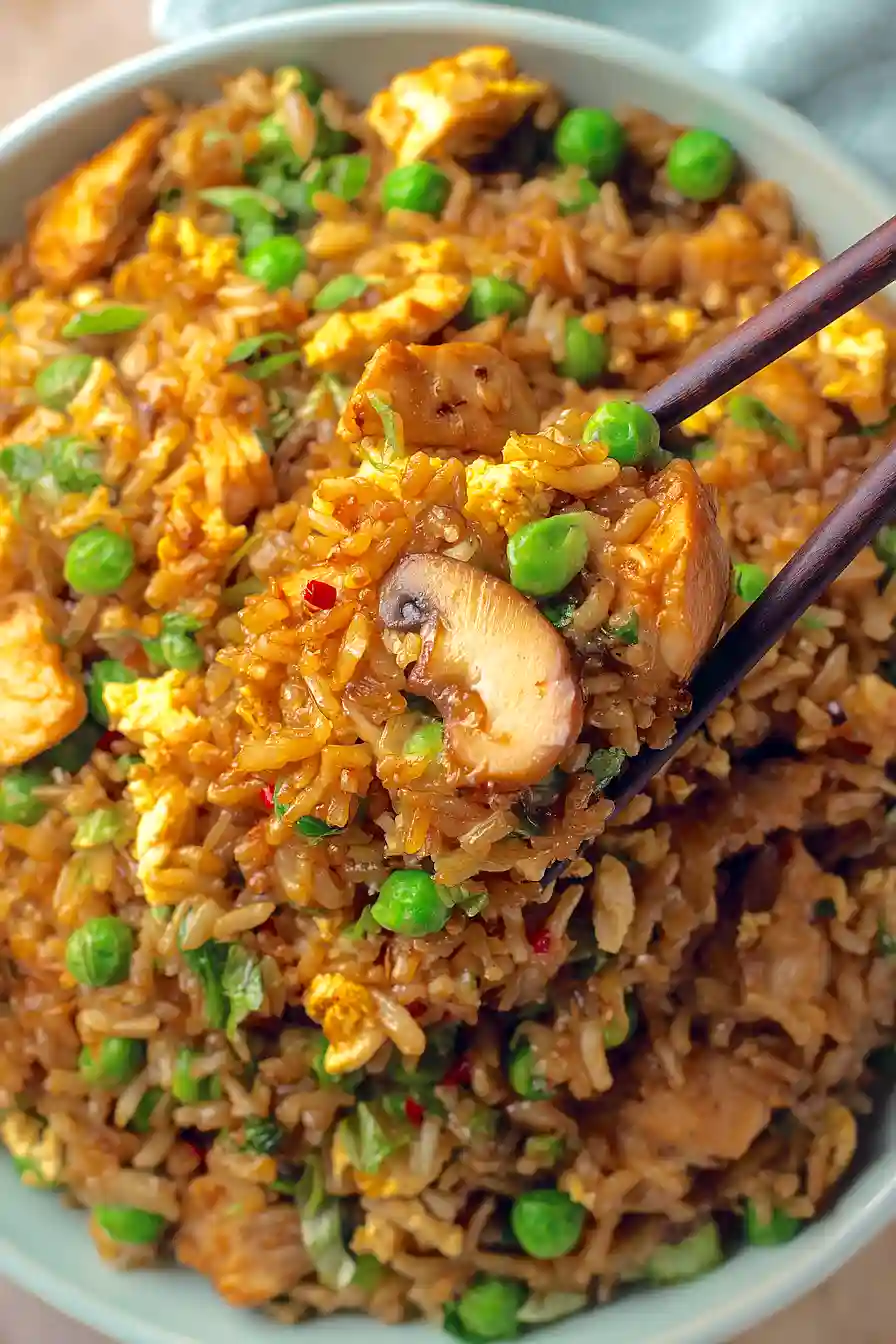
This Thai-inspired chicken fried rice brings together savory fish sauce, aromatic ginger and garlic, and a hint of lime for a dish that’s packed with flavor. Tender chicken pieces mix with shiitake mushrooms, sweet peas, and scrambled eggs for a satisfying one-pan meal.
It’s tossed together in a hot wok with day-old jasmine rice that gets perfectly crispy at the edges. Fresh cilantro, a squeeze of lime, and a drizzle of sriracha help the whole thing come together.
It’s a weeknight-friendly dinner that beats takeout any day, plus you probably have most of the ingredients already.

Why You’ll Love This Thai Chicken Fried Rice
- Perfect for using leftover rice – This recipe is ideal for transforming day-old rice into something special, making it a smart way to reduce food waste while creating a delicious meal.
- Quick weeknight dinner – Ready in under an hour, this fried rice comes together fast and is much quicker than ordering takeout.
- Authentic Thai flavors – The combination of fish sauce, lime juice, and fresh chile gives you restaurant-quality taste right in your own kitchen.
- One-pan meal – Everything cooks in a single wok or large skillet, which means less cleanup and more time to relax after dinner.
- Customizable ingredients – You can easily swap the vegetables or protein based on what you have on hand, making it a flexible recipe for any night of the week.
What Kind of Rice Should I Use?
The secret to great fried rice is using rice that’s been cooked and refrigerated for at least a day or two. Fresh rice is too moist and will turn mushy when you stir-fry it, but day-old rice has dried out just enough to get those nice separate grains we’re looking for. Jasmine rice is the traditional choice for Thai fried rice and gives you that authentic flavor, but regular long-grain white rice works perfectly fine too. If you’re in a pinch and only have fresh rice, spread it out on a baking sheet and pop it in the fridge for an hour or two to help dry it out before cooking.

Options for Substitutions
This fried rice is super forgiving and works well with whatever you have in your kitchen:
- Rice: Day-old rice is really important here – it’s drier and won’t turn mushy when stir-fried. If you only have fresh rice, spread it on a baking sheet and let it cool in the fridge for at least an hour before using.
- Chicken: Swap the chicken for shrimp, pork, tofu, or even leftover rotisserie chicken. You can also make it vegetarian by leaving out the meat entirely and adding more vegetables.
- Fish sauce: If you don’t have fish sauce, you can use extra soy sauce, but the flavor won’t be quite as authentic. For a closer match, try mixing soy sauce with a tiny bit of Worcestershire sauce.
- Shiitake mushrooms: Regular button mushrooms, cremini, or oyster mushrooms all work fine. You can also skip them if mushrooms aren’t your thing.
- Spring onions: Regular yellow or white onions can stand in for spring onions – just use about half a medium onion, diced.
- Fresh chile: Use whatever chile you have on hand – jalapeño, serrano, or even a pinch of red pepper flakes. Adjust the amount based on how much heat you like.
- Vegetables: The celery and peas can be swapped for carrots, bell peppers, broccoli, or whatever vegetables you need to use up. Just make sure to cut everything into small, similar-sized pieces.
Watch Out for These Mistakes While Cooking
The biggest mistake people make with fried rice is using freshly cooked rice, which turns sticky and clumpy instead of light and separated – always use rice that’s been refrigerated for at least a day, as the cold, dry grains fry up perfectly.
Overcrowding the pan is another common error that leads to steaming instead of frying, so make sure your wok or pan is hot enough that the rice sizzles when it hits the surface, and don’t be afraid to cook in batches if needed.
Many home cooks add the sauce too early or all at once, which makes the rice soggy – drizzle it around the edges of the pan so it hits the hot surface first, creating that signature smoky flavor.
Finally, resist the urge to constantly stir the rice; let it sit undisturbed for a minute or two between tosses to develop those crispy, golden bits that make fried rice so good.
What to Serve With Thai Chicken Fried Rice?
Thai fried rice is pretty filling on its own, but I love serving it with a few simple sides to round out the meal. A fresh cucumber salad with rice vinegar and a touch of sugar cuts through the richness of the fried rice and adds a nice crunch. You could also add some Thai-style chicken satay skewers on the side, or keep it simple with spring rolls or dumplings that you can dip in sweet chili sauce. If you want something lighter, a bowl of hot and sour soup or a simple egg drop soup works great as a starter before diving into the fried rice.
Storage Instructions
Store: Keep your leftover fried rice in an airtight container in the fridge for up to 4 days. The flavors actually get even better the next day as everything has time to meld together, making it perfect for meal prep or quick lunches throughout the week.
Freeze: This fried rice freezes really well for up to 2 months. Let it cool completely first, then portion it into freezer-safe containers or bags. I like to freeze individual servings so I can grab just what I need for a quick meal.
Reheat: The best way to reheat is in a skillet or wok over medium-high heat with a tiny splash of oil to bring back that crispy texture. You can also microwave it, but add a tablespoon of water and cover it to keep the rice from drying out. Stir it halfway through for even heating.
| Preparation Time | 20-30 minutes |
| Cooking Time | 25-35 minutes |
| Total Time | 45-65 minutes |
| Level of Difficulty | Medium |
| Servings | 4 servings |
Estimated Nutrition
Estimated nutrition for the whole recipe (without optional ingredients):
- Calories: 1250-1450
- Protein: 48-58 g
- Fat: 32-38 g
- Carbohydrates: 210-240 g
Ingredients
For the chicken:
- 1 lb chicken breast (thinly sliced into 1-inch pieces across the grain)
- 1 1/2 tbsp soy sauce
For the sauce:
- 2 1/2 tbsp soy sauce (I use Kikkoman Less Sodium for better salt control)
- 4 tbsp chicken stock
- 3 1/2 tbsp fish sauce
- 1 1/2 tbsp lime juice
- 1 1/2 tsp sugar
- 1/4 tsp white pepper
For the stir-fry:
- 5 cups rice (day-old jasmine rice is best for a firm texture)
- 3 tbsp vegetable oil
- 1 tsp toasted sesame oil
- 4 spring onions
- 4 garlic cloves (minced)
- 1 tbsp fresh ginger (finely grated)
- 1-2 Thai bird’s eye chiles
- 7 shiitake mushrooms
- 1 stalk celery
- 2/3 cup frozen sweet peas
- 2 large eggs
For the garnish:
- 1 tbsp chile sauce (I recommend Huy Fong Sriracha for a classic kick)
- 1/4 cup fresh cilantro or Thai basil leaves
Step 1: Prepare Mise en Place and Make Sauce Base
- 4 tbsp chicken stock
- 3 1/2 tbsp fish sauce
- 2 1/2 tbsp soy sauce
- 1 1/2 tbsp lime juice
- 1 1/2 tsp sugar
- 1/4 tsp white pepper
- 4 garlic cloves, minced
- 1 tbsp fresh ginger, finely grated
- 4 spring onions, separated into white and green parts
- 7 shiitake mushrooms, sliced
- 1 stalk celery, chopped
- 1-2 Thai bird’s eye chiles, sliced
Start by preparing all your ingredients while the pan heats up.
Slice the chicken breast into 1-inch pieces across the grain and set aside.
Mince the garlic cloves and finely grate the ginger.
Slice the spring onions, separating the white parts from the green parts—you’ll use these at different stages.
Slice the shiitake mushrooms and chop the celery into small pieces.
Slice the Thai bird’s eye chiles (remove seeds if you prefer less heat).
In a small bowl, whisk together the stock, fish sauce, soy sauce, lime juice, sugar, and white pepper to create the sauce base.
This advance prep ensures everything cooks smoothly without scrambling mid-cooking.
Step 2: Marinate Chicken and Break Up Rice
- 1 lb chicken breast, thinly sliced
- 1 1/2 tbsp soy sauce
- 5 cups rice, day-old jasmine rice
- 1 tbsp vegetable oil
Toss the sliced chicken breast pieces with 1 1/2 tablespoon soy sauce and set aside to marinate while you prep the rice.
Break up any clumps in your day-old jasmine rice by drizzling it with 1 tablespoon of vegetable oil and gently separating the grains with your fingers or a fork until each grain is distinct.
I prefer using day-old rice because it’s drier and won’t get mushy—fresh rice tends to clump and become sticky.
Set the rice aside.
Step 3: Cook Aromatics and Protein
- 2 tbsp vegetable oil
- white parts of spring onions from Step 1
- 4 garlic cloves, minced from Step 1
- 1-2 Thai bird’s eye chiles, sliced from Step 1
- 1 tbsp fresh ginger, finely grated from Step 1
- marinated chicken from Step 2
Heat 2 tablespoons of vegetable oil in a large wok or skillet over high heat until shimmering.
Add the white parts of the spring onions, minced garlic, and sliced Thai chiles, stirring constantly for about 1 minute until fragrant.
Add the ginger and stir for another 15 seconds.
Now add the marinated chicken from Step 2 and cook for 2-3 minutes, stirring frequently, until the chicken is mostly cooked through.
The chicken doesn’t need to be fully cooked at this point since it will continue cooking in the rice.
Step 4: Build Layers with Vegetables
- 7 shiitake mushrooms, sliced from Step 1
- 1 stalk celery, chopped from Step 1
Add the sliced shiitake mushrooms and chopped celery to the wok and cook for 2-3 minutes, stirring occasionally, until the mushrooms begin to soften and release their moisture.
This step adds umami depth to the dish and allows the vegetables to slightly caramelize at the edges.
Step 5: Combine Rice and Create the Base
- rice from Step 2
Increase the heat to high and add all the separated rice from Step 2 to the wok, breaking up any remaining clumps as you stir.
Toss everything together for about 2 minutes, making sure the rice coats evenly with the oil and is heated through.
This high-heat tossing helps give the rice a slightly toasted flavor and prevents it from steaming into mushiness.
Step 6: Incorporate Sauce and Finish Cooking
- sauce base from Step 1
- 2/3 cup frozen sweet peas
- 1 tsp toasted sesame oil
Pour the sauce base from Step 1 over the rice mixture and stir everything together thoroughly.
Add the frozen sweet peas and drizzle with the toasted sesame oil.
Continue cooking on high heat for 6-10 minutes, stirring frequently, until the sauce is absorbed and the rice is fragrant.
I like to keep the heat high at this stage to prevent the rice from becoming mushy—the constant movement and high heat create better texture and help develop the Thai flavor profile.
Step 7: Add Egg and Final Assembly
- 2 large eggs
- 1 tbsp chile sauce
- green parts of spring onions from Step 1
- 1/4 cup fresh cilantro or Thai basil leaves
Create a small well in the center of the rice by pushing the rice toward the edges of the wok.
Crack both large eggs directly into the center and let them sit for 10-15 seconds without stirring.
Then scramble the eggs gently with a spatula, allowing the cooked egg to gradually mix with the rice.
Once the eggs are mostly cooked but still slightly wet, fold everything together and cook for another minute.
Transfer to a serving plate and drizzle with the chile sauce, then top with the reserved green parts of the spring onions and fresh cilantro or Thai basil leaves.

Tasty Thai Chicken Fried Rice
Ingredients
For the chicken
- 1 lb chicken breast (thinly sliced into 1-inch pieces across the grain)
- 1 1/2 tbsp soy sauce
For the sauce
- 2 1/2 tbsp soy sauce (I use Kikkoman Less Sodium for better salt control)
- 4 tbsp chicken stock
- 3 1/2 tbsp fish sauce
- 1 1/2 tbsp lime juice
- 1 1/2 tsp sugar
- 1/4 tsp white pepper
For the stir-fry
- 5 cups rice (day-old jasmine rice is best for a firm texture)
- 3 tbsp vegetable oil
- 1 tsp toasted sesame oil
- 4 spring onions
- 4 garlic cloves (minced)
- 1 tbsp fresh ginger (finely grated)
- 1-2 Thai bird's eye chiles
- 7 shiitake mushrooms
- 1 stalk celery
- 2/3 cup frozen sweet peas
- 2 large eggs
For the garnish
- 1 tbsp chile sauce (I recommend Huy Fong Sriracha for a classic kick)
- 1/4 cup fresh cilantro or Thai basil leaves
Instructions
- Start by preparing all your ingredients while the pan heats up. Slice the chicken breast into 1-inch pieces across the grain and set aside. Mince the garlic cloves and finely grate the ginger. Slice the spring onions, separating the white parts from the green parts—you'll use these at different stages. Slice the shiitake mushrooms and chop the celery into small pieces. Slice the Thai bird's eye chiles (remove seeds if you prefer less heat). In a small bowl, whisk together the stock, fish sauce, soy sauce, lime juice, sugar, and white pepper to create the sauce base. This advance prep ensures everything cooks smoothly without scrambling mid-cooking.
- Toss the sliced chicken breast pieces with 1 1/2 tablespoon soy sauce and set aside to marinate while you prep the rice. Break up any clumps in your day-old jasmine rice by drizzling it with 1 tablespoon of vegetable oil and gently separating the grains with your fingers or a fork until each grain is distinct. I prefer using day-old rice because it's drier and won't get mushy—fresh rice tends to clump and become sticky. Set the rice aside.
- Heat 2 tablespoons of vegetable oil in a large wok or skillet over high heat until shimmering. Add the white parts of the spring onions, minced garlic, and sliced Thai chiles, stirring constantly for about 1 minute until fragrant. Add the ginger and stir for another 15 seconds. Now add the marinated chicken from Step 2 and cook for 2-3 minutes, stirring frequently, until the chicken is mostly cooked through. The chicken doesn't need to be fully cooked at this point since it will continue cooking in the rice.
- Add the sliced shiitake mushrooms and chopped celery to the wok and cook for 2-3 minutes, stirring occasionally, until the mushrooms begin to soften and release their moisture. This step adds umami depth to the dish and allows the vegetables to slightly caramelize at the edges.
- Increase the heat to high and add all the separated rice from Step 2 to the wok, breaking up any remaining clumps as you stir. Toss everything together for about 2 minutes, making sure the rice coats evenly with the oil and is heated through. This high-heat tossing helps give the rice a slightly toasted flavor and prevents it from steaming into mushiness.
- Pour the sauce base from Step 1 over the rice mixture and stir everything together thoroughly. Add the frozen sweet peas and drizzle with the toasted sesame oil. Continue cooking on high heat for 6-10 minutes, stirring frequently, until the sauce is absorbed and the rice is fragrant. I like to keep the heat high at this stage to prevent the rice from becoming mushy—the constant movement and high heat create better texture and help develop the Thai flavor profile.
- Create a small well in the center of the rice by pushing the rice toward the edges of the wok. Crack both large eggs directly into the center and let them sit for 10-15 seconds without stirring. Then scramble the eggs gently with a spatula, allowing the cooked egg to gradually mix with the rice. Once the eggs are mostly cooked but still slightly wet, fold everything together and cook for another minute. Transfer to a serving plate and drizzle with the chile sauce, then top with the reserved green parts of the spring onions and fresh cilantro or Thai basil leaves.







