I didn’t eat a hot cross bun until I was in my twenties. Growing up, they just weren’t a thing in my house around Easter time. We had chocolate eggs and jelly beans, but no spiced buns with crosses on top.
When I finally tried one at a friend’s place, I remember thinking it was good but kind of small. Like, why make a bun that’s gone in three bites? That’s when I decided that if I was going to make them myself, they needed to be bigger. Way bigger. These XL hot cross buns are about twice the size of regular ones, which means you can actually taste all those warm spices and plump raisins in every bite. Plus, more bun means more of that sticky apricot glaze on top.

Why You’ll Love These Hot Cross Buns
- Extra-large size – These XL buns are bigger and more satisfying than regular hot cross buns, making them perfect for a special breakfast or Easter brunch.
- Packed with flavor – The combination of warm spices like cinnamon, nutmeg, and cloves with sweet raisins and orange zest creates a delicious taste in every bite.
- Impressive homemade treat – While they take a bit of time, the process is straightforward and the result looks and tastes like something from a fancy bakery.
- Perfect for sharing – These buns are great for holiday gatherings or weekend breakfasts with family, and they fill your kitchen with an amazing aroma while baking.
What Kind of Raisins Should I Use?
For hot cross buns, you can use regular dark raisins, golden raisins, or even a mix of both depending on what you prefer. Dark raisins will give you that traditional, slightly deeper flavor, while golden raisins tend to be a bit plumper and sweeter. If you’re feeling adventurous, you can also swap in dried currants or even chopped dried apricots for part of the raisins. The key is to make sure you soak them in the boiling water as the recipe calls for – this plumps them up and keeps them moist so they don’t dry out your buns during baking.
Options for Substitutions
These hot cross buns are pretty forgiving when it comes to swaps:
- Raisins: Not a raisin fan? Try dried currants, chopped dried apricots, cranberries, or even chocolate chips for a modern twist. You can also mix different dried fruits together.
- Milk: Any milk works here – whole, 2%, or even non-dairy options like oat or almond milk. Just make sure it’s at room temperature before using.
- Spices: Feel free to adjust the spice blend to your taste. Add more cinnamon if you love it, or try cardamom or allspice instead of cloves. You can also use 1 teaspoon of pumpkin pie spice to replace all three spices.
- Orange zest: Lemon zest works just as well and gives a slightly different citrus note. In a pinch, you can use 1/2 teaspoon of orange extract.
- Apricot preserves: Any smooth jam or preserves will work for the glaze – try peach, orange marmalade, or even honey thinned with a bit of water.
- Butter: You can substitute with margarine or coconut oil, though butter gives the best flavor and texture.
Watch Out for These Mistakes While Baking
The biggest mistake when making hot cross buns is using milk that’s too hot or too cold for the yeast – if it’s above 120°F you’ll kill the yeast, and below 105°F it won’t activate properly, so stick to that 113°F-115°F range for the best rise.
Another common error is skipping the windowpane test, which tells you if your dough has developed enough gluten – stretch a small piece of dough between your fingers, and if it forms a thin, translucent membrane without tearing, you’re good to go.
Don’t rush the rising times or try to speed them up with extra heat, as this can result in dense, heavy buns instead of the light, fluffy texture you’re after.
Finally, make sure your cross piping paste is thick enough to hold its shape – if it’s too runny, it’ll spread and disappear during baking, so aim for a consistency similar to toothpaste.

What to Serve With Hot Cross Buns?
Hot cross buns are perfect on their own, but they’re even better when you slather them with salted butter while they’re still warm from the oven. I love serving them alongside a cup of strong tea or coffee for breakfast or an afternoon snack – the spices in the buns pair really nicely with both. If you want to make it more of a brunch spread, set out some cream cheese, extra jam, or honey so everyone can customize their buns. These also work great as part of an Easter breakfast table with fresh fruit, scrambled eggs, and maybe some crispy bacon on the side.
Storage Instructions
Store: Keep your hot cross buns in an airtight container or wrapped in plastic wrap at room temperature for up to 3 days. They’ll stay soft and delicious, making them perfect for breakfast or an afternoon snack with a cup of tea.
Freeze: These buns freeze really well for up to 3 months. Let them cool completely, then wrap each one individually in plastic wrap before placing them in a freezer bag. This way you can grab just one or two whenever you want without thawing the whole batch.
Warm Up: To bring your buns back to life, just pop them in a 300°F oven for about 10 minutes if they’re from the fridge, or 15-20 minutes if frozen. You can also microwave them for 15-20 seconds for a quick warm-up, though the oven gives you that fresh-baked feel again.
| Preparation Time | 90-110 minutes |
| Cooking Time | 25-35 minutes |
| Total Time | 115-145 minutes |
| Level of Difficulty | Hard |
| Servings | 12 buns |
Estimated Nutrition
Estimated nutrition for the whole recipe (without optional ingredients):
- Calories: 3500-3700
- Protein: 55-65 g
- Fat: 60-70 g
- Carbohydrates: 720-760 g
Ingredients
For the dough:
- 1.5 cups raisins (soak in boiling water for 15 minutes to plump)
- 2 cups boiling water
- 1.5 cups milk (warmed to exactly 110°F for yeast activation)
- 1 tbsp yeast
- 1.5 tsp sugar
- 4 cups all-purpose flour
- 1.75 tsp salt
- 3/4 tsp cinnamon
- 1/4 tsp nutmeg
- 1/4 tsp cloves
- 1/3 cup brown sugar
- 1/4 cup sugar
- 1 tbsp orange zest (freshly grated for maximum citrus aroma)
- 1 large egg
- 1 tsp vanilla
- 2.5 oz unsalted butter
For the flour paste:
- 3/4 cup flour
- 1/2 cup water (mixed until smooth enough to pipe through a small tip)
For the glaze:
- 5.5 oz apricot preserves (strained through a fine-mesh sieve to remove fruit chunks)
Step 1: Prepare the Raisins and Activate the Yeast
- 1.5 cups raisins
- 2 cups boiling water
- 1.5 cups milk
- 1 tbsp yeast
- 1.5 tsp sugar
Pour 2 cups of boiling water over the 1.5 cups of raisins and let them soak for 15 minutes to plump and soften.
While the raisins soak, warm your milk to exactly 110°F—this is crucial for proper yeast activation.
Once the milk reaches temperature, combine it in a bowl with 1 tablespoon of yeast and 1.5 teaspoons of sugar, then let this mixture sit undisturbed for 8 minutes until it becomes foamy and fragrant.
Drain the raisins well and set aside.
Step 2: Mix the Dough Base with Spices and Aromatics
- yeast mixture from Step 1
- 4 cups all-purpose flour
- 1.75 tsp salt
- 3/4 tsp cinnamon
- 1/4 tsp nutmeg
- 1/4 tsp cloves
- 1/3 cup brown sugar
- 1/4 cup sugar
- 1 tbsp orange zest
- 1 large egg
- 1 tsp vanilla
In a stand mixer bowl, combine the foamy yeast mixture from Step 1 with 4 cups of all-purpose flour, 1.75 teaspoons of salt, 3/4 teaspoon of cinnamon, 1/4 teaspoon of nutmeg, 1/4 teaspoon of cloves, 1/3 cup of brown sugar, 1/4 cup of sugar, 1 tablespoon of freshly grated orange zest, 1 large egg, and 1 teaspoon of vanilla.
Mix on medium speed with the dough hook for about 5-7 minutes until a shaggy dough forms.
The dough will be slightly sticky at this stage, which is perfectly normal.
Step 3: Incorporate Butter and Develop the Dough
- 2.5 oz unsalted butter
- drained raisins from Step 1
With the mixer running on medium speed, add 2.5 ounces of unsalted butter one tablespoon at a time, allowing each addition to fully incorporate before adding the next—this should take about 3-4 minutes total.
The dough will initially look shiny and slightly slick, but continue mixing until it becomes smooth, elastic, and passes the windowpane test (a small piece should stretch thin enough to see light through it without tearing).
I find that patience here makes all the difference—rushing this step results in less developed gluten and denser buns.
Once the dough is properly developed, reduce the mixer speed to low and add the drained raisins from Step 1, mixing for just 1-2 minutes until they’re evenly distributed throughout.
Step 4: First Rise and Shape the Buns
- dough from Step 3
Transfer the dough from Step 3 to a lightly oiled bowl, cover with a damp towel or plastic wrap, and let it rise in a warm place for 1 hour and 10 minutes until it roughly doubles in size.
After the rise, gently turn the dough out onto a lightly floured surface and divide it into 8 equal portions for XL buns (or 12 for slightly smaller ones).
Shape each portion into a tight, smooth ball by gently pulling the sides down and under, then place the balls seam-side down in a parchment-lined 9×13 inch baking dish, spacing them so they have room to rise and expand slightly without touching.
Step 5: Second Rise and Prepare the Cross Paste
- 3/4 cup flour
- 1/2 cup water
Cover the shaped buns with a damp towel and let them rise for 45 minutes in a warm place.
About 20 minutes into this rise, preheat your oven to 375°F.
While the buns are rising, prepare the cross paste by whisking together 3/4 cup of flour and 1/2 cup of water in a small bowl, stirring until smooth and thick enough to pipe through a small round tip.
The consistency should be like thick cake batter—you want it to hold its shape when piped but still flow smoothly from the piping bag.
Step 6: Pipe Crosses and Bake the Buns
- cross paste from Step 5
- shaped and risen buns from Step 5
Once the buns have finished their second rise and the oven is preheated to 375°F, transfer the cross paste to a piping bag fitted with a small round tip.
Carefully pipe a cross onto the top of each bun, starting from one side and dragging the tip through the center, then repeating perpendicular to create a complete cross.
Place the baking dish in the preheated oven and bake for 28-35 minutes until the buns are deep golden brown and the crosses are set and slightly firm to the touch.
I recommend checking them at the 28-minute mark since XL buns can vary in size—you’re looking for a rich golden color all over.
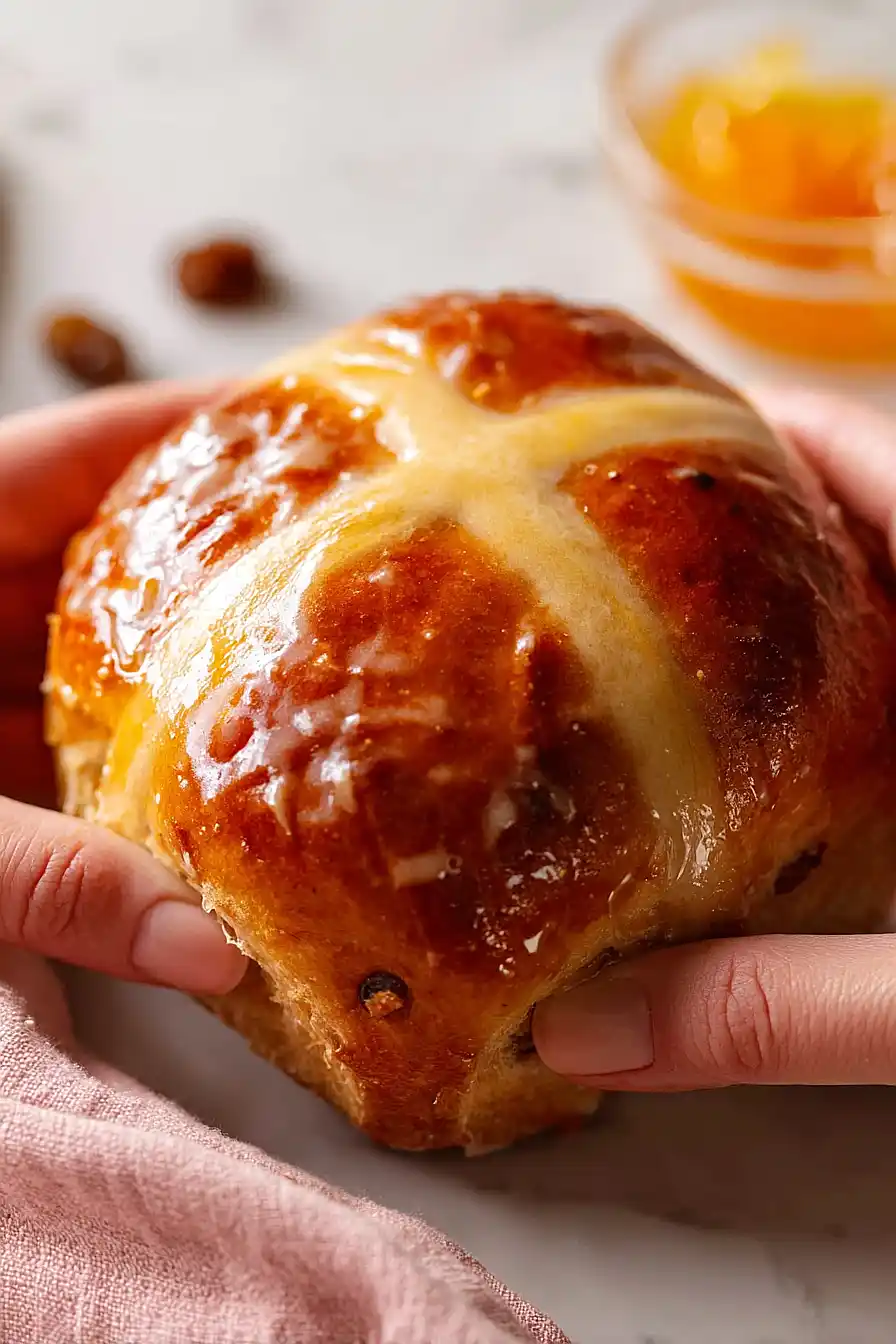
Step 7: Glaze with Apricot Preserves
- 5.5 oz apricot preserves
While the buns are still hot from the oven, quickly microwave the 5.5 ounces of apricot preserves (strained through a fine-mesh sieve to remove any fruit chunks) for about 1 minute until it becomes a pourable consistency.
Working quickly, brush the warm apricot glaze generously over the tops and sides of each hot bun using a pastry brush.
The heat from the buns will help the glaze set into a beautiful shine.
Allow the buns to cool in the dish for at least 15 minutes before serving—this helps them firm up and hold their shape.

Tasty XL Hot Cross Buns
Ingredients
For the dough::
- 1.5 cups raisins (soak in boiling water for 15 minutes to plump)
- 2 cups boiling water
- 1.5 cups milk (warmed to exactly 110°F for yeast activation)
- 1 tbsp yeast
- 1.5 tsp sugar
- 4 cups all-purpose flour
- 1.75 tsp salt
- 3/4 tsp cinnamon
- 1/4 tsp nutmeg
- 1/4 tsp cloves
- 1/3 cup brown sugar
- 1/4 cup sugar
- 1 tbsp orange zest (freshly grated for maximum citrus aroma)
- 1 large egg
- 1 tsp vanilla
- 2.5 oz unsalted butter
For the flour paste::
- 3/4 cup flour
- 1/2 cup water (mixed until smooth enough to pipe through a small tip)
For the glaze::
- 5.5 oz apricot preserves (strained through a fine-mesh sieve to remove fruit chunks)
Instructions
- Pour 2 cups of boiling water over the 1.5 cups of raisins and let them soak for 15 minutes to plump and soften. While the raisins soak, warm your milk to exactly 110°F—this is crucial for proper yeast activation. Once the milk reaches temperature, combine it in a bowl with 1 tablespoon of yeast and 1.5 teaspoons of sugar, then let this mixture sit undisturbed for 8 minutes until it becomes foamy and fragrant. Drain the raisins well and set aside.
- In a stand mixer bowl, combine the foamy yeast mixture from Step 1 with 4 cups of all-purpose flour, 1.75 teaspoons of salt, 3/4 teaspoon of cinnamon, 1/4 teaspoon of nutmeg, 1/4 teaspoon of cloves, 1/3 cup of brown sugar, 1/4 cup of sugar, 1 tablespoon of freshly grated orange zest, 1 large egg, and 1 teaspoon of vanilla. Mix on medium speed with the dough hook for about 5-7 minutes until a shaggy dough forms. The dough will be slightly sticky at this stage, which is perfectly normal.
- With the mixer running on medium speed, add 2.5 ounces of unsalted butter one tablespoon at a time, allowing each addition to fully incorporate before adding the next—this should take about 3-4 minutes total. The dough will initially look shiny and slightly slick, but continue mixing until it becomes smooth, elastic, and passes the windowpane test (a small piece should stretch thin enough to see light through it without tearing). I find that patience here makes all the difference—rushing this step results in less developed gluten and denser buns. Once the dough is properly developed, reduce the mixer speed to low and add the drained raisins from Step 1, mixing for just 1-2 minutes until they're evenly distributed throughout.
- Transfer the dough from Step 3 to a lightly oiled bowl, cover with a damp towel or plastic wrap, and let it rise in a warm place for 1 hour and 10 minutes until it roughly doubles in size. After the rise, gently turn the dough out onto a lightly floured surface and divide it into 8 equal portions for XL buns (or 12 for slightly smaller ones). Shape each portion into a tight, smooth ball by gently pulling the sides down and under, then place the balls seam-side down in a parchment-lined 9x13 inch baking dish, spacing them so they have room to rise and expand slightly without touching.
- Cover the shaped buns with a damp towel and let them rise for 45 minutes in a warm place. About 20 minutes into this rise, preheat your oven to 375°F. While the buns are rising, prepare the cross paste by whisking together 3/4 cup of flour and 1/2 cup of water in a small bowl, stirring until smooth and thick enough to pipe through a small round tip. The consistency should be like thick cake batter—you want it to hold its shape when piped but still flow smoothly from the piping bag.
- Once the buns have finished their second rise and the oven is preheated to 375°F, transfer the cross paste to a piping bag fitted with a small round tip. Carefully pipe a cross onto the top of each bun, starting from one side and dragging the tip through the center, then repeating perpendicular to create a complete cross. Place the baking dish in the preheated oven and bake for 28-35 minutes until the buns are deep golden brown and the crosses are set and slightly firm to the touch. I recommend checking them at the 28-minute mark since XL buns can vary in size—you're looking for a rich golden color all over.
- While the buns are still hot from the oven, quickly microwave the 5.5 ounces of apricot preserves (strained through a fine-mesh sieve to remove any fruit chunks) for about 1 minute until it becomes a pourable consistency. Working quickly, brush the warm apricot glaze generously over the tops and sides of each hot bun using a pastry brush. The heat from the buns will help the glaze set into a beautiful shine. Allow the buns to cool in the dish for at least 15 minutes before serving—this helps them firm up and hold their shape.


