I’ll be honest—when I first heard about garlic bread cinnamon rolls, I thought someone was playing a joke on me. Sweet cinnamon rolls, but make them savory? It sounded weird.
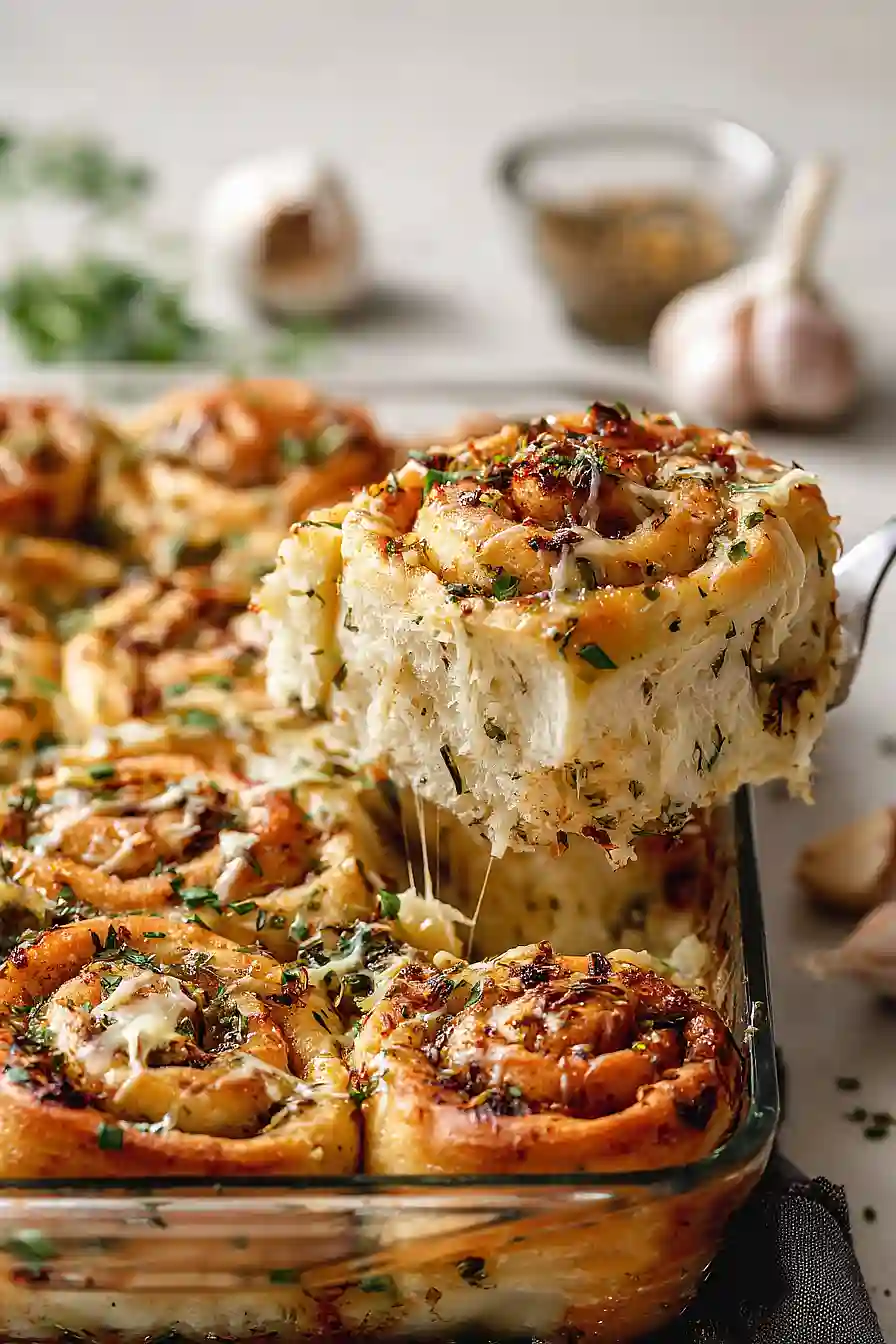
But then I actually tried making them, and everything clicked. They’ve got that same soft, fluffy spiral you love in regular cinnamon rolls, except instead of sugar and cinnamon, you’re getting butter, garlic, and herbs. It’s basically all the best parts of garlic bread, but in a fun pull-apart shape that makes everyone at the table way too excited.
The first time I served these, my family kept reaching for “just one more” until the whole pan was gone. Now they’re my go-to when I need a side dish that actually gets people talking.

Why You’ll Love These Garlic Bread Cinnamon Rolls
- Creative twist on two classics – These rolls combine the soft, fluffy texture of cinnamon rolls with the savory, garlicky goodness of garlic bread for a fun appetizer or side dish that’ll surprise everyone at the table.
- Impressive but doable – Sure, homemade rolls take some time, but the process is straightforward and the wow factor makes it totally worth it when you pull these beauties out of the oven.
- Packed with flavor – The herb-infused dough, garlic-butter filling, and parmesan cheese create layers of savory flavor in every bite.
- Perfect for gatherings – These make an amazing appetizer or side for dinner parties, potlucks, or holiday meals, and they’re guaranteed to be the first thing to disappear from the table.
What Kind of Butter Should I Use?
For this recipe, you’ll want to stick with unsalted butter so you can control the salt level in your dough and filling. Since you’re using butter in three different ways here – melted and cooled for the dough, softened for the filling, and melted for brushing on top – make sure you prep each portion accordingly before you start. Room temperature butter is key for the filling because it needs to spread easily without tearing your dough, so take it out of the fridge about 30-45 minutes before you plan to roll out your cinnamon rolls. Any standard supermarket butter will work great, though European-style butter with higher fat content can give you an even richer flavor if you want to splurge a little.
Options for Substitutions
While some ingredients are pretty essential here, you do have some wiggle room with a few swaps:
- Bread flour: All-purpose flour can work in a pinch, though your rolls might be slightly less chewy. Use the same amount and add an extra tablespoon or two if the dough seems too sticky.
- Fresh garlic: If you don’t have fresh garlic cloves for grating, you can use 2-3 teaspoons of jarred minced garlic or garlic paste instead. The flavor will be a bit milder but still tasty.
- Dried herbs: Feel free to swap the oregano, thyme, and rosemary with an Italian seasoning blend – use about 2 tablespoons total. You can also use fresh herbs if you have them, just triple the amount since dried herbs are more concentrated.
- Parmesan cheese blend: Regular parmesan works great, or try a mix of parmesan and mozzarella for extra meltiness. Asiago or pecorino romano are also good alternatives.
- Active dry yeast: Don’t substitute the yeast – it’s absolutely necessary for these rolls to rise properly and get that fluffy texture.
- Honey: Sugar works just as well here – use 1 tablespoon of granulated sugar to feed the yeast if you’re out of honey.
Watch Out for These Mistakes While Baking
The biggest mistake when making garlic bread cinnamon rolls is using water that’s too hot, which can kill the yeast – stick to 110°F (it should feel warm but not hot on your wrist) and if your yeast doesn’t foam up after 5 minutes, start over with fresh yeast.
Another common error is adding too much flour too quickly, which creates tough, dense rolls instead of soft ones – add that final 1/4 cup gradually and only if the dough is still sticky, since you want it slightly tacky to the touch.
When spreading the garlic butter filling, make sure it’s softened but not melted, as melted butter will just run off the dough and pool at the bottom of your pan.
Finally, don’t skip the second rise after rolling – those 30 minutes allow the rolls to puff up and become light and fluffy, so resist the urge to pop them straight into the oven.
What to Serve With Garlic Bread Cinnamon Rolls?
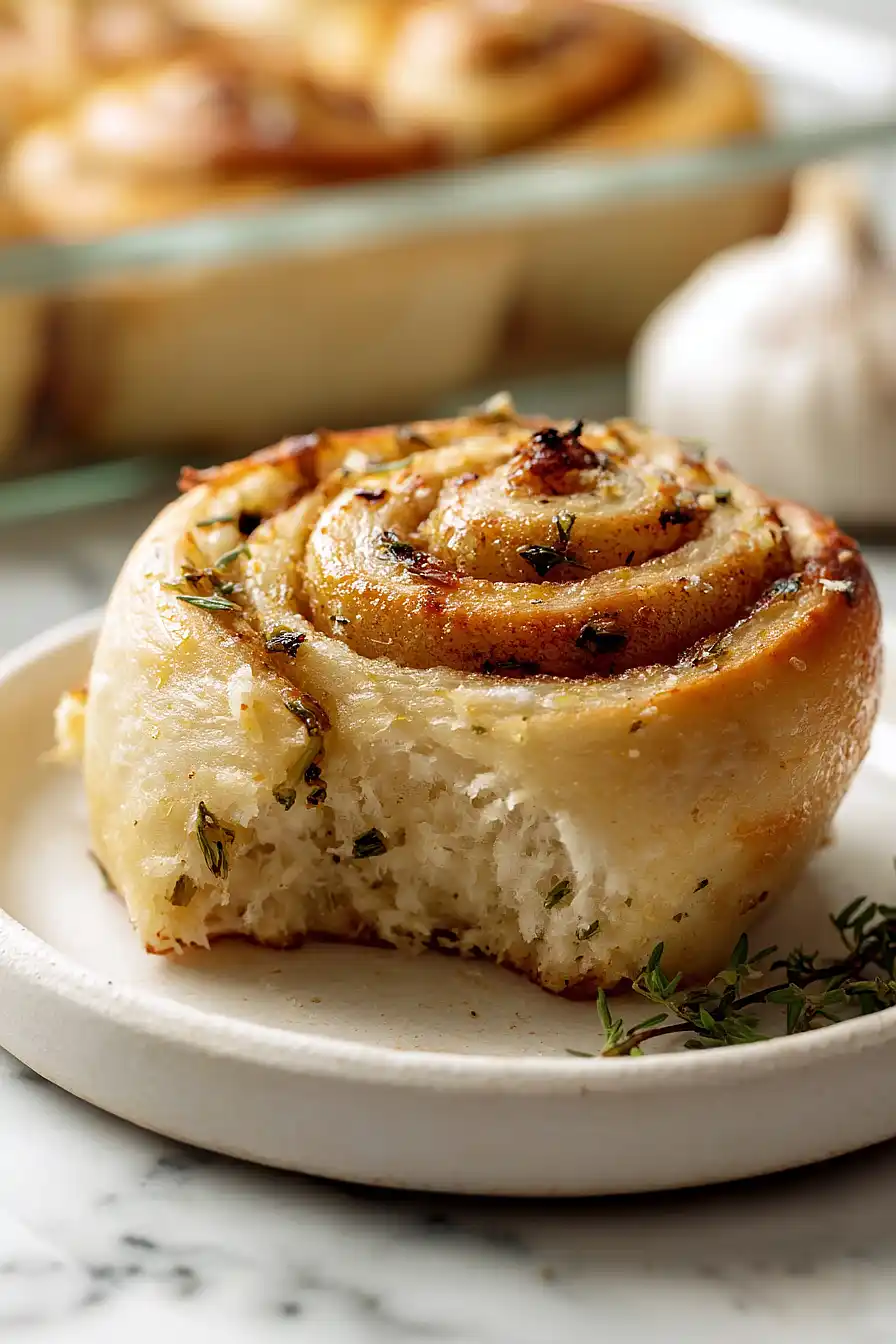
These garlic bread cinnamon rolls are perfect alongside a big bowl of pasta with marinara or meat sauce – they’re basically fancy garlic bread in roll form, so they work with anything Italian. I love serving them with a simple Caesar salad or a tomato-based soup like minestrone, where you can tear off pieces and dip them right in. They also make a great appetizer before dinner, or you can set them out on a platter for game day or parties with some marinara sauce on the side for dipping. If you’re going all out, pair them with lasagna or baked ziti for the kind of meal that’ll have everyone asking for seconds.
Storage Instructions
Store: Keep your garlic bread cinnamon rolls in an airtight container at room temperature for up to 2 days, or in the fridge for up to 5 days. They’re best enjoyed fresh, but they’ll still taste great after a day or two!
Freeze: These rolls freeze really well for up to 3 months. Let them cool completely, then wrap them tightly in plastic wrap and place in a freezer-safe bag. You can freeze them before or after baking, depending on when you want to enjoy them.
Reheat: To bring back that fresh-baked taste, warm them in a 350°F oven for about 10 minutes, or microwave individual rolls for 20-30 seconds. If they’re frozen, let them thaw in the fridge overnight first, then reheat until warmed through and the cheese gets melty again.
| Preparation Time | 30-40 minutes |
| Cooking Time | 25-35 minutes |
| Total Time | 210-240 minutes |
| Level of Difficulty | Medium |
| Servings | 12 rolls |
Estimated Nutrition
Estimated nutrition for the whole recipe (without optional ingredients):
- Calories: 2500-2700
- Protein: 60-70 g
- Fat: 110-120 g
- Carbohydrates: 315-340 g
Ingredients
For the dough:
- 1 cup water (warm to the touch, about 110°F)
- 1 tbsp honey
- 2 1/4 tsp yeast (I always use Fleischmann’s RapidRise)
- 3 tbsp butter (melted and cooled slightly)
- 1 tbsp oregano
- 1 tsp thyme
- 1 tbsp rosemary
- 1 1/2 tsp garlic powder
- 3 1/4 cups flour (I prefer King Arthur bread flour for better chew)
- 2 1/4 tsp salt
For the filling:
- 6 tbsp butter (softened to room temperature, about 70°F)
- 8 cloves garlic (freshly minced for best flavor)
- 1 tsp salt
- 1 1/4 cups parmesan
- 1/2 tsp red pepper flakes
For the topping:
- 3 tbsp butter
- 1/2 tsp garlic powder
- 1 tsp parsley (finely chopped, about 1/8-inch pieces)
Step 1: Prepare the Dough and Mix Wet Ingredients
- 1 cup warm water
- 1 tbsp honey
- 2 1/4 tsp yeast
- 3 tbsp melted butter
- 1 tbsp oregano
- 1 tsp thyme
- 1 tbsp rosemary
- 1 1/2 tsp garlic powder
In a large bowl, combine warm water, honey, and yeast.
Let sit for 5 minutes until foamy and activated—this ensures your yeast is alive and the dough will rise properly.
Add the melted butter, oregano, thyme, rosemary, and garlic powder, stirring until well combined.
These aromatic herbs will infuse the entire dough with savory garlic bread flavor from the inside out.
Step 2: Build and Knead the Dough
- wet ingredient mixture from Step 1
- 3 1/4 cups flour
- 2 1/4 tsp salt
- oil for coating
Mix in 2 cups of flour and salt to the wet ingredient mixture from Step 1, stirring for 2 minutes until mostly combined.
Add the remaining 1 1/4 cups flour in stages, mixing for 2 minutes, then switch to medium speed and knead for 5 minutes until the dough becomes smooth and elastic.
The dough should be slightly sticky but hold together—I prefer King Arthur bread flour because it creates a better chew in the final rolls.
Lightly oil the dough and place it in the oiled bowl, turning to coat all sides.
Step 3: First Rise
Cover the bowl with a damp cloth or plastic wrap and let the dough rise at room temperature for 2 hours until doubled in size.
This slow rise develops deeper flavor in the dough and gives the yeast time to work effectively.
Step 4: Roll Out and Fill the Dough
- risen dough from Step 3
- 6 tbsp softened butter
- 8 cloves garlic
- 1 tsp salt
- 1/2 tsp red pepper flakes
- 1 1/4 cups parmesan
Turn the risen dough from Step 3 onto a lightly floured surface and roll it into an 18 x 12 inch rectangle.
In a small bowl, combine softened butter, minced garlic, salt, and red pepper flakes to create the savory filling.
Spread this mixture evenly over the dough, leaving a small border.
I use freshly minced garlic rather than pre-minced because the flavor is brighter and more pronounced.
Sprinkle the parmesan cheese evenly over the garlic-butter layer.
Step 5: Shape and Second Rise
- filled dough from Step 4
Cut the filled dough into 12 equal strips, then roll each strip tightly from one end to create a spiral cinnamon roll shape.
Place the rolls seam-side down in a greased 9×13 inch baking dish, spacing them about 1 inch apart so they have room to expand.
Cover with a damp cloth and let rise at room temperature for 30 minutes until they’ve puffed up and are touching each other slightly.
Step 6: Bake the Rolls
- rolls from Step 5
- 3 tbsp butter
- 1/2 tsp garlic powder
- 1 tsp parsley
Preheat your oven to 350°F.
Bake the rolls from Step 5 for 28-33 minutes until they’re golden brown on top and a toothpick inserted in the center comes out clean.
While the rolls bake, prepare the finishing butter by melting 3 tbsp butter with garlic powder and parsley—this will add a final layer of garlic bread flavor to the rolls.
Step 7: Finish and Serve
- baked rolls from Step 6
- garlic-parsley butter from Step 6
Remove the baked rolls from the oven and immediately brush generously with the garlic-parsley butter from Step 6 while they’re still hot.
This final step seals in moisture and ensures every bite has that authentic garlic bread flavor.
Serve warm and enjoy the perfect marriage of cinnamon roll texture with savory garlic bread seasoning.
Aromatic Garlic Bread Cinnamon Rolls
Ingredients
For the dough
- 1 cup water (warm to the touch, about 110°F)
- 1 tbsp honey
- 2 1/4 tsp yeast (I always use Fleischmann's RapidRise)
- 3 tbsp butter (melted and cooled slightly)
- 1 tbsp oregano
- 1 tsp thyme
- 1 tbsp rosemary
- 1 1/2 tsp garlic powder
- 3 1/4 cups flour (I prefer King Arthur bread flour for better chew)
- 2 1/4 tsp salt
For the filling
- 6 tbsp butter (softened to room temperature, about 70°F)
- 8 cloves garlic (freshly minced for best flavor)
- 1 tsp salt
- 1 1/4 cups parmesan
- 1/2 tsp red pepper flakes
For the topping
- 3 tbsp butter
- 1/2 tsp garlic powder
- 1 tsp parsley (finely chopped, about 1/8-inch pieces)
Instructions
- In a large bowl, combine warm water, honey, and yeast. Let sit for 5 minutes until foamy and activated—this ensures your yeast is alive and the dough will rise properly. Add the melted butter, oregano, thyme, rosemary, and garlic powder, stirring until well combined. These aromatic herbs will infuse the entire dough with savory garlic bread flavor from the inside out.
- Mix in 2 cups of flour and salt to the wet ingredient mixture from Step 1, stirring for 2 minutes until mostly combined. Add the remaining 1 1/4 cups flour in stages, mixing for 2 minutes, then switch to medium speed and knead for 5 minutes until the dough becomes smooth and elastic. The dough should be slightly sticky but hold together—I prefer King Arthur bread flour because it creates a better chew in the final rolls. Lightly oil the dough and place it in the oiled bowl, turning to coat all sides.
- Cover the bowl with a damp cloth or plastic wrap and let the dough rise at room temperature for 2 hours until doubled in size. This slow rise develops deeper flavor in the dough and gives the yeast time to work effectively.
- Turn the risen dough from Step 3 onto a lightly floured surface and roll it into an 18 x 12 inch rectangle. In a small bowl, combine softened butter, minced garlic, salt, and red pepper flakes to create the savory filling. Spread this mixture evenly over the dough, leaving a small border. I use freshly minced garlic rather than pre-minced because the flavor is brighter and more pronounced. Sprinkle the parmesan cheese evenly over the garlic-butter layer.
- Cut the filled dough into 12 equal strips, then roll each strip tightly from one end to create a spiral cinnamon roll shape. Place the rolls seam-side down in a greased 9x13 inch baking dish, spacing them about 1 inch apart so they have room to expand. Cover with a damp cloth and let rise at room temperature for 30 minutes until they've puffed up and are touching each other slightly.
- Preheat your oven to 350°F. Bake the rolls from Step 5 for 28-33 minutes until they're golden brown on top and a toothpick inserted in the center comes out clean. While the rolls bake, prepare the finishing butter by melting 3 tbsp butter with garlic powder and parsley—this will add a final layer of garlic bread flavor to the rolls.
- Remove the baked rolls from the oven and immediately brush generously with the garlic-parsley butter from Step 6 while they're still hot. This final step seals in moisture and ensures every bite has that authentic garlic bread flavor. Serve warm and enjoy the perfect marriage of cinnamon roll texture with savory garlic bread seasoning.







