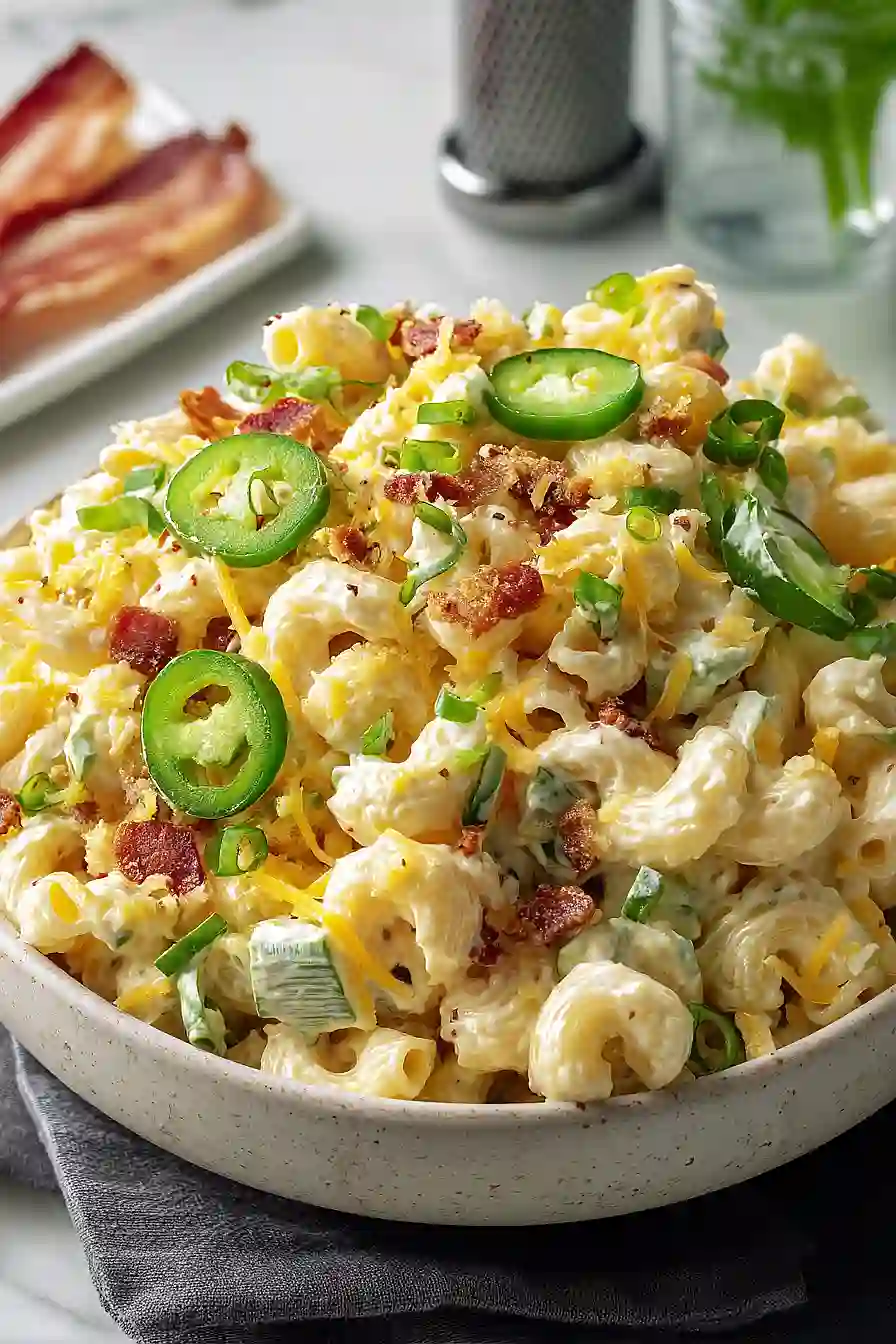
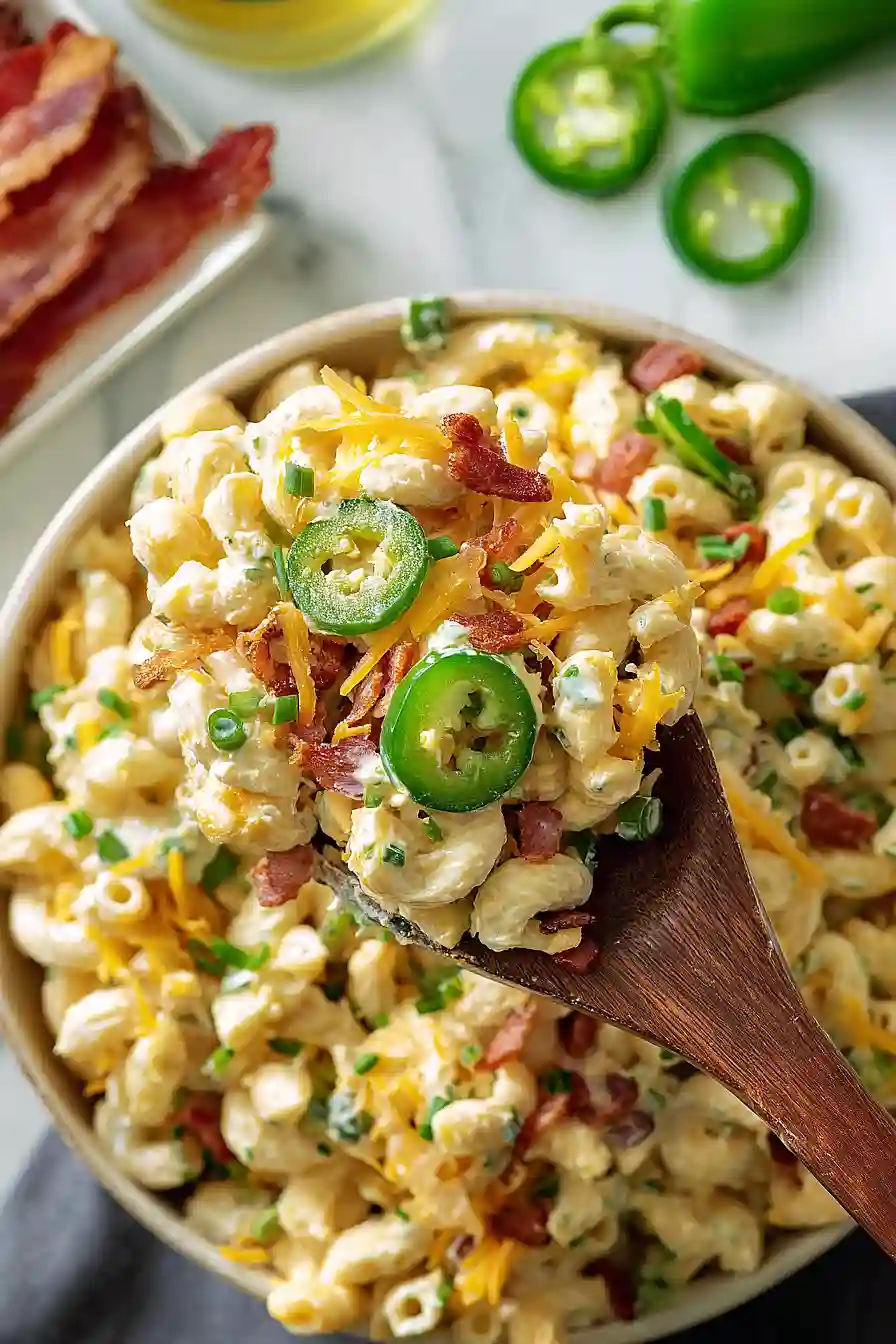
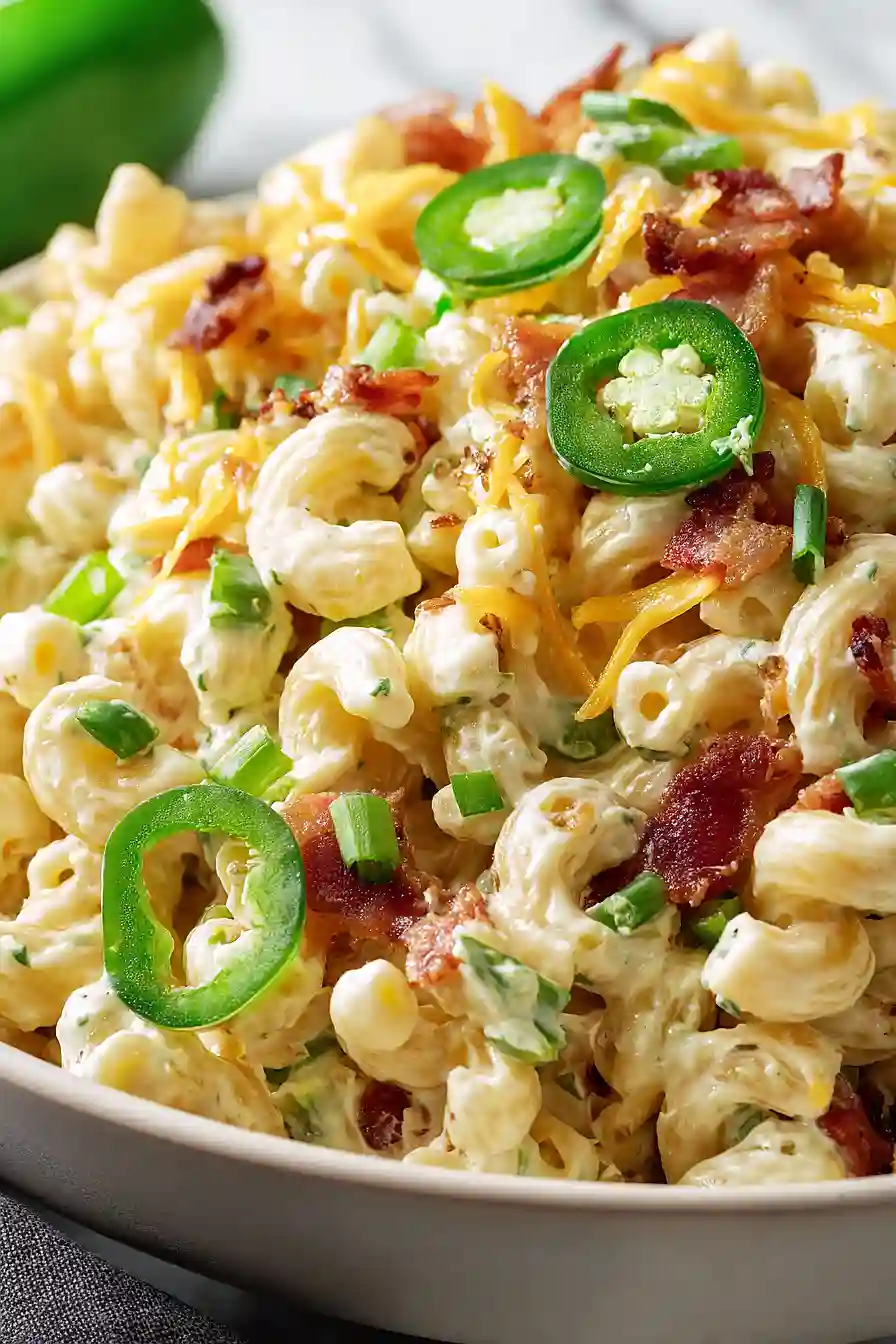
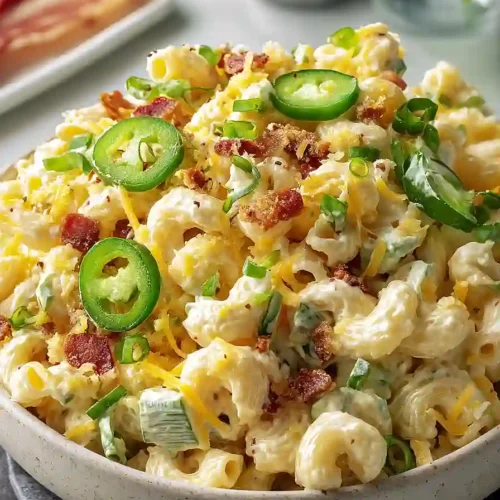
If you ask me, jalapeño poppers were meant to become a pasta salad.
This creamy side dish takes everything you love about the classic appetizer and turns it into a crowd-pleasing salad. Tangy cream cheese and sour cream create a rich dressing that coats every bite of tender elbow macaroni.
Fresh jalapeños bring the heat while crispy bacon adds a smoky crunch. Sharp cheddar cheese and chopped scallions round out the flavors, making each forkful just as good as the last.
It’s the kind of dish that disappears fast at potlucks and cookouts, perfect for anyone who likes a little kick in their pasta salad.
Why You’ll Love This Jalapeño Popper Pasta Salad
- All the flavors of jalapeño poppers without the frying – You get that creamy, spicy, cheesy goodness in an easy pasta salad form that’s perfect for potlucks and barbecues.
- Quick and easy to make – This comes together in under an hour, and most of that time is just waiting for the pasta to cook and cool.
- Crowd-pleasing side dish – The combination of bacon, cheese, and just the right amount of heat makes this a hit at every gathering, and it’s always one of the first dishes to disappear.
- Make-ahead friendly – You can prepare this pasta salad a day in advance, making party prep so much easier since the flavors actually get better as they sit together in the fridge.
What Kind of Jalapeños Should I Use?
You’ve got a few options when it comes to jalapeños for this pasta salad, and honestly, they all work great. Canned diced jalapeños are super convenient and give you a mild, consistent heat that’s perfect if you’re serving a crowd. Pickled jalapeños add a nice tangy kick that plays well with the creamy dressing, while fresh jalapeños will give you the brightest flavor and let you control the heat level by removing the seeds and membranes if you want. If you go the fresh route, just dice them up small so they distribute evenly throughout the salad, and remember to wash your hands well after handling them!
Options for Substitutions
This pasta salad is pretty forgiving when it comes to swaps, so feel free to work with what you have:
- Elbow pasta: Any short pasta shape works great here – try rotini, shells, or penne. They all hold onto that creamy dressing nicely.
- Mayonnaise: You can replace some or all of the mayo with Greek yogurt for a lighter version. Just keep in mind it’ll have a tangier taste and slightly thinner consistency.
- Sour cream: Plain Greek yogurt makes a good swap here too, or you can use additional cream cheese thinned with a splash of milk.
- Jalapeños: The recipe already mentions you can use canned, pickled, or fresh jalapeños. If using fresh, you’ll want to mince them finely and maybe add a splash more vinegar to mimic that pickled tang.
- Bacon: Turkey bacon works if you prefer it, or skip the meat entirely for a vegetarian version. You could also try crumbled cooked sausage for a different flavor.
- Cheese blend: Any melty cheese you like will work – all cheddar, all Pepper Jack, Colby Jack, or even Monterey Jack. Just stick with something that shreds easily.
- Apple cider vinegar: White vinegar or white wine vinegar can step in without changing the flavor much.
Watch Out for These Mistakes While Cooking
The biggest mistake you can make with this pasta salad is adding the creamy dressing to piping hot pasta, which will cause the cream cheese to become too runny and the mayonnaise to separate – let your pasta cool for about 10 minutes after draining so it’s just warm to the touch.
Another common error is under-salting the pasta water, so make sure it tastes like the ocean before adding your elbows, as this is your only chance to season the pasta itself.
Don’t skip draining your jalapeños well (and even pat them dry with a paper towel), because excess liquid will water down your dressing and make the whole salad soupy.
Finally, resist the urge to serve this right away – the full 2-hour chill time lets the flavors blend together and allows the pasta to soak up the dressing, making each bite way more flavorful than if you dig in early.
What to Serve With Jalapeño Popper Pasta Salad?
This pasta salad is pretty hearty on its own, so it pairs best with grilled meats like chicken breasts, burgers, or hot dogs at your next cookout. Since it’s got a bit of a kick from the jalapeños, I like serving it alongside something simple and cooling like watermelon slices or a fresh cucumber salad. It’s also great as a side dish for BBQ ribs or pulled pork sandwiches, where the creamy, spicy flavors complement the smoky meat really nicely. If you’re keeping things casual, just throw some tortilla chips on the side for scooping, and you’ve got yourself a complete meal.
Storage Instructions
Store: Keep your jalapeño popper pasta salad in an airtight container in the fridge for up to 3 days. The flavors actually get better as they sit together, so it’s great for making a day ahead for parties or potlucks. You might need to stir in a splash of milk or extra mayo before serving if it seems a bit dry.
Make Ahead: This pasta salad is perfect for prepping ahead! You can make it up to 24 hours in advance and store it covered in the refrigerator. Just wait to add the bacon until right before serving so it stays nice and crispy.
Serve: This salad is best served cold or at room temperature. If you’re taking it to a gathering, keep it chilled in a cooler until you’re ready to eat, especially since it has mayo and sour cream in the dressing.
| Preparation Time | 15-20 minutes |
| Cooking Time | 10-15 minutes |
| Total Time | 45-60 minutes |
| Level of Difficulty | Easy |
| Servings | 8 servings |
Estimated Nutrition
Estimated nutrition for the whole recipe (without optional ingredients):
- Calories: 3250-3500
- Protein: 85-100 g
- Fat: 200-220 g
- Carbohydrates: 270-290 g
Ingredients
For the dressing:
- 3 oz cream cheese (softened to room temperature, about 70°F)
- 3/4 cup mayo (I prefer Hellmann’s mayonnaise)
- 1/2 cup sour cream
- 1 1/2 tsp cider vinegar
- 1 tbsp jalapeño brine (from the jar)
- 3/4 tsp pepper
- 1/2 tsp garlic powder
- 1/2 tsp smoked paprika
For the pasta salad:
- 16 oz macaroni (I always use Barilla elbow pasta)
- 4 oz fresh jalapenos (finely diced into 1/4-inch pieces)
- 4 scallions (chopped thin)
- 10 slices bacon (cooked crisp and crumbled into 1/2-inch bits)
- 1 1/2 cups sharp cheddar (shredded)
Step 1: Prepare Ingredients and Cook Pasta
- 16 oz macaroni
- 10 slices bacon
- 4 oz fresh jalapeños
- 4 scallions
- 1 1/2 cups sharp cheddar
Start by bringing a large pot of salted water to a boil—this will take about 10 minutes.
While the water heats, prepare your mise en place: cook the bacon in a skillet over medium heat until crisp (about 8-10 minutes), then crumble it into 1/2-inch pieces and set aside.
Dice the fresh jalapeños into 1/4-inch pieces, chop the scallions thin, and shred the cheddar cheese.
Once the water is boiling, add the elbow pasta and cook according to package directions until al dente (usually 8-9 minutes), then drain well and set aside while still warm.
Step 2: Build the Creamy Dressing Base
- 3 oz cream cheese
- 3/4 cup mayo
- 1/2 cup sour cream
- 1 1/2 tsp cider vinegar
- 1 tbsp jalapeño brine
- 3/4 tsp pepper
- 1/2 tsp garlic powder
- 1/2 tsp smoked paprika
In a large mixing bowl, combine the softened cream cheese, mayo, sour cream, cider vinegar, jalapeño brine, pepper, garlic powder, and smoked paprika.
Whisk everything together until smooth and well combined—this base should be creamy and uniform with no lumps.
I like to use a whisk rather than a spoon here because it incorporates the ingredients more evenly and creates a silkier dressing that coats the pasta better.
Step 3: Combine Pasta with Dressing
- warm cooked pasta from Step 1
- creamy dressing base from Step 2
Add the warm pasta from Step 1 directly into the dressing bowl.
The warmth of the pasta helps it absorb the flavors more effectively.
Stir everything together thoroughly, making sure each piece of pasta is coated with the creamy dressing and no dry pasta remains at the bottom of the bowl.
Step 4: Fold in Vegetables, Bacon, and Cheese
- diced jalapeños from Step 1
- chopped scallions from Step 1
- crumbled bacon from Step 1
- shredded cheddar from Step 1
Now fold in the diced jalapeños, chopped scallions, crumbled bacon, and shredded cheddar cheese from Step 1.
Use a gentle folding motion rather than aggressive stirring to keep the ingredients evenly distributed and prevent the cheese from clumping.
I prefer to add the cheese last and fold it in gently so it maintains its texture and doesn’t become overly mixed into the dressing.
Step 5: Chill and Serve
Transfer the pasta salad to a serving bowl or storage container and refrigerate for at least 2 hours before serving.
This chilling time allows the flavors to meld together and the dressing to set slightly, creating a more cohesive dish.
Give it a gentle stir before serving, and adjust the seasoning with a pinch of salt or pepper if needed.
Cheesy Jalapeño Popper Pasta Salad
Ingredients
For the dressing
- 3 oz cream cheese (softened to room temperature, about 70°F)
- 3/4 cup mayo (I prefer Hellmann's mayonnaise)
- 1/2 cup sour cream
- 1 1/2 tsp cider vinegar
- 1 tbsp jalapeño brine (from the jar)
- 3/4 tsp pepper
- 1/2 tsp garlic powder
- 1/2 tsp smoked paprika
For the pasta salad
- 16 oz macaroni (I always use Barilla elbow pasta)
- 4 oz fresh jalapenos (finely diced into 1/4-inch pieces)
- 4 scallions (chopped thin)
- 10 slices bacon (cooked crisp and crumbled into 1/2-inch bits)
- 1 1/2 cups sharp cheddar (shredded)
Instructions
- Start by bringing a large pot of salted water to a boil—this will take about 10 minutes. While the water heats, prepare your mise en place: cook the bacon in a skillet over medium heat until crisp (about 8-10 minutes), then crumble it into 1/2-inch pieces and set aside. Dice the fresh jalapeños into 1/4-inch pieces, chop the scallions thin, and shred the cheddar cheese. Once the water is boiling, add the elbow pasta and cook according to package directions until al dente (usually 8-9 minutes), then drain well and set aside while still warm.
- In a large mixing bowl, combine the softened cream cheese, mayo, sour cream, cider vinegar, jalapeño brine, pepper, garlic powder, and smoked paprika. Whisk everything together until smooth and well combined—this base should be creamy and uniform with no lumps. I like to use a whisk rather than a spoon here because it incorporates the ingredients more evenly and creates a silkier dressing that coats the pasta better.
- Add the warm pasta from Step 1 directly into the dressing bowl. The warmth of the pasta helps it absorb the flavors more effectively. Stir everything together thoroughly, making sure each piece of pasta is coated with the creamy dressing and no dry pasta remains at the bottom of the bowl.
- Now fold in the diced jalapeños, chopped scallions, crumbled bacon, and shredded cheddar cheese from Step 1. Use a gentle folding motion rather than aggressive stirring to keep the ingredients evenly distributed and prevent the cheese from clumping. I prefer to add the cheese last and fold it in gently so it maintains its texture and doesn't become overly mixed into the dressing.
- Transfer the pasta salad to a serving bowl or storage container and refrigerate for at least 2 hours before serving. This chilling time allows the flavors to meld together and the dressing to set slightly, creating a more cohesive dish. Give it a gentle stir before serving, and adjust the seasoning with a pinch of salt or pepper if needed.


