Finding a comforting, flavorful dinner that works for everyone at the table can feel impossible, especially when you’re dealing with gluten sensitivities or celiac disease. Traditional jambalaya recipes often hide gluten in unexpected places like store-bought seasonings or thickeners, which means this Louisiana classic is usually off-limits for gluten-free eaters.
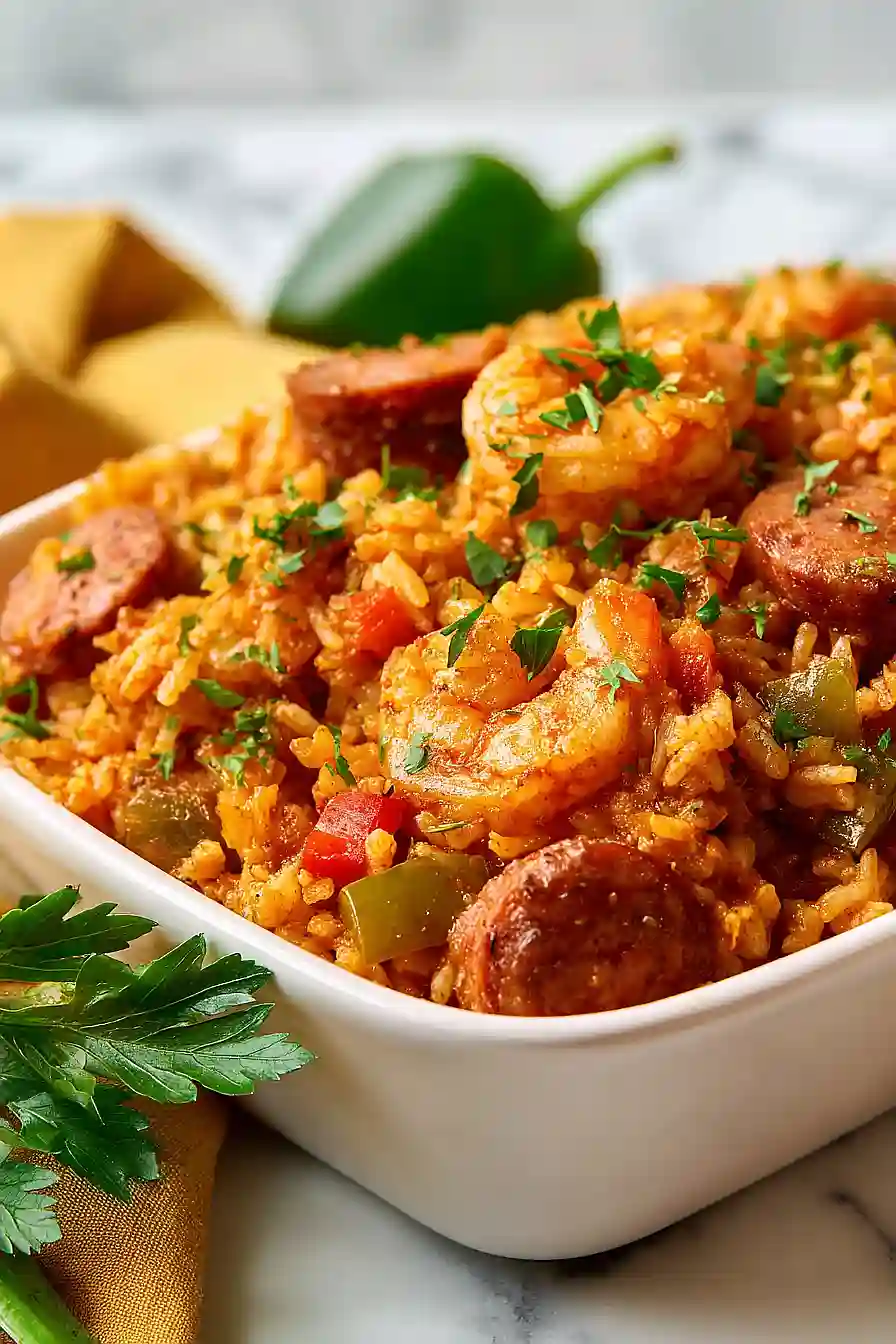
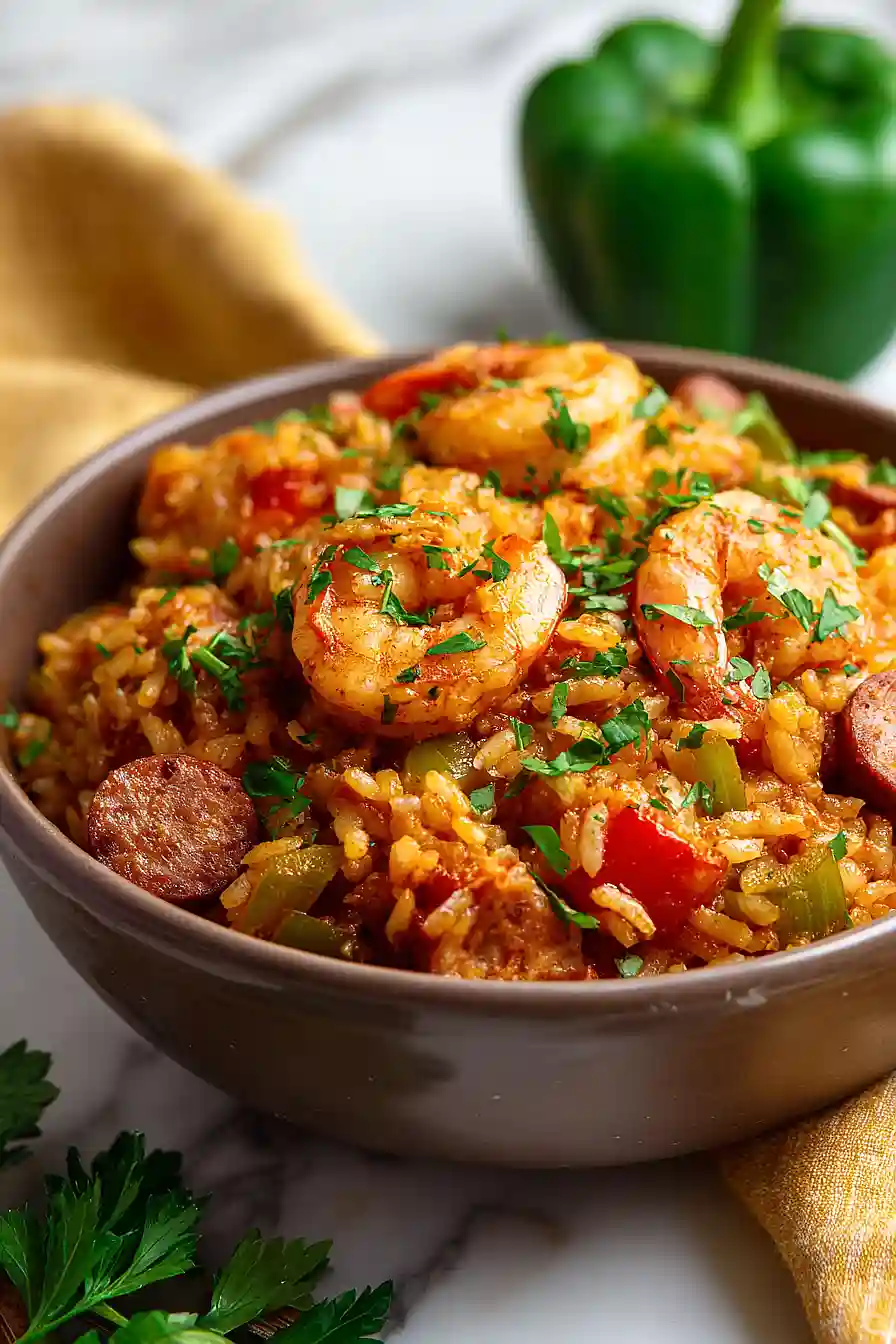
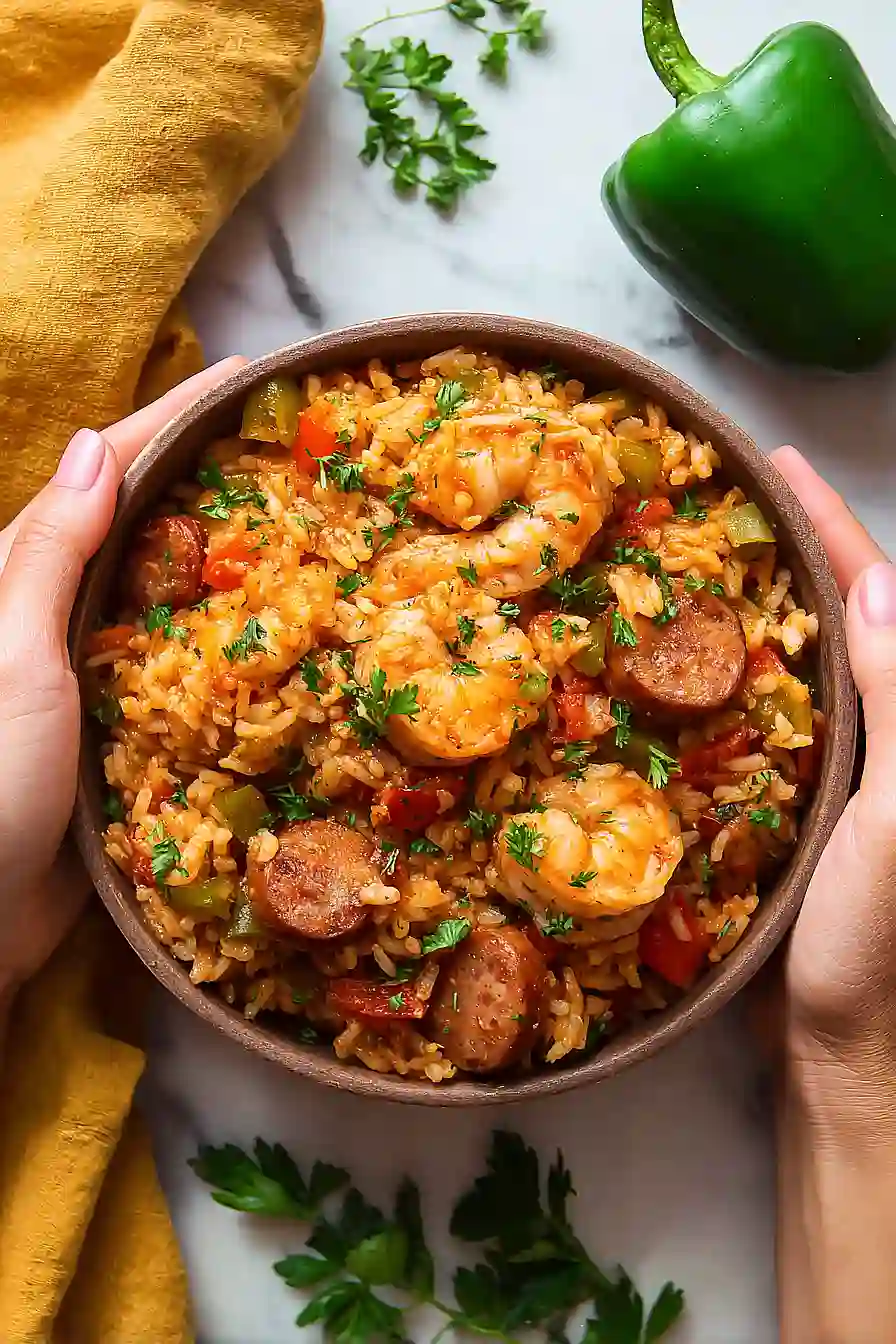
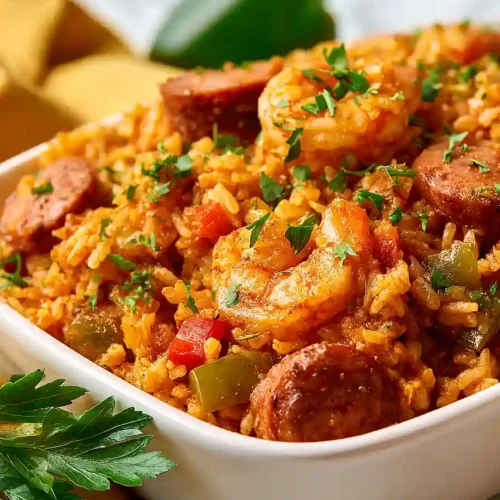
Thankfully, this gluten-free jambalaya delivers all the bold, smoky flavors you crave without any of the gluten. It’s packed with tender shrimp, savory smoked sausage, and perfectly seasoned rice, plus it comes together in one pot for easy cleanup on busy weeknights.
Why You’ll Love This Jambalaya
- Low FODMAP and gluten-free friendly – This recipe is perfect if you’re following a low FODMAP diet or avoiding gluten, so you can enjoy classic Cajun flavors without the digestive discomfort.
- Ready in under 45 minutes – You’ll have a flavorful, restaurant-quality meal on the table in less time than it takes to order takeout.
- One-pot meal – Everything cooks together in a single pot, which means less cleanup and more time to relax after dinner.
- Packed with protein – The combination of shrimp and sausage makes this a satisfying, protein-rich dinner that will keep you full.
- Bold Cajun flavors – The Cajun seasoning, smoked sausage, and tomatoes create that authentic Louisiana taste you’re craving, even with dietary modifications.
What Kind of Smoked Sausage Should I Use?
For jambalaya, you’ll want a good quality smoked sausage that packs plenty of flavor. Traditional options include andouille sausage, which has a nice smoky kick, or kielbasa if you prefer something a bit milder. If you’re following a low FODMAP diet like this recipe suggests, make sure to check the ingredient label carefully since many sausages contain garlic or onion powder. You can find low FODMAP options at specialty stores or online, or ask your local butcher if they make any sausages without those ingredients. In a pinch, plain smoked turkey sausage or chicken sausage can work too, though they’ll give you a lighter flavor overall.
Options for Substitutions
This jambalaya recipe offers some room for swaps, though a few ingredients are must-haves:
- Shrimp: If you’re not a fan of shrimp or want to skip it, you can add more sausage or use diced chicken thighs instead. Just cook the chicken through before adding the rice.
- Low FODMAP smoked sausage: Regular andouille or kielbasa sausage works great if you’re not following a low FODMAP diet. You can also use chicken sausage for a lighter option.
- Long grain white rice: This one’s important – stick with long grain white rice for authentic jambalaya texture. Other rice types like jasmine or basmati can work, but avoid short grain or brown rice as they’ll change the consistency and cooking time.
- Garlic-infused olive oil: If you’re not following a low FODMAP diet, regular olive oil plus 3-4 minced garlic cloves will give you even more flavor.
- Tamari sauce: Regular soy sauce works fine if gluten isn’t a concern. In a pinch, Worcestershire sauce can substitute, though it’ll add a slightly different flavor profile.
- Green bell pepper and celery: These are part of the classic jambalaya ‘holy trinity’ and really shouldn’t be skipped, as they provide the base flavor for the dish.
Watch Out for These Mistakes While Cooking
The biggest mistake when making jambalaya is not scraping the bottom of the pot after adding the broth, which can trigger the dreaded “burn” notice on your pressure cooker – make sure to get every bit of stuck-on rice and tomato paste loosened before sealing the lid.
Another common error is adding the shrimp at the beginning, which turns them rubbery and overcooked by the time everything’s done, so always stir them in at the end to let the residual heat warm them through gently.
Don’t skip the natural pressure release time either, as opening the valve immediately can result in undercooked, crunchy rice that ruins the whole dish.
Finally, if your jambalaya seems too thick after cooking, stir in a splash of extra broth to loosen it up – the rice continues absorbing liquid as it sits, so it’s better to have it slightly wetter than you think it needs to be.
What to Serve With Gluten Free Jambalaya?
Jambalaya is pretty much a complete meal on its own since it’s packed with protein, rice, and veggies, but I love serving it with a simple side salad dressed with a light vinaigrette to balance out the spicy, rich flavors. Cornbread is another great option if you can find or make a gluten-free version – it’s perfect for soaking up any extra sauce at the bottom of your bowl. For something fresh and crunchy, try some pickled vegetables or coleslaw on the side, which adds a nice contrast to the warm, smoky dish. If you want to keep things really easy, just serve it with some crusty gluten-free bread and call it a day!
Storage Instructions
Store: Keep your leftover jambalaya in an airtight container in the fridge for up to 4 days. The flavors actually get better as they sit together, so it makes a great make-ahead meal for busy weeknights.
Freeze: This jambalaya freezes really well for up to 3 months. Just portion it out into freezer-safe containers or bags, and you’ll have a quick dinner ready whenever you need it. The rice and sausage hold up great, though the shrimp might be slightly softer after freezing.
Reheat: Warm it up on the stovetop over medium-low heat with a splash of broth or water to keep it from drying out. You can also microwave individual portions for 2-3 minutes, stirring halfway through to heat evenly.
| Preparation Time | 15-20 minutes |
| Cooking Time | 20-25 minutes |
| Total Time | 35-45 minutes |
| Level of Difficulty | Medium |
| Servings | 6 servings |
Estimated Nutrition
Estimated nutrition for the whole recipe (without optional ingredients):
- Calories: 1600-1800
- Protein: 65-75 g
- Fat: 80-90 g
- Carbohydrates: 150-170 g
Ingredients
For the shrimp and sausage:
- 1 lb shrimp (peeled and deveined)
- 14 oz smoked sausage (thinly sliced)
- 2 1/2 tsp cajun seasoning
- 1/2 tsp smoked paprika
For the base:
- 2 tbsp garlic-infused olive oil
- 1 1/4 cups bell pepper (diced into 1/2-inch pieces)
- 1/2 cup leek leaves (finely chopped)
- 1 1/2 celery stalks (sliced)
- 1 cup long-grain white rice
- 1 1/2 tbsp tomato paste
- 2 tsp cajun seasoning
- 1 3/4 cups chicken bone broth
- 14.5 oz tomatoes (crushed or petite diced with juice)
- 1 tbsp tamari
- 1 bay leaf
- 2 tbsp fresh parsley (chopped for garnish)
Step 1: Prepare Ingredients and Season the Proteins
- 1 lb shrimp
- 14 oz smoked sausage
- 2 tsp cajun seasoning
- 1 1/4 cups bell pepper
- 1/2 cup leek leaves
- 1 1/2 celery stalks
- 2 tbsp garlic-infused olive oil
Pat the shrimp dry with paper towels and season with 1 teaspoon of Cajun seasoning, setting them aside on a plate.
Season the sliced smoked sausage with the remaining 1 teaspoon of Cajun seasoning and set aside separately.
Having your proteins prepped and seasoned ensures they cook evenly and allows the seasoning to adhere better when they hit the hot oil.
Dice the bell pepper into 1/2-inch pieces, finely chop the leek leaves, slice the celery stalks, and mince the garlic or measure out the garlic-infused oil—this mise en place keeps your cooking efficient and prevents scrambling once you start.
Step 2: Sear the Shrimp and Sausage
- 1 lb shrimp
- 14 oz smoked sausage
- 2 tbsp garlic-infused olive oil
Heat the garlic-infused olive oil in a large pot or Dutch oven over medium-high heat until it shimmers.
Add the seasoned shrimp and sear for about 5 minutes, flipping halfway through until they turn pink and opaque, then remove to a plate.
In the same pot, brown the seasoned sausage for about 1 minute per side to develop color and render some fat, then remove to another plate.
I like to cook the shrimp first because it cooks faster and won’t overcook while you’re browning the sausage—this keeps everything tender and flavorful.
Step 3: Build the Aromatic Base
- 1 1/4 cups bell pepper
- 1/2 cup leek leaves
- 1 1/2 celery stalks
- 1 1/2 tbsp tomato paste
- 2 tsp cajun seasoning
In the same pot with the remaining oil and fond (browned bits), add the diced bell pepper, chopped leek leaves, and sliced celery.
Sauté over medium heat for 2 minutes, stirring occasionally, until the vegetables soften slightly and release their aromatics—this creates the flavor foundation of your jambalaya.
Stir in the tomato paste and the remaining 2 teaspoons of Cajun seasoning, cooking for 1 minute while stirring constantly to distribute the seasoning and allow the tomato paste to caramelize slightly.
Step 4: Toast the Rice and Deglaze
- 1 cup long-grain white rice
- 1 3/4 cups chicken bone broth
Add the long-grain white rice to the pot and stir constantly for about 1 minute, allowing each grain to toast lightly and absorb the flavorful oil—this adds a subtle nutty dimension and prevents the rice from becoming mushy.
Pour in the chicken bone broth and use a wooden spoon to scrape up all the browned bits from the bottom of the pot, stirring well to combine.
Step 5: Add Remaining Ingredients and Pressure Cook
- 14.5 oz tomatoes
- 1 tbsp tamari
- 1 bay leaf
- browned sausage from Step 2
Stir in the crushed or petite diced tomatoes with their juice and the tamari (or soy sauce), then nestle the bay leaf on top of the mixture—don’t stir it in, as it will be easier to find and remove later.
Return the browned sausage to the pot and stir to combine all ingredients evenly.
If using a pressure cooker, seal the lid and cook on high pressure for 5 minutes.
If cooking on the stovetop, bring to a boil, then reduce heat to low, cover partially, and simmer for 18-20 minutes until the rice is tender and the liquid is mostly absorbed.
Step 6: Release Pressure and Finish with Shrimp
- cooked shrimp from Step 2
- 2 tbsp fresh parsley
If pressure cooking, allow the pressure to release naturally for 8 minutes, then carefully release any remaining pressure according to your cooker’s instructions.
Remove and discard the bay leaf, then gently stir the jambalaya to fluff the rice.
Add the cooked shrimp from Step 2 back into the pot and stir gently to combine without breaking apart the shrimp—they only need to warm through, about 1 minute.
For a brighter finish, I always add fresh parsley at the end rather than during cooking, as it preserves its vibrant color and fresh herbal notes.
Easy Gluten Free Jambalaya
Ingredients
For the shrimp and sausage
- 1 lb shrimp (peeled and deveined)
- 14 oz smoked sausage (thinly sliced)
- 2 1/2 tsp cajun seasoning
- 1/2 tsp smoked paprika
For the base
- 2 tbsp garlic-infused olive oil
- 1 1/4 cups bell pepper (diced into 1/2-inch pieces)
- 1/2 cup leek leaves (finely chopped)
- 1 1/2 celery stalks (sliced)
- 1 cup long-grain white rice
- 1 1/2 tbsp tomato paste
- 2 tsp cajun seasoning
- 1 3/4 cups chicken bone broth
- 14.5 oz tomatoes (crushed or petite diced with juice)
- 1 tbsp tamari
- 1 bay leaf
- 2 tbsp fresh parsley (chopped for garnish)
Instructions
- Pat the shrimp dry with paper towels and season with 1 teaspoon of Cajun seasoning, setting them aside on a plate. Season the sliced smoked sausage with the remaining 1 teaspoon of Cajun seasoning and set aside separately. Having your proteins prepped and seasoned ensures they cook evenly and allows the seasoning to adhere better when they hit the hot oil. Dice the bell pepper into 1/2-inch pieces, finely chop the leek leaves, slice the celery stalks, and mince the garlic or measure out the garlic-infused oil—this mise en place keeps your cooking efficient and prevents scrambling once you start.
- Heat the garlic-infused olive oil in a large pot or Dutch oven over medium-high heat until it shimmers. Add the seasoned shrimp and sear for about 5 minutes, flipping halfway through until they turn pink and opaque, then remove to a plate. In the same pot, brown the seasoned sausage for about 1 minute per side to develop color and render some fat, then remove to another plate. I like to cook the shrimp first because it cooks faster and won't overcook while you're browning the sausage—this keeps everything tender and flavorful.
- In the same pot with the remaining oil and fond (browned bits), add the diced bell pepper, chopped leek leaves, and sliced celery. Sauté over medium heat for 2 minutes, stirring occasionally, until the vegetables soften slightly and release their aromatics—this creates the flavor foundation of your jambalaya. Stir in the tomato paste and the remaining 2 teaspoons of Cajun seasoning, cooking for 1 minute while stirring constantly to distribute the seasoning and allow the tomato paste to caramelize slightly.
- Add the long-grain white rice to the pot and stir constantly for about 1 minute, allowing each grain to toast lightly and absorb the flavorful oil—this adds a subtle nutty dimension and prevents the rice from becoming mushy. Pour in the chicken bone broth and use a wooden spoon to scrape up all the browned bits from the bottom of the pot, stirring well to combine.
- Stir in the crushed or petite diced tomatoes with their juice and the tamari (or soy sauce), then nestle the bay leaf on top of the mixture—don't stir it in, as it will be easier to find and remove later. Return the browned sausage to the pot and stir to combine all ingredients evenly. If using a pressure cooker, seal the lid and cook on high pressure for 5 minutes. If cooking on the stovetop, bring to a boil, then reduce heat to low, cover partially, and simmer for 18-20 minutes until the rice is tender and the liquid is mostly absorbed.
- If pressure cooking, allow the pressure to release naturally for 8 minutes, then carefully release any remaining pressure according to your cooker's instructions. Remove and discard the bay leaf, then gently stir the jambalaya to fluff the rice. Add the cooked shrimp from Step 2 back into the pot and stir gently to combine without breaking apart the shrimp—they only need to warm through, about 1 minute. For a brighter finish, I always add fresh parsley at the end rather than during cooking, as it preserves its vibrant color and fresh herbal notes.


