If you ask me, linzer cookies are one of the best treats to bake during the holidays.
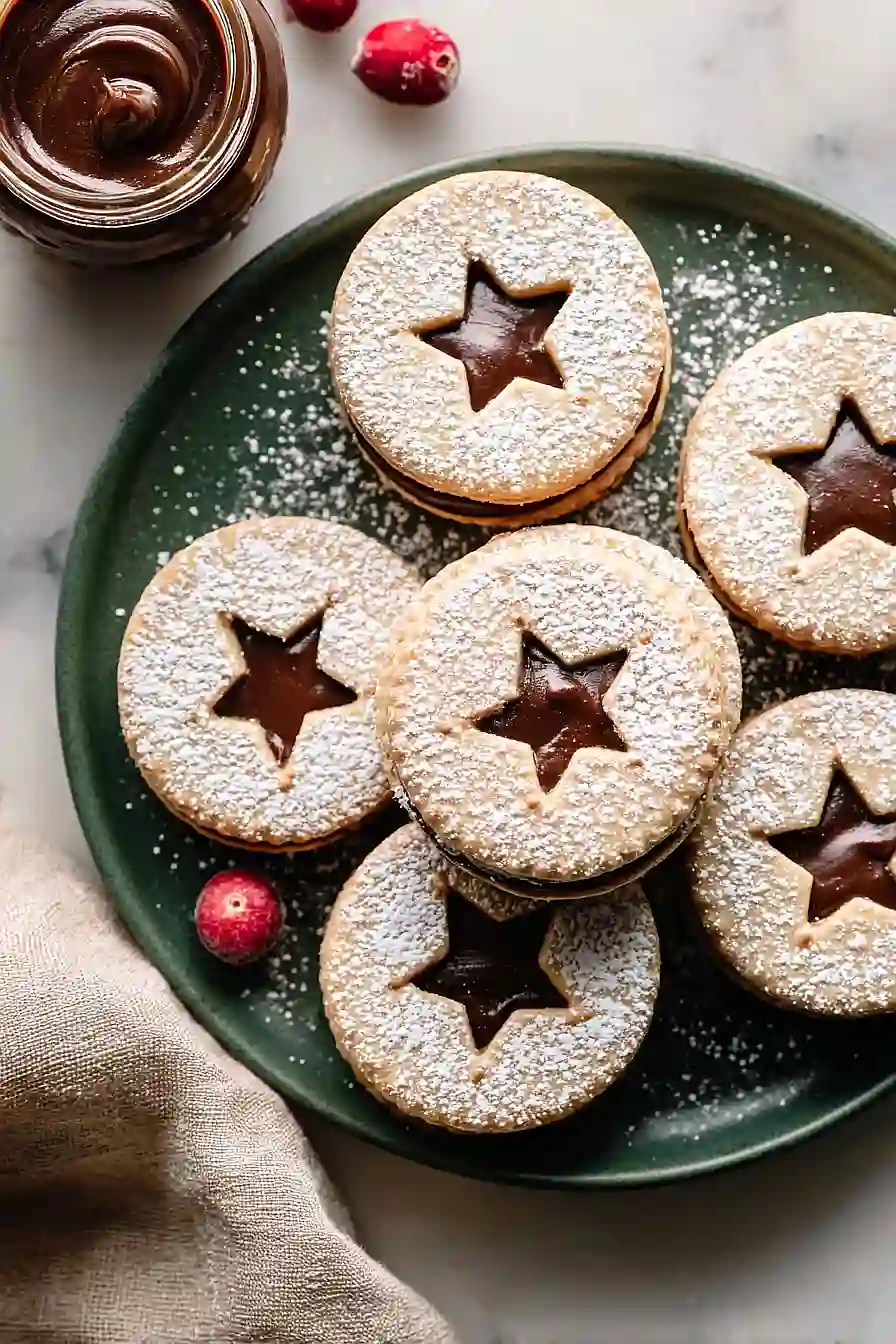
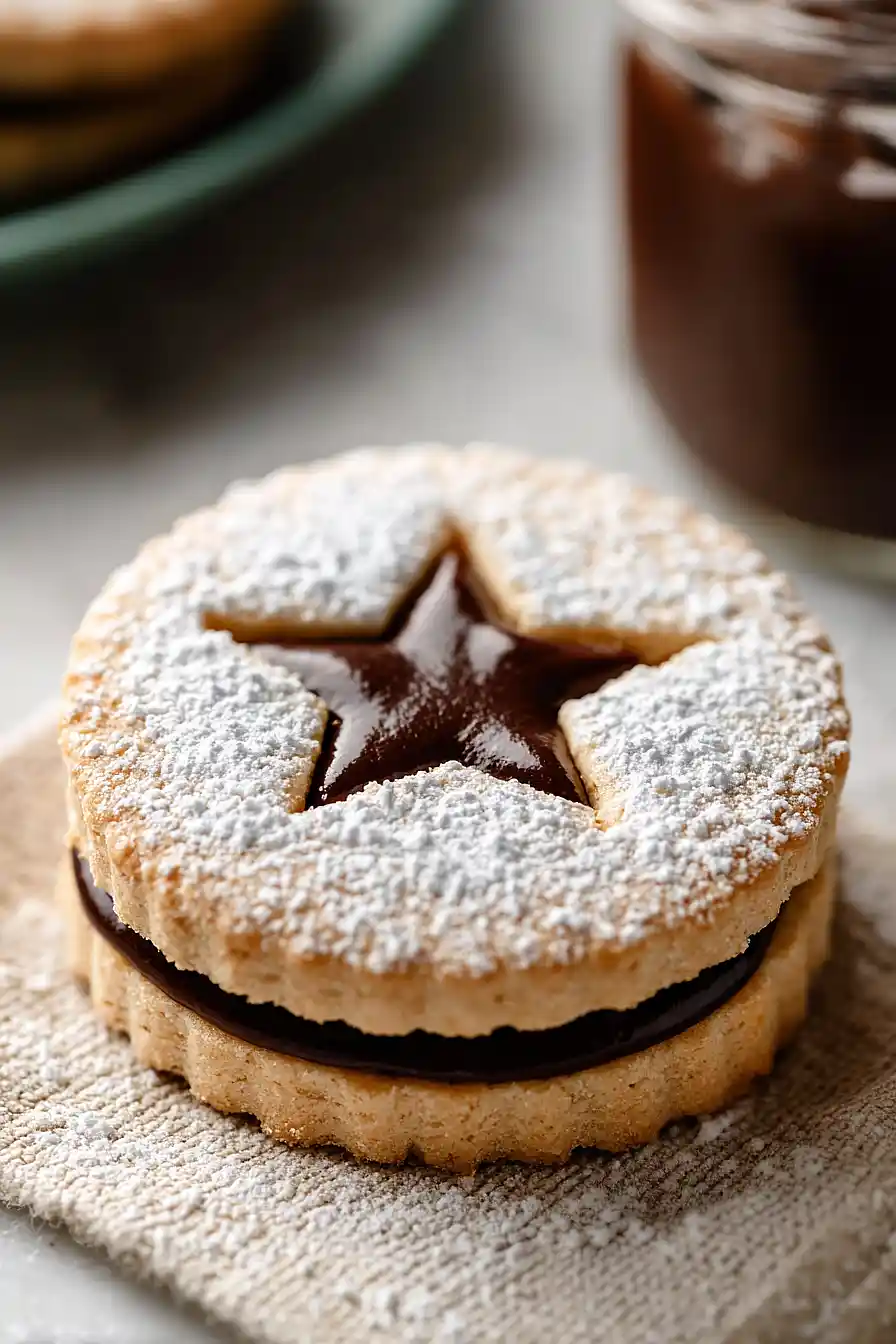
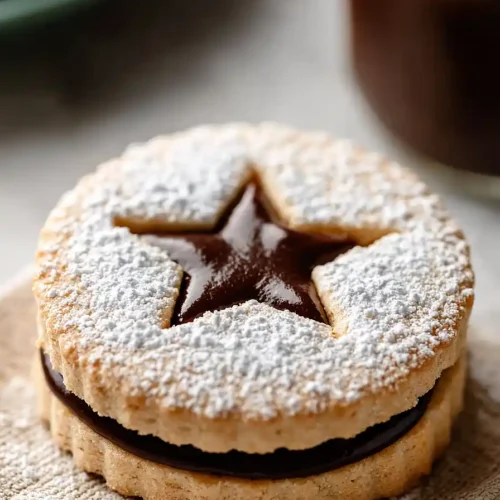
These hazelnut linzer cookies put a nutty twist on the classic sandwich cookie that’s been around for ages. Buttery hazelnut-flecked dough gets cut into shapes and baked until golden at the edges.
The cookies are sandwiched together with a smear of hazelnut spread that melts just slightly into the tender cookie. A dusting of powdered sugar on top makes them look like they came from a bakery window.
They’re a crowd-pleasing cookie that feels fancy but comes together easier than you’d think, perfect for gift boxes or your own cookie jar.

Why You’ll Love These Hazelnut Linzer Cookies
- Beautiful presentation – These cookies look like they came from a fancy bakery with their cut-out windows showing off the hazelnut spread filling, making them perfect for holiday cookie exchanges or gift-giving.
- Nutty, rich flavor – The combination of hazelnut flour in the dough and hazelnut spread filling creates a deep, toasty flavor that’s way more interesting than your typical sugar cookie.
- Make-ahead friendly – You can prepare the dough in advance and keep it in the fridge, or bake the cookies ahead of time since they store well for several days.
- Fun to make – Using cookie cutters to create the window effect is an enjoyable activity, especially if you’re baking with kids or want a relaxing weekend baking project.
What Kind of Hazelnut Flour Should I Use?
Hazelnut flour is the star ingredient that gives these linzer cookies their rich, nutty flavor. You can find hazelnut flour at most specialty grocery stores or online, and it’s basically just finely ground hazelnuts – some brands call it hazelnut meal, which works exactly the same. If you can’t find hazelnut flour or want to save some money, almond flour makes a great substitute and you’ll still get that nice, nutty taste. For the freshest flavor, store your hazelnut flour in the fridge or freezer since the natural oils can go rancid at room temperature, and always give it a quick sniff before using to make sure it still smells sweet and nutty.
Options for Substitutions
These cookies are pretty forgiving when it comes to swaps, so here are some options if you need to make changes:
- Hazelnut flour: As mentioned in the recipe, almond flour works great as a substitute. You can also make your own by grinding toasted hazelnuts in a food processor until finely ground – just be careful not to over-process or you’ll end up with nut butter.
- Brown sugar: If you’re out of brown sugar, you can use all granulated sugar instead. The cookies will be slightly less chewy and won’t have that molasses flavor, but they’ll still taste good.
- Hazelnut spread: Feel free to use any chocolate-hazelnut spread you like, or switch it up with raspberry jam, apricot preserves, or even chocolate ganache for a different flavor profile.
- Unsalted butter: Salted butter can work in a pinch – just reduce the added salt to 1/4 teaspoon to keep the cookies from getting too salty.
- All-purpose flour: This is one ingredient you’ll want to stick with. All-purpose flour gives these cookies their structure and texture, so substituting with other flours might change how they turn out.
Watch Out for These Mistakes While Baking
The biggest mistake when making linzer cookies is rolling the dough when it’s too warm, which causes it to stick to everything and lose its shape – if your dough feels soft or sticky, pop it in the fridge for 20-30 minutes before rolling it out.
Another common error is cutting the window shapes too large in the top cookies, which can cause the jam to bubble over and make a mess, so stick to smaller cutouts about 1 inch in diameter.
Overbaking these delicate cookies will make them hard and dry instead of tender, so pull them from the oven when the edges are just barely golden and the centers still look slightly soft.
Finally, don’t spread the hazelnut spread on the cookies while they’re still warm – let them cool completely first, otherwise the filling will melt and ooze out the sides when you sandwich them together.
What to Serve With Hazelnut Linzer Cookies?
These cookies are perfect alongside a hot cup of coffee or tea, especially during the holidays when you want something a little fancy but not too fussy. I love setting them out on a platter with other simple cookies like shortbread or sugar cookies for a nice variety at parties or cookie exchanges. They also pair really well with a glass of cold milk if you’re going for that classic cookie-and-milk situation. For a more grown-up dessert spread, serve them with espresso or hot chocolate topped with whipped cream.
Storage Instructions
Store: These cookies stay fresh in an airtight container at room temperature for up to a week. Just make sure they’re completely cooled before storing, and try to keep them in a single layer or separated with parchment paper so the hazelnut spread doesn’t stick them together.
Freeze: You can freeze the baked cookies for up to 3 months in a freezer-safe container with parchment between layers. I also like to freeze the dough! Just roll it out, cut your shapes, and freeze them on a baking sheet before transferring to a bag. Then you can bake them straight from frozen, adding just a couple extra minutes to the baking time.
Make Ahead: Linzer cookies are actually great to make ahead since the flavors meld together nicely over time. You can bake them up to 3 days before you need them and they’ll taste even better. Just wait to dust them with powdered sugar until right before serving so it doesn’t get absorbed into the cookie.
| Preparation Time | 20-30 minutes |
| Cooking Time | 19-25 minutes |
| Total Time | 2 hours 39 minutes – 2 hours 55 minutes |
| Level of Difficulty | Medium |
Estimated Nutrition
Estimated nutrition for the whole recipe (without optional ingredients):
- Calories: 3350-3550
- Protein: 44-50 g
- Fat: 200-220 g
- Carbohydrates: 320-335 g
Ingredients
For the dough:
- 2 large eggs (room temperature)
- 1 tsp baking powder
- 3.5 oz hazelnut flour (finely ground)
- 3.5 oz brown sugar
- 1/2 tsp salt
- 8 oz unsalted butter (softened to room temperature)
- 13.4 oz all-purpose flour (I use King Arthur all-purpose flour)
- 1.75 oz granulated sugar
- 1 tsp vanilla extract
For the filling and assembly:
- powdered sugar for dusting
- 1.75 oz hazelnut spread (I use Nutella for classic flavor)
Step 1: Cream Butter and Sugars, Then Add Eggs and Vanilla
- 8 oz unsalted butter
- 3.5 oz brown sugar
- 1.75 oz granulated sugar
- 2 large eggs
- 1 tsp vanilla extract
In a large mixing bowl, beat the softened butter, brown sugar, and granulated sugar together until the mixture is light, fluffy, and pale—this should take about 2-3 minutes.
This creaming process incorporates air into the dough, which helps create tender cookies.
Add the room-temperature eggs one at a time, beating well after each addition, then add the vanilla extract and mix until fully combined.
The mixture should look smooth and homogeneous before moving to the next step.
Step 2: Combine Dry Ingredients
- 13.4 oz all-purpose flour
- 3.5 oz hazelnut flour
- 1 tsp baking powder
- 1/2 tsp salt
In a separate bowl, whisk together the all-purpose flour, hazelnut flour, baking powder, and salt.
Whisking these dry ingredients together distributes the leavening agent evenly and prevents lumps, which ensures your cookies will have a consistent texture throughout.
Set this mixture aside—you’ll be combining it with the wet mixture next.
Step 3: Combine Wet and Dry Mixtures, Then Chill the Dough
- wet ingredient mixture from Step 1
- dry ingredient mixture from Step 2
Add the dry ingredient mixture from Step 2 to the creamed butter and egg mixture from Step 1, mixing on low speed just until combined—don’t overmix, as this can develop gluten and make the cookies tough.
Divide the dough in half and flatten each portion into a disc about 1 inch thick.
Wrap each disc tightly in plastic wrap and refrigerate for at least 2 hours (or up to overnight).
I like to chill my dough this long because it prevents excessive spreading during baking and makes the dough much easier to roll and cut without sticking.
Step 4: Prepare Oven and Roll Out Bottom Cookie Dough
- chilled dough disc from Step 3
Preheat your oven to 350°F and line two baking sheets with parchment paper.
Remove one dough disc from the refrigerator and let it sit at room temperature for 5-10 minutes to soften slightly—this makes it easier to roll without cracking.
On a lightly floured surface, roll the dough to about 1/8 inch thickness, then cut out 3-inch rounds using a cookie cutter.
Place the rounds on one of your prepared baking sheets and gather any scraps to re-roll for additional cookies.
Step 5: Bake Bottom Cookies and Prepare Top Cookies
- chilled dough disc from Step 3
Bake the bottom cookie rounds for 10 minutes until the edges are just set but the centers are still tender.
While these bake, remove the second dough disc from the refrigerator and repeat the rolling and cutting process from Step 4 on the second baking sheet.
However, for the top cookies, after placing the 3-inch rounds on the baking sheet, use a small mini cookie cutter (about 1-1.5 inches) to cut out the centers of each round—this creates the signature window that will show the hazelnut spread filling.
Allow the bottom cookies to cool completely on the baking sheet, then bake the top cookies for 9 minutes (they bake slightly faster since they have the center cutout and less dough mass).
Step 6: Assemble the Linzer Cookies
- 1.75 oz hazelnut spread
- powdered sugar for dusting
Once all cookies have cooled completely, flip the bottom cookies over so the flat side faces up.
Spread 1-2 teaspoons of hazelnut spread onto the center of each bottom cookie.
Dust the top cookies generously with powdered sugar to create a beautiful snowy finish and to offset the richness of the filling.
Carefully press the top cookie (sugar-side up) onto the hazelnut spread, creating a sandwich with the filling visible through the cutout window.
I find that dusting the top cookies with powdered sugar before assembly not only looks more beautiful, but it also helps distinguish the top from the bottom, making assembly less confusing.
Mouthwatering Hazelnut Linzer Cookies
Ingredients
For the dough:
- 2 large eggs (room temperature)
- 1 tsp baking powder
- 3.5 oz hazelnut flour (finely ground)
- 3.5 oz brown sugar
- 1/2 tsp salt
- 8 oz unsalted butter (softened to room temperature)
- 13.4 oz all-purpose flour (I use King Arthur all-purpose flour)
- 1.75 oz granulated sugar
- 1 tsp vanilla extract
For the filling and assembly:
- powdered sugar for dusting
- 1.75 oz hazelnut spread (I use Nutella for classic flavor)
Instructions
- In a large mixing bowl, beat the softened butter, brown sugar, and granulated sugar together until the mixture is light, fluffy, and pale—this should take about 2-3 minutes. This creaming process incorporates air into the dough, which helps create tender cookies. Add the room-temperature eggs one at a time, beating well after each addition, then add the vanilla extract and mix until fully combined. The mixture should look smooth and homogeneous before moving to the next step.
- In a separate bowl, whisk together the all-purpose flour, hazelnut flour, baking powder, and salt. Whisking these dry ingredients together distributes the leavening agent evenly and prevents lumps, which ensures your cookies will have a consistent texture throughout. Set this mixture aside—you'll be combining it with the wet mixture next.
- Add the dry ingredient mixture from Step 2 to the creamed butter and egg mixture from Step 1, mixing on low speed just until combined—don't overmix, as this can develop gluten and make the cookies tough. Divide the dough in half and flatten each portion into a disc about 1 inch thick. Wrap each disc tightly in plastic wrap and refrigerate for at least 2 hours (or up to overnight). I like to chill my dough this long because it prevents excessive spreading during baking and makes the dough much easier to roll and cut without sticking.
- Preheat your oven to 350°F and line two baking sheets with parchment paper. Remove one dough disc from the refrigerator and let it sit at room temperature for 5-10 minutes to soften slightly—this makes it easier to roll without cracking. On a lightly floured surface, roll the dough to about 1/8 inch thickness, then cut out 3-inch rounds using a cookie cutter. Place the rounds on one of your prepared baking sheets and gather any scraps to re-roll for additional cookies.
- Bake the bottom cookie rounds for 10 minutes until the edges are just set but the centers are still tender. While these bake, remove the second dough disc from the refrigerator and repeat the rolling and cutting process from Step 4 on the second baking sheet. However, for the top cookies, after placing the 3-inch rounds on the baking sheet, use a small mini cookie cutter (about 1-1.5 inches) to cut out the centers of each round—this creates the signature window that will show the hazelnut spread filling. Allow the bottom cookies to cool completely on the baking sheet, then bake the top cookies for 9 minutes (they bake slightly faster since they have the center cutout and less dough mass).
- Once all cookies have cooled completely, flip the bottom cookies over so the flat side faces up. Spread 1-2 teaspoons of hazelnut spread onto the center of each bottom cookie. Dust the top cookies generously with powdered sugar to create a beautiful snowy finish and to offset the richness of the filling. Carefully press the top cookie (sugar-side up) onto the hazelnut spread, creating a sandwich with the filling visible through the cutout window. I find that dusting the top cookies with powdered sugar before assembly not only looks more beautiful, but it also helps distinguish the top from the bottom, making assembly less confusing.


