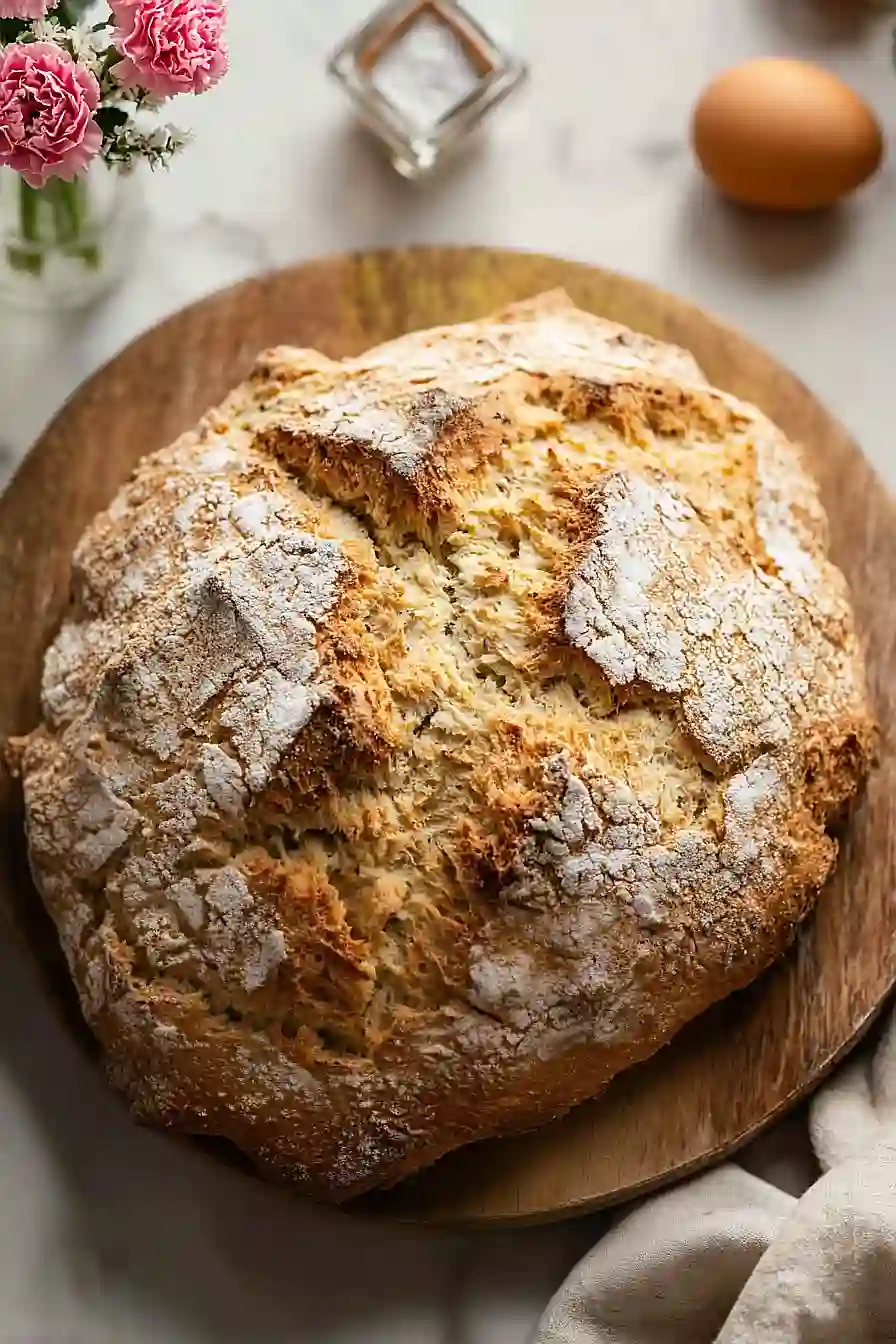
If you ask me, Irish soda bread is one of those recipes that sounds fancy but couldn’t be easier to make.
This rustic loaf comes together in about an hour with no yeast and no waiting around for dough to rise. The caraway seeds add a warm, slightly sweet flavor that makes the whole kitchen smell amazing while it bakes.
It’s made with simple pantry staples like flour, buttermilk, and baking soda. A touch of orange zest and good butter help the whole thing come together into something special.
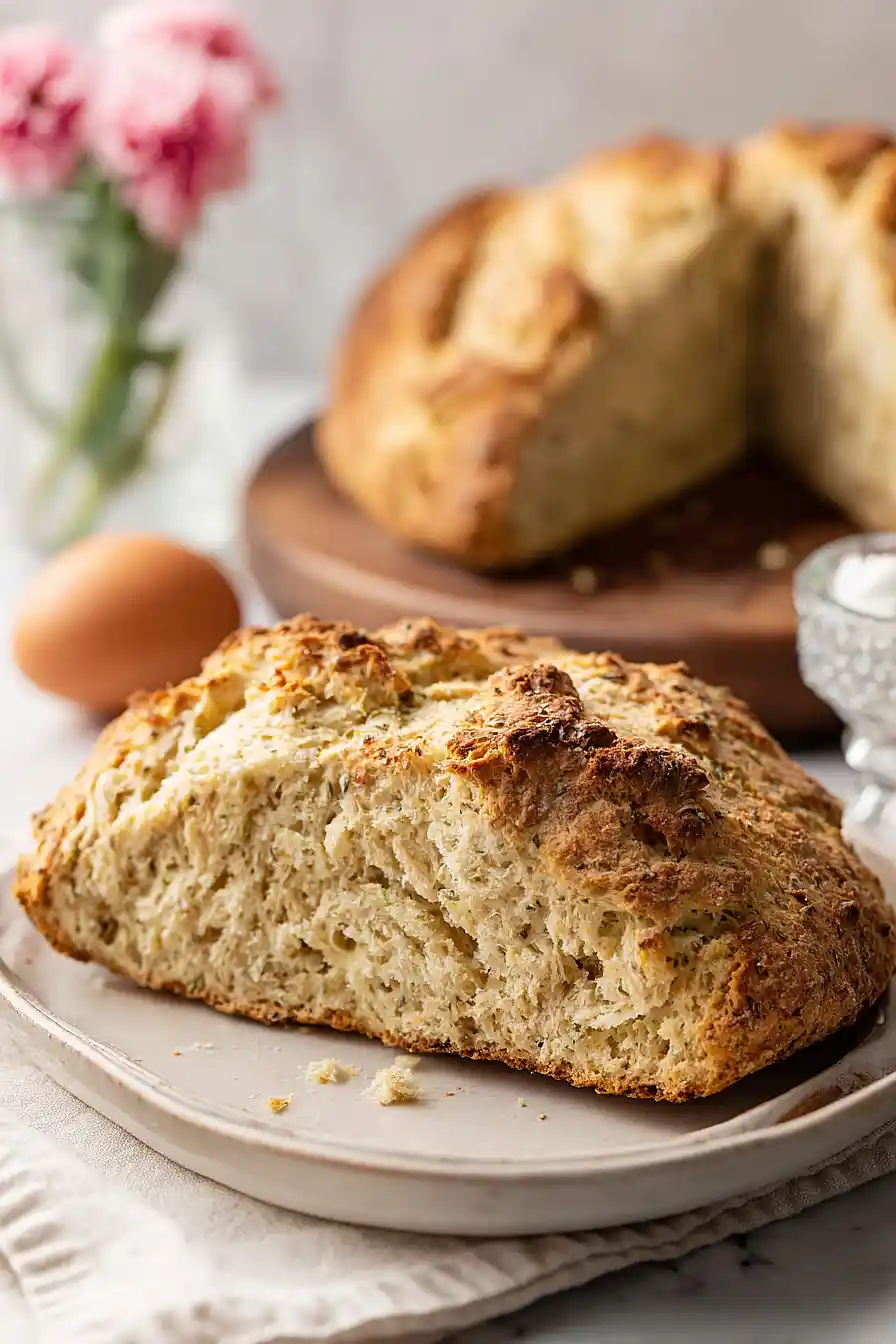
It’s a no-fuss bread that’s perfect for breakfast toast, dunking in soup, or serving alongside dinner.
Why You’ll Love This Irish Soda Bread
- No yeast required – This bread uses baking soda instead of yeast, so there’s no waiting around for dough to rise. You can have fresh homemade bread on the table in under an hour.
- Simple ingredients – You probably already have most of these pantry staples at home, making this an easy recipe to whip up whenever the craving strikes.
- Beginner-friendly – Even if you’ve never baked bread before, this straightforward recipe is hard to mess up. Just mix, shape, and bake.
- Traditional flavor – The caraway seeds give this bread its classic Irish taste that pairs perfectly with soups, stews, or just a smear of butter.
What Kind of Flour Should I Use?
All-purpose flour is your best bet for traditional Irish soda bread, and it’s what most recipes call for. You can use bleached or unbleached – both will give you that classic tender crumb with a slightly crispy crust. If you want a heartier, more rustic loaf, you can swap out up to half of the all-purpose flour for whole wheat flour, though this will make your bread a bit denser. Just make sure your flour is fresh and stored properly, as old flour can affect the rise and taste of your bread.
Options for Substitutions
This traditional bread recipe allows for a few simple swaps if you need them:
- Buttermilk: Don’t have buttermilk? Make your own by adding 1 1/2 tablespoons of lemon juice or white vinegar to regular milk and letting it sit for 5 minutes. You can also use plain yogurt thinned with a bit of milk to reach a pourable consistency.
- Caraway seeds: If you’re not a fan of caraway seeds, you can leave them out completely or swap them with raisins or currants for a sweeter version. Some folks prefer adding dried cranberries instead.
- Butter: You can use coconut oil or vegetable shortening in place of butter, though butter does give the best flavor. Make sure whatever you use is cold and cut it into the flour until it resembles coarse crumbs.
- All-purpose flour: You can replace up to 1 cup of the all-purpose flour with whole wheat flour for a heartier texture, but don’t substitute all of it or your bread will be too dense.
- Baking soda: Don’t substitute the baking soda – it’s what reacts with the buttermilk to make the bread rise. Without it, your soda bread won’t work properly.
Watch Out for These Mistakes While Baking
The biggest mistake people make with Irish soda bread is overworking the dough, which activates too much gluten and turns your bread tough and dense instead of tender and crumbly – knead it just 5-6 times until it barely comes together.
Another common error is not cutting the cross deep enough into the top of the loaf, so make sure your knife goes at least halfway through the dough to help it bake evenly and create that classic look.
Don’t skip the initial high-heat baking at 450°F, as this quick blast helps create a nice crust, and if your buttermilk is too cold, let it sit at room temperature for 15 minutes before mixing so the baking soda activates properly.
Finally, resist the urge to slice into the bread right away – letting it cool for at least 10 minutes prevents it from crumbling apart and makes cutting much cleaner.
What to Serve With Irish Soda Bread?
Irish soda bread is perfect alongside a hearty bowl of beef stew or Irish stew, where you can use thick slices to soak up all that rich gravy. It’s also really good with a simple breakfast spread – just slather on some salted butter and jam, or serve it with scrambled eggs and bacon for a filling morning meal. The caraway seeds in this bread make it a natural pairing with corned beef and cabbage, especially around St. Patrick’s Day. You can also toast leftover slices and top them with cream cheese or smoked salmon for an easy snack.
Storage Instructions
Store: Irish soda bread is best enjoyed within the first day or two, but you can keep it fresh for up to 4 days. Wrap it tightly in plastic wrap or aluminum foil and store at room temperature. The crust will soften a bit over time, but the bread stays moist and delicious.
Freeze: This bread freezes really well if you want to make it ahead. Let it cool completely, then wrap it tightly in plastic wrap and again in foil before freezing for up to 3 months. You can freeze the whole loaf or slice it first for easier thawing.
Refresh: To bring back that fresh-baked taste, thaw frozen bread at room temperature for a few hours. Then warm it in a 350°F oven for about 10 minutes to crisp up the crust again. You can also toast individual slices straight from the freezer for a quick breakfast.
| Preparation Time | 10-15 minutes |
| Cooking Time | 40-45 minutes |
| Total Time | 50-60 minutes |
| Level of Difficulty | Easy |
| Servings | 10 slices |
Estimated Nutrition
Estimated nutrition for the whole recipe (without optional ingredients):
- Calories: 1850-2100
- Protein: 35-40 g
- Fat: 55-65 g
- Carbohydrates: 320-350 g
Ingredients
- 3.75 cups flour (I always use King Arthur all-purpose flour)
- 1.5 tbsp sugar
- 1.5 tsp salt
- 1 tsp baking soda (sifted to remove lumps)
- 2 tsp caraway seeds
- 5 tbsp butter (I like Kerrygold unsalted butter for this)
- 1.5 cups buttermilk
- 1 tsp orange zest
Step 1: Prepare Mise en Place and Combine Dry Ingredients
- 3.75 cups flour
- 1.5 tbsp sugar
- 1.5 tsp salt
- 1 tsp baking soda
- 2 tsp caraway seeds
- 1 tsp orange zest
Measure out all your ingredients and preheat your oven to 450°F.
In a large mixing bowl, whisk together the flour, sugar, salt, sifted baking soda, caraway seeds, and orange zest.
Make sure the baking soda is sifted to remove any lumps—this ensures even leavening throughout the bread.
I always sift my baking soda separately before mixing because lumps can create bitter spots in the finished loaf.
This dry mixture is the foundation for your bread, so take a moment to distribute the leavening and flavorings evenly.
Step 2: Cut in Butter to Create Crumb Texture
- 5 tbsp butter
- dry ingredient mixture from Step 1
Cut the cold butter into small cubes and add it to the dry mixture.
Using your fingertips, quickly rub the butter into the flour until the mixture resembles coarse breadcrumbs with pea-sized pieces of butter still visible.
This technique is crucial for Irish soda bread—the small butter pieces create pockets of steam that give the bread its characteristic tender crumb.
Work quickly and keep your hands cool; if the butter gets too warm, it’ll incorporate too fully and the bread will be dense rather than light.
Step 3: Bring Dough Together with Buttermilk
- 1.5 cups buttermilk
- flour mixture with butter from Step 2
Make a well in the center of the flour mixture and pour in the buttermilk.
Using a fork or wooden spoon, gently stir from the center outward, incorporating flour gradually until a shaggy dough forms.
Be careful not to overmix—Irish soda bread relies on baking soda reacting with the buttermilk’s acidity, and overworking the dough develops gluten that makes the bread tough.
The dough should be slightly sticky and rough; this is exactly what you want.
Step 4: Shape and Score the Loaf
- dough from Step 3
Turn the dough out onto a lightly floured work surface and gently gather it into a round ball with minimal kneading—just a few turns to bring it together cohesively.
Shape it into a loaf approximately 6-7 inches in diameter.
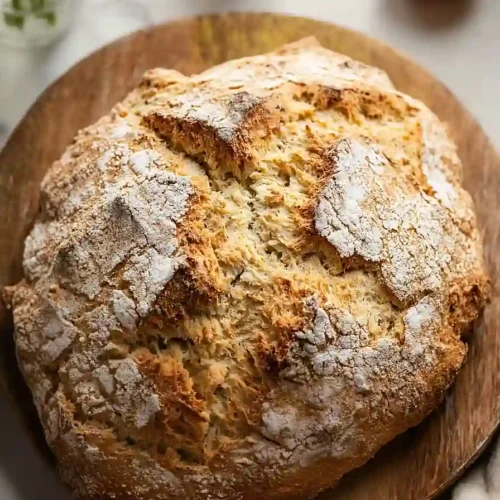
Transfer to a parchment-lined baking sheet, then using a sharp knife, cut a deep cross about ½ inch deep across the top of the loaf.
This cross serves both a traditional purpose and a practical one: it helps the bread rise evenly and creates those signature crusty edges inside the loaf.
Step 5: Bake in Two Temperature Stages
- shaped loaf from Step 4
Place the loaf in your preheated 450°F oven and bake for 15 minutes—this initial high heat sets the crust and gives the baking soda time to fully activate before the interior sets.
After 15 minutes, reduce the oven temperature to 400°F and continue baking for 25 minutes more.
I like to rotate the pan halfway through the second baking stage to ensure even browning.
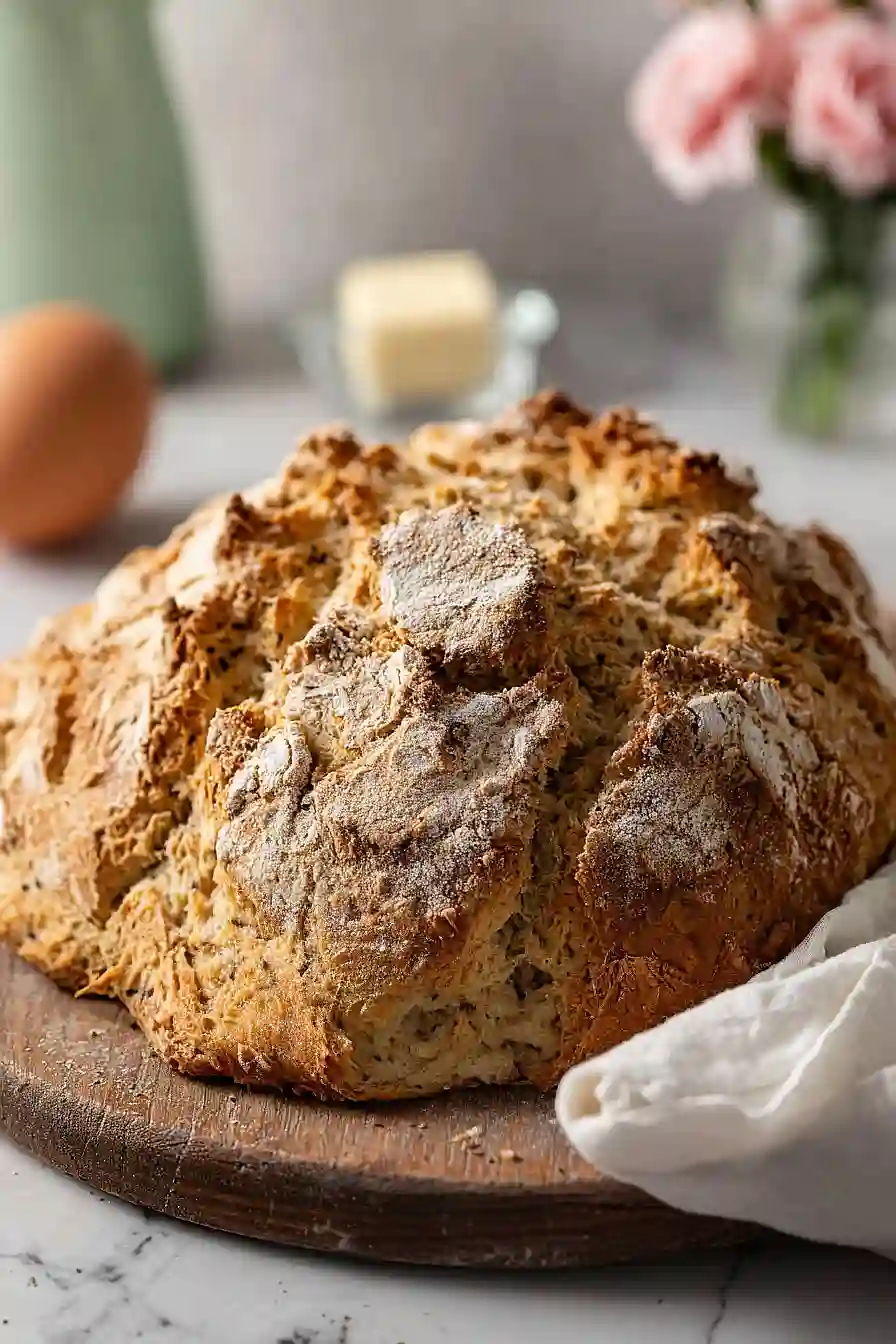
The bread is done when it’s deep golden brown on top and sounds hollow when tapped on the bottom—this should take about 40 minutes total.
Step 6: Cool and Rest
- baked loaf from Step 5
Remove the bread from the oven and let it cool on the baking sheet for 5-10 minutes.
This brief resting period allows the crumb structure to set properly.
Transfer the loaf to a wire rack to cool completely before slicing.
Resist the temptation to cut into it while warm—the interior will continue to firm up as it cools, giving you cleaner slices with better texture.
Rustic Irish Soda Bread with Caraway Seeds
Ingredients
- 3.75 cups flour (I always use King Arthur all-purpose flour)
- 1.5 tbsp sugar
- 1.5 tsp salt
- 1 tsp baking soda (sifted to remove lumps)
- 2 tsp caraway seeds
- 5 tbsp butter (I like Kerrygold unsalted butter for this)
- 1.5 cups buttermilk
- 1 tsp orange zest
Instructions
- Measure out all your ingredients and preheat your oven to 450°F. In a large mixing bowl, whisk together the flour, sugar, salt, sifted baking soda, caraway seeds, and orange zest. Make sure the baking soda is sifted to remove any lumps—this ensures even leavening throughout the bread. I always sift my baking soda separately before mixing because lumps can create bitter spots in the finished loaf. This dry mixture is the foundation for your bread, so take a moment to distribute the leavening and flavorings evenly.
- Cut the cold butter into small cubes and add it to the dry mixture. Using your fingertips, quickly rub the butter into the flour until the mixture resembles coarse breadcrumbs with pea-sized pieces of butter still visible. This technique is crucial for Irish soda bread—the small butter pieces create pockets of steam that give the bread its characteristic tender crumb. Work quickly and keep your hands cool; if the butter gets too warm, it'll incorporate too fully and the bread will be dense rather than light.
- Make a well in the center of the flour mixture and pour in the buttermilk. Using a fork or wooden spoon, gently stir from the center outward, incorporating flour gradually until a shaggy dough forms. Be careful not to overmix—Irish soda bread relies on baking soda reacting with the buttermilk's acidity, and overworking the dough develops gluten that makes the bread tough. The dough should be slightly sticky and rough; this is exactly what you want.
- Turn the dough out onto a lightly floured work surface and gently gather it into a round ball with minimal kneading—just a few turns to bring it together cohesively. Shape it into a loaf approximately 6-7 inches in diameter. Transfer to a parchment-lined baking sheet, then using a sharp knife, cut a deep cross about ½ inch deep across the top of the loaf. This cross serves both a traditional purpose and a practical one: it helps the bread rise evenly and creates those signature crusty edges inside the loaf.
- Place the loaf in your preheated 450°F oven and bake for 15 minutes—this initial high heat sets the crust and gives the baking soda time to fully activate before the interior sets. After 15 minutes, reduce the oven temperature to 400°F and continue baking for 25 minutes more. I like to rotate the pan halfway through the second baking stage to ensure even browning. The bread is done when it's deep golden brown on top and sounds hollow when tapped on the bottom—this should take about 40 minutes total.
- Remove the bread from the oven and let it cool on the baking sheet for 5-10 minutes. This brief resting period allows the crumb structure to set properly. Transfer the loaf to a wire rack to cool completely before slicing. Resist the temptation to cut into it while warm—the interior will continue to firm up as it cools, giving you cleaner slices with better texture.


